The other five partaking in the course are: Jarno from Finland, Phil from California, John from London, Michael from Seattle and Mirella who lives locally.
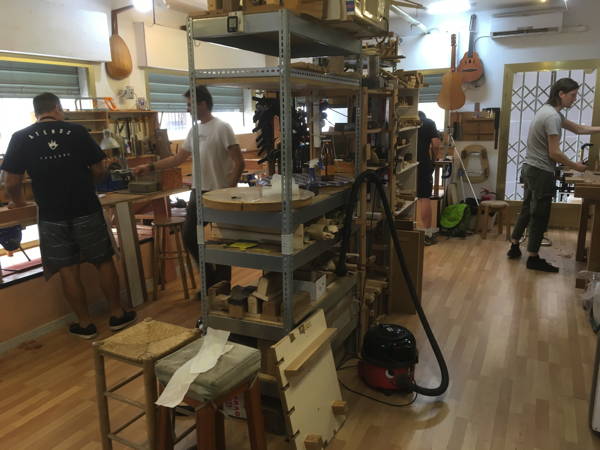
We began with a brief introduction covering various formalities and rules of etiquette while working in the worship. The structure for the day will be as follows: begin at 9.15am, coffee break at about 11am, then lunch from 2pm to 3.30pm. The day finishes at 6.30pm. Overtime is optional and we all have keys for the workshop.
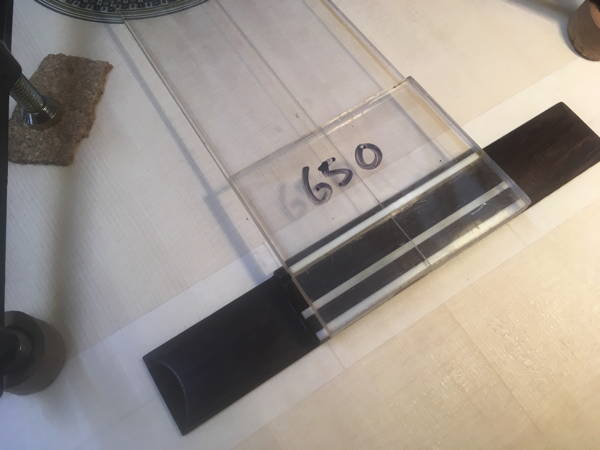
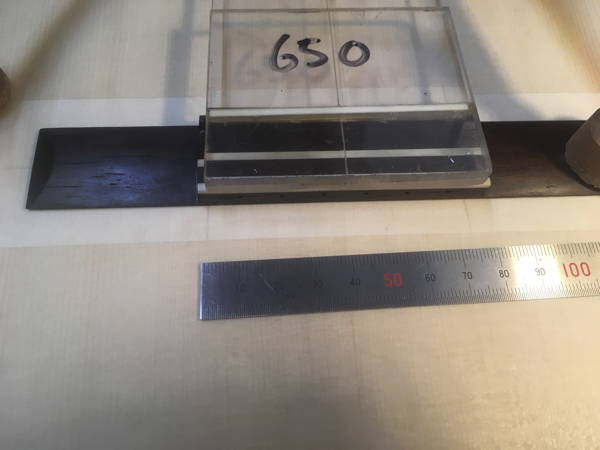
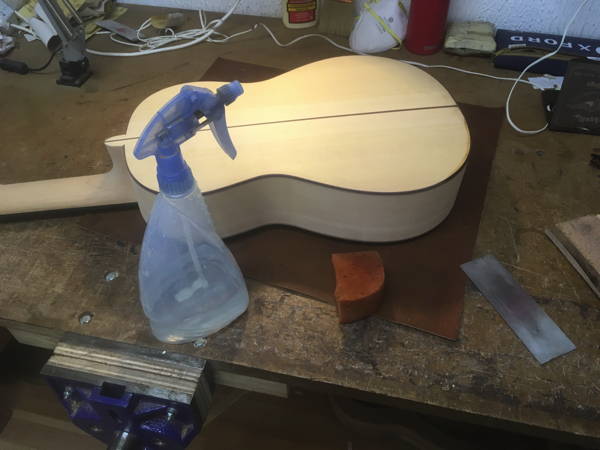
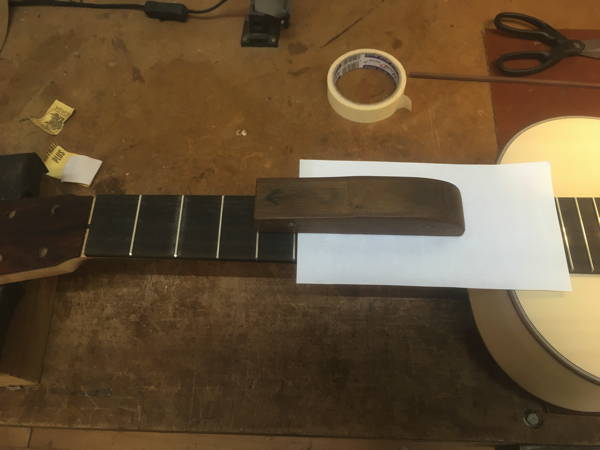
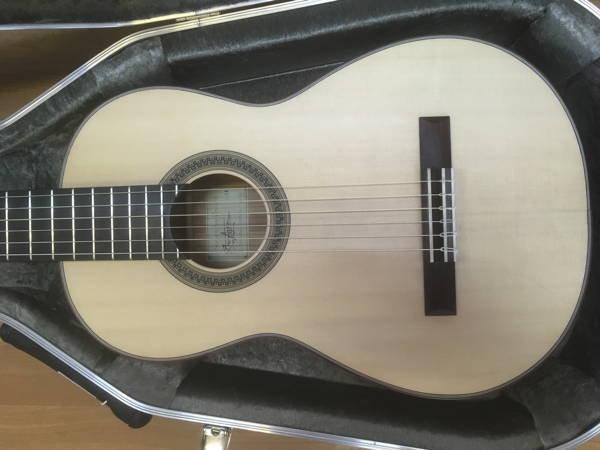
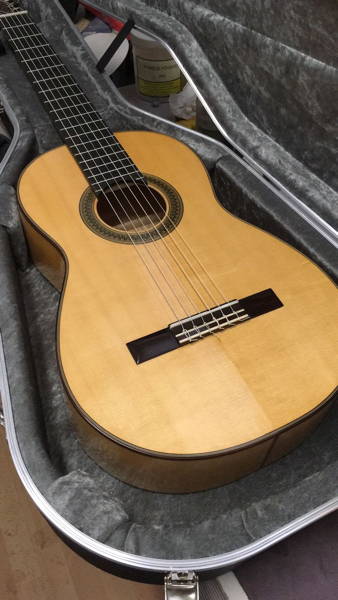
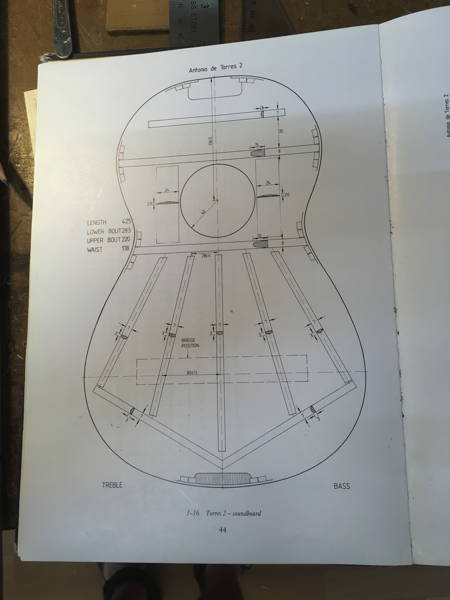
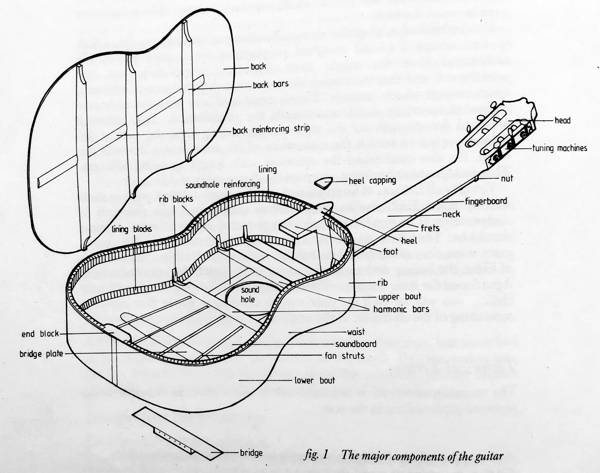
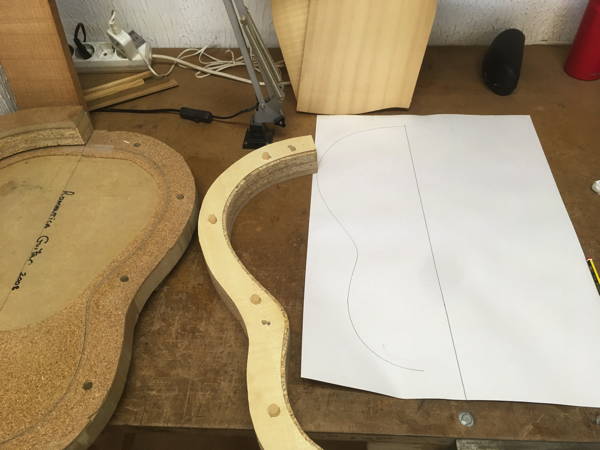
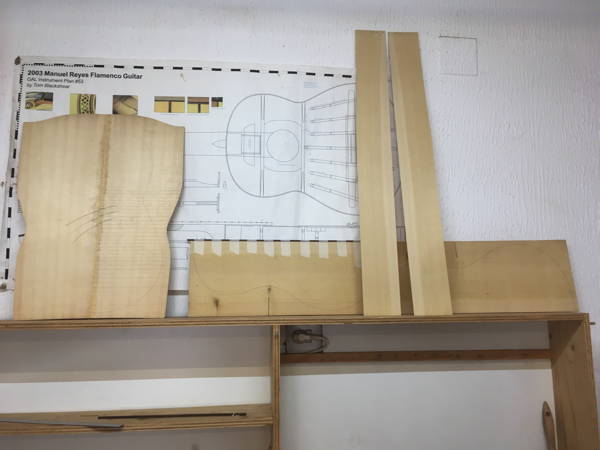
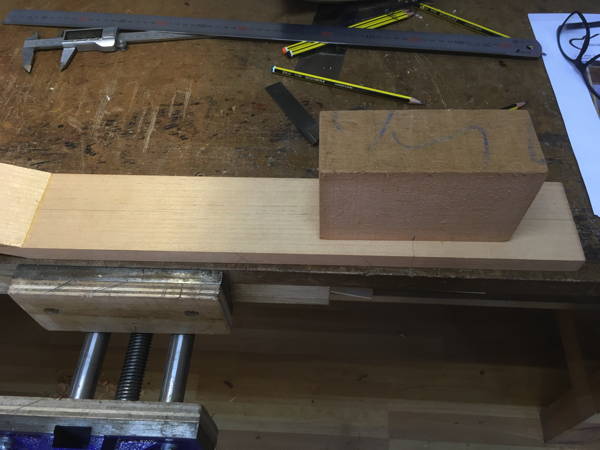
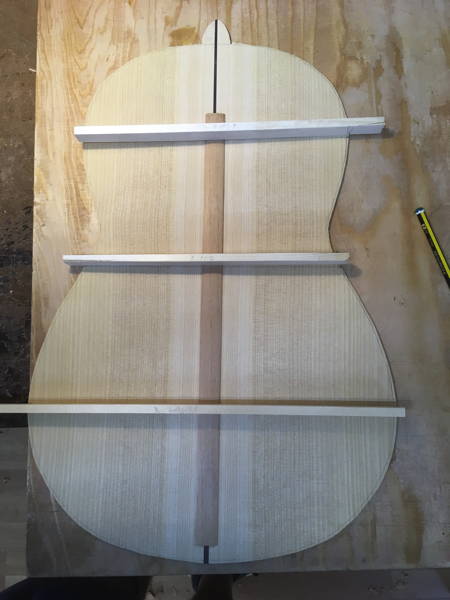
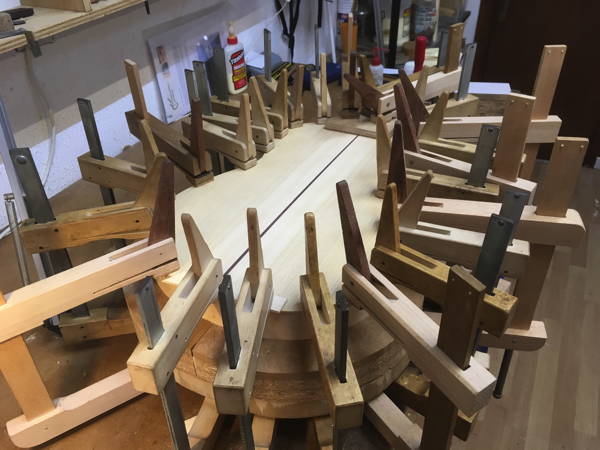
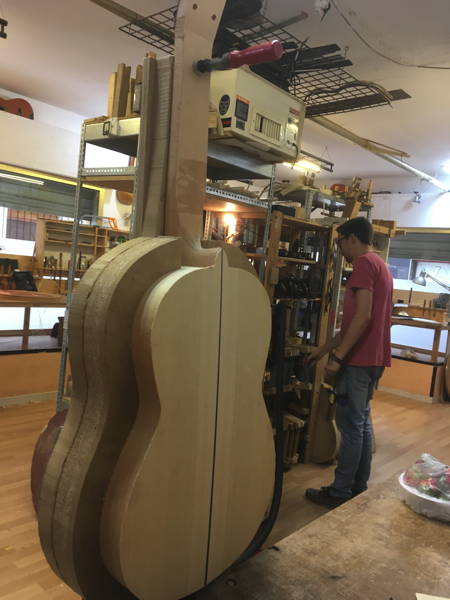
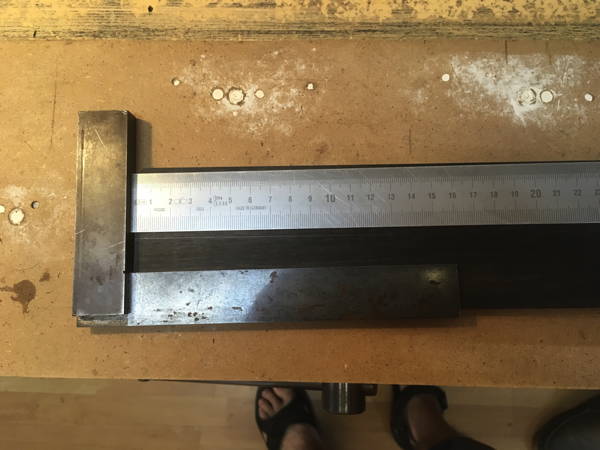
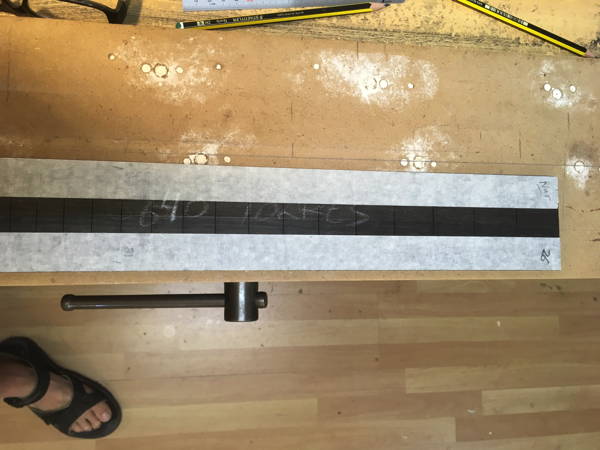
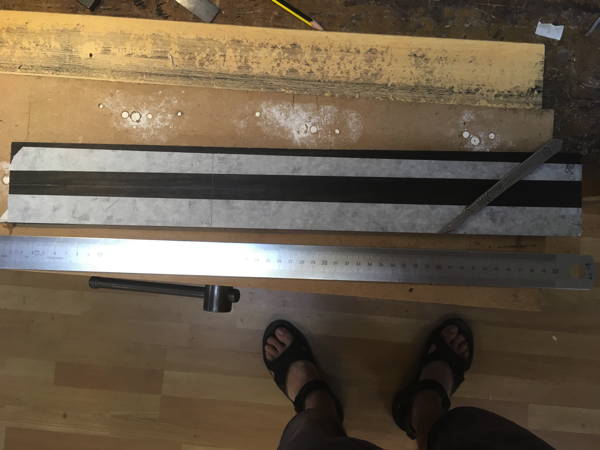
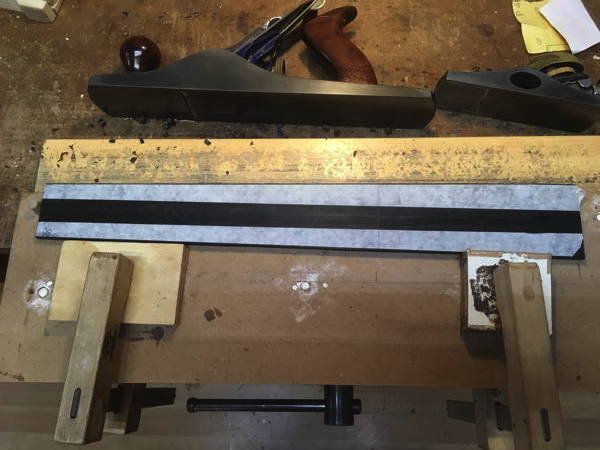
I was aiming to make a small bodied, romantic parlour size guitar loosly based on Antonio Torres specifications. Torres made a number of guitars with small bodies and shorter scale lengths, especially during his first era of guitar construction. I wanted to incorporate some of his methods of construction, so I opted to use Cypress* for the back and ribs - tone woods which he often used for his every day guitars (not the bigger concert models). The scale length will be 640mm (650mm is standard). I'm also going to incorparate a 5 strut fan based system for the soundboard - the standard Torres configuration. I also intend to make the sides and soundboard as thin as possible to creates a light instrument.
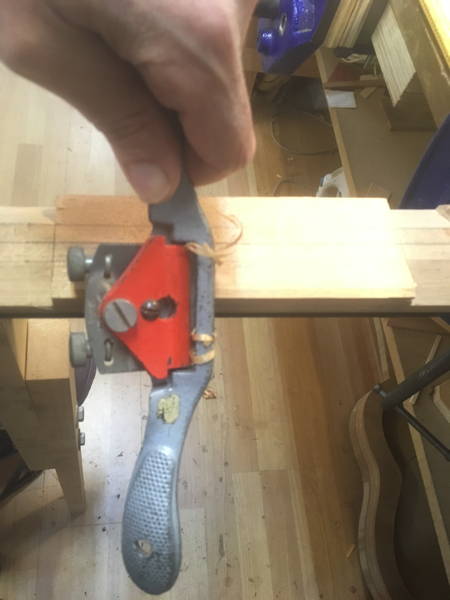
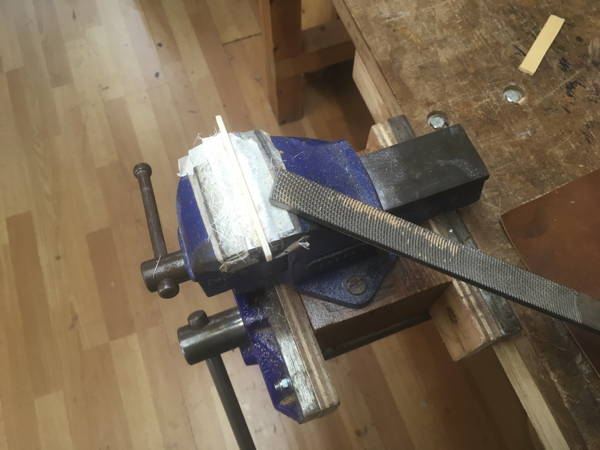
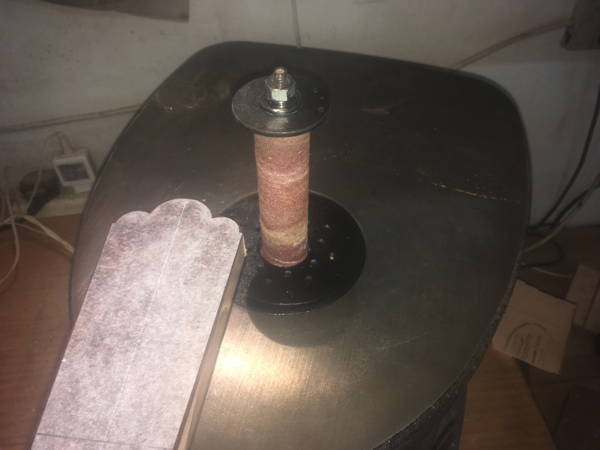
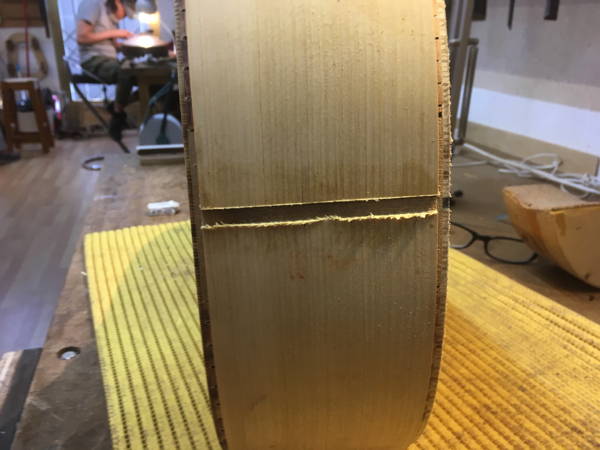
I had to reduce the thickness of the ribs to less than 2mm. Unfortunately I turned the handle the wrong way. The sand paper bit into the wood and damaged one side. Luckily there was a spare set of sides on hand.
I nearly repeated the same error. As I turned over the wood and ran it through and it took more off than I wished. Luckily, although it was a bit finer than I had intended, it was still within the acceptable parameters for the type of guitar I was making.
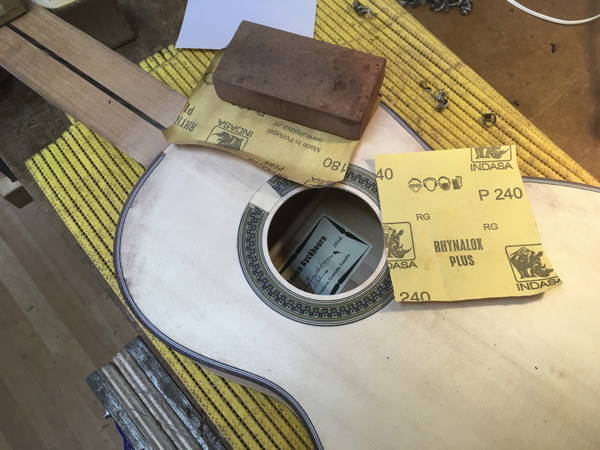
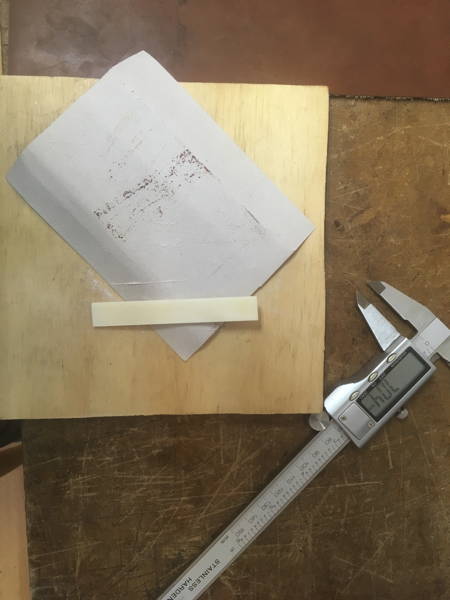
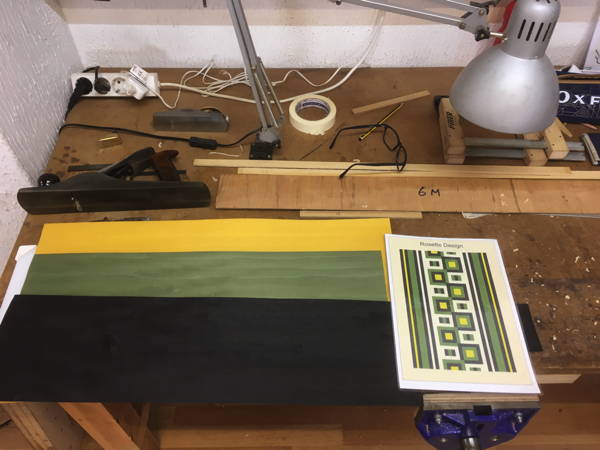
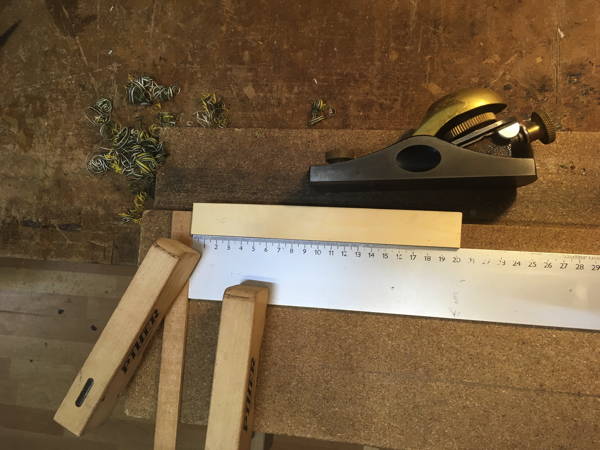
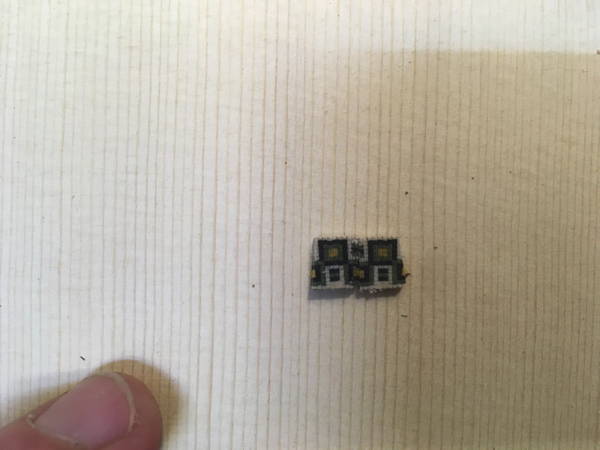
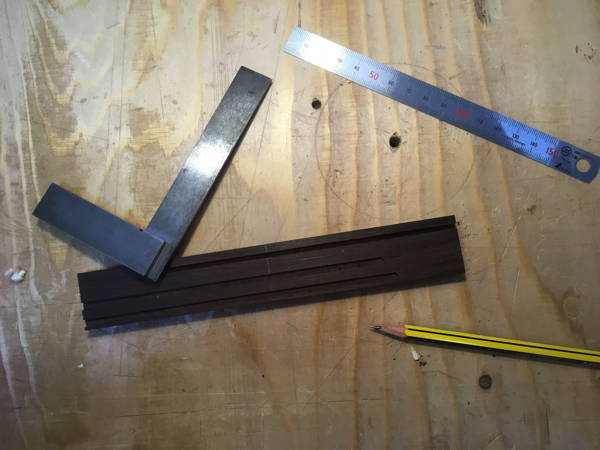
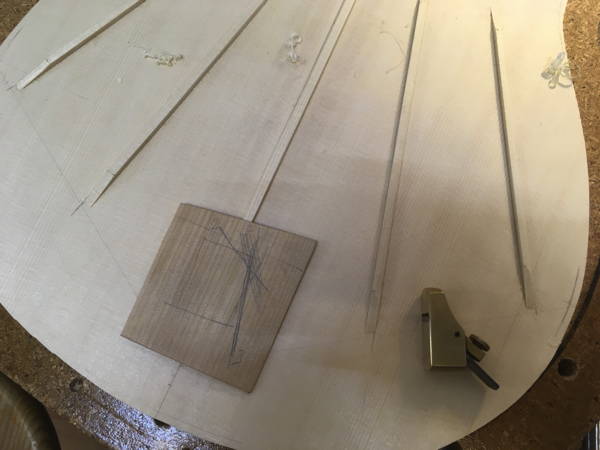
Next it was time to start on preparing my rosette from the design I had previously created prior to the course.
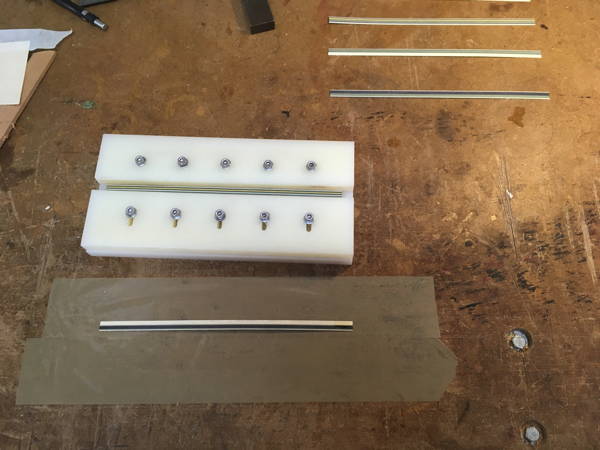
The process involved building up a pixilated construction using sheets of 0.5 mm veneer. The various colours had to be cut off into strips then these were glued together and placed in a press to form the lines of pixels which make up each individual section. It's complicated to explain, and complicated to visualise and I'm hoping the process will become clearer with each stage.
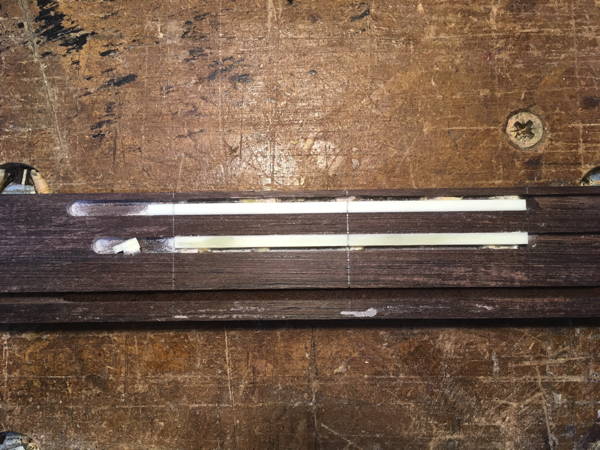
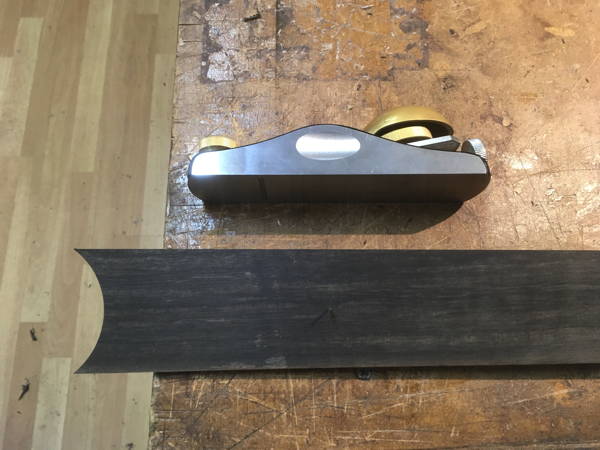
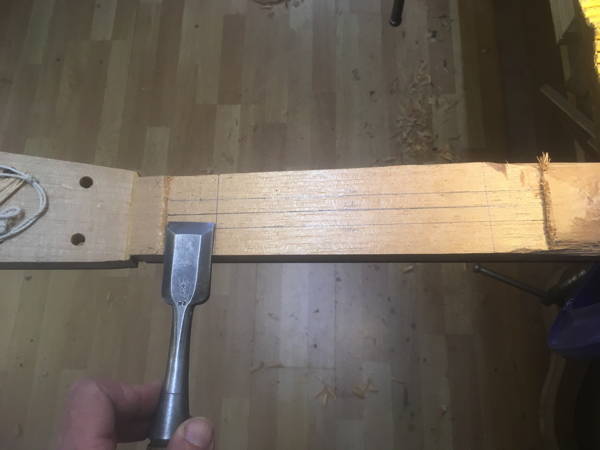
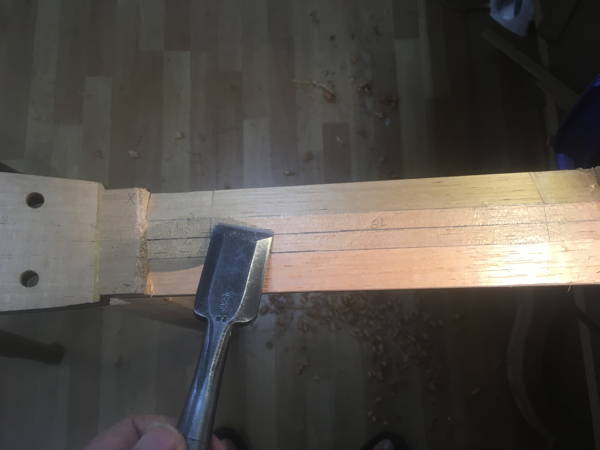
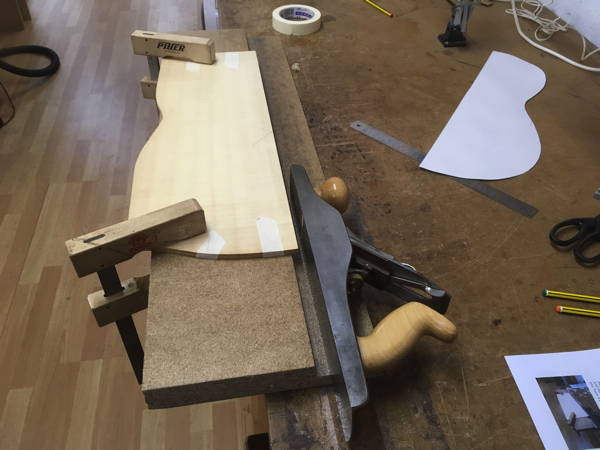
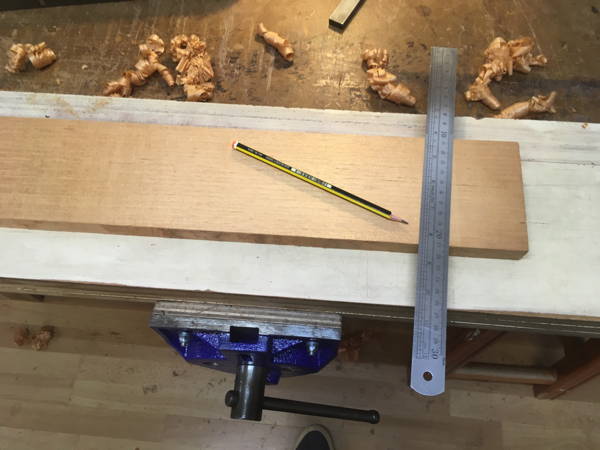
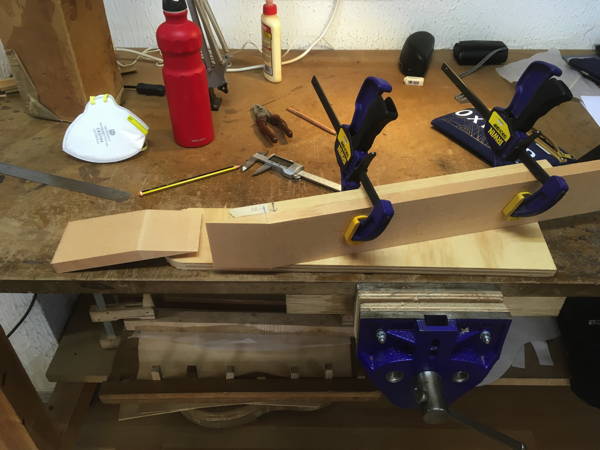
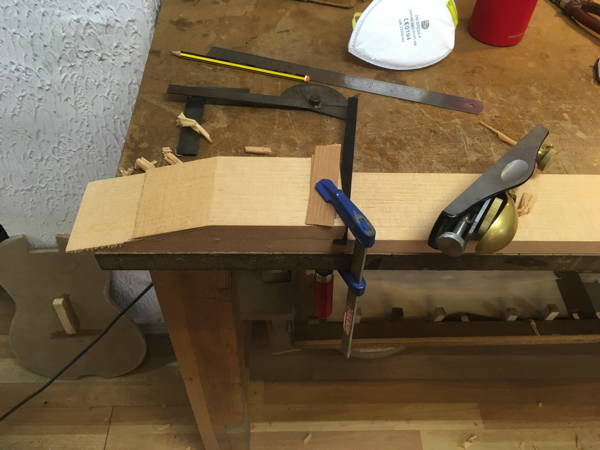
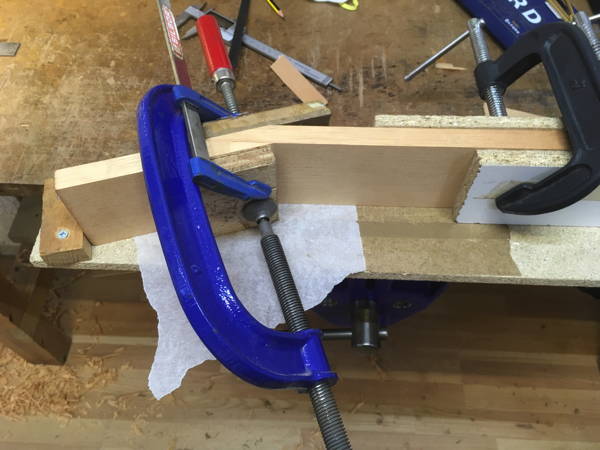
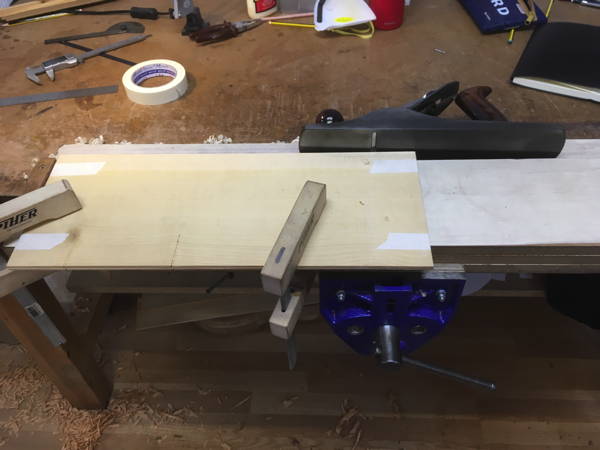
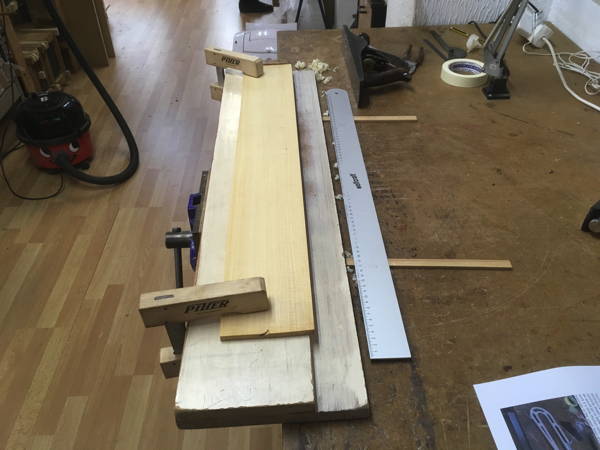
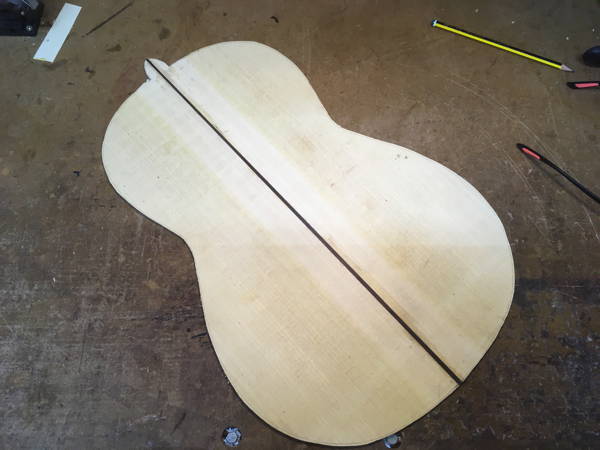
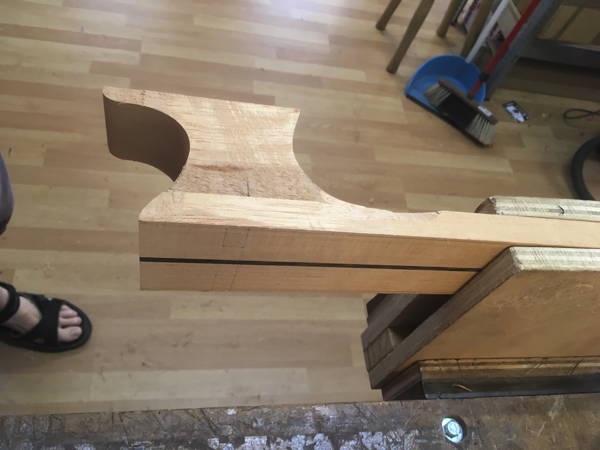
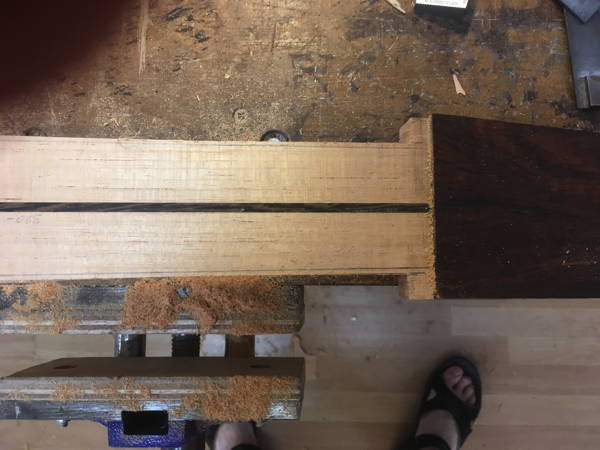
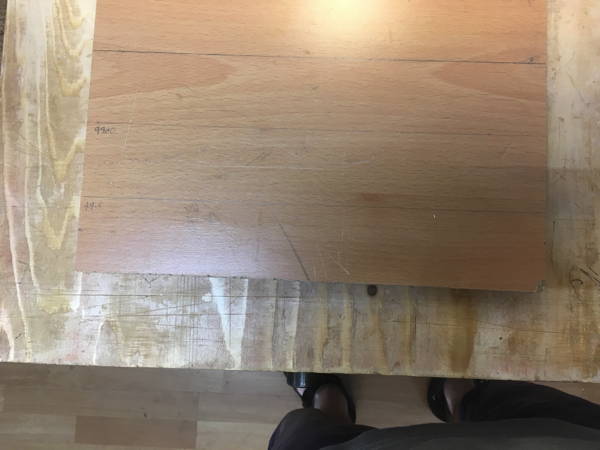
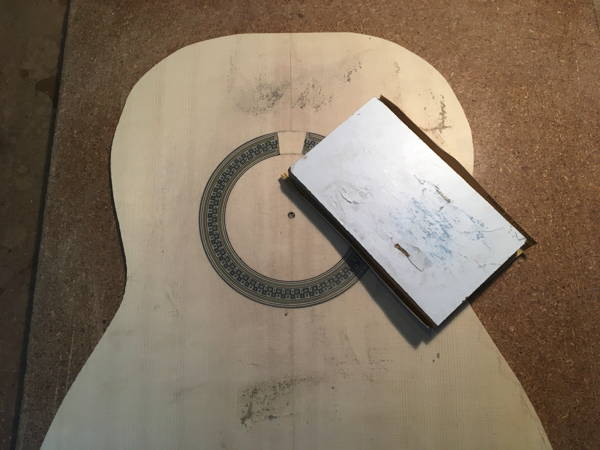
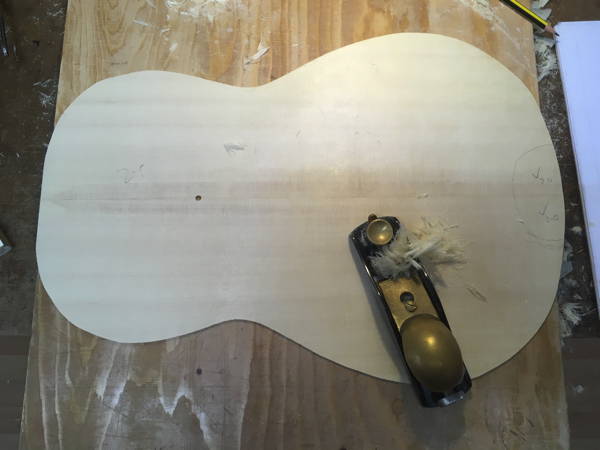
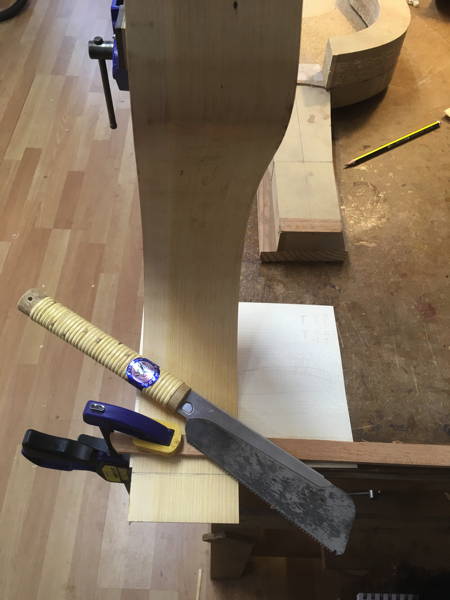
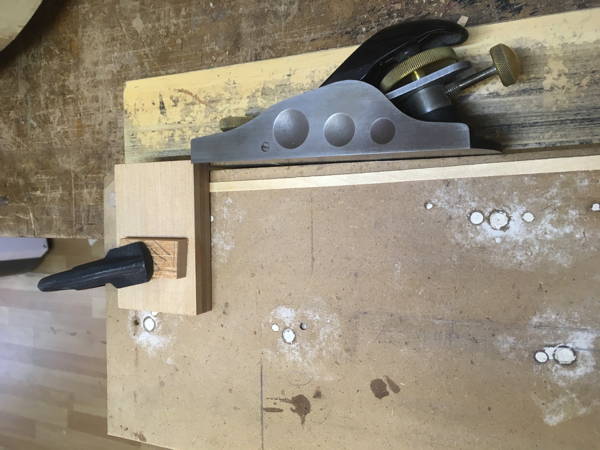
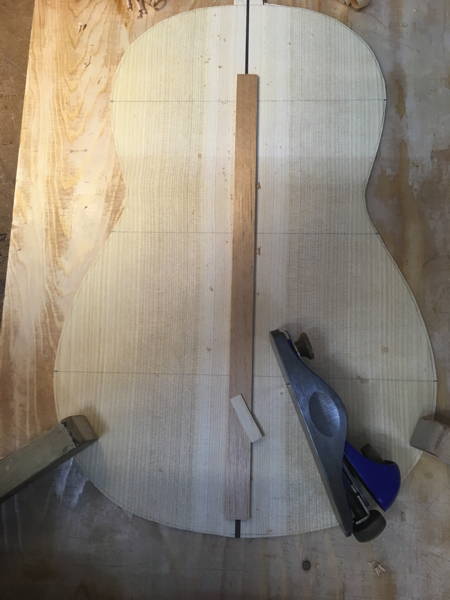
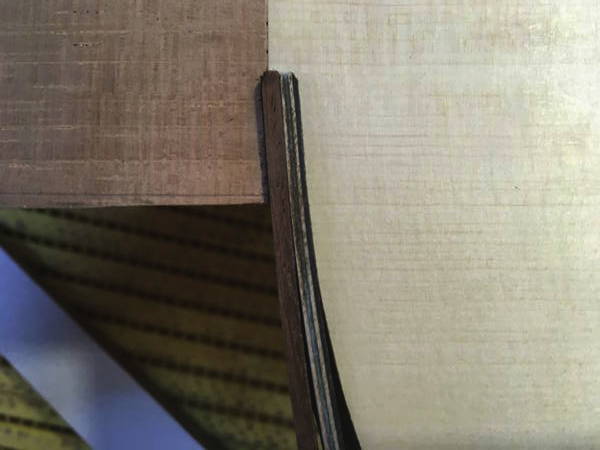
I planed the wedge I had glued to once side of the back so it was flush to the back.
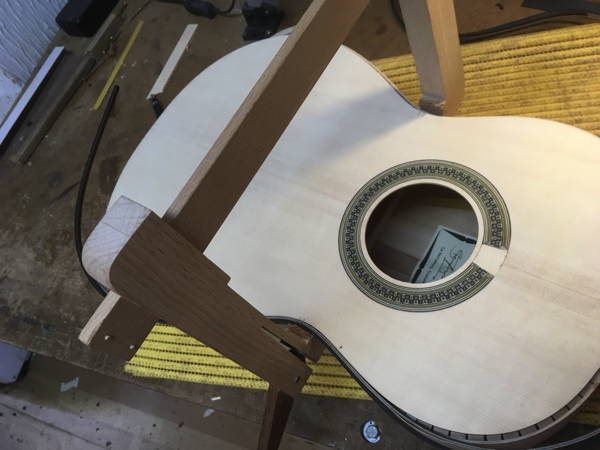
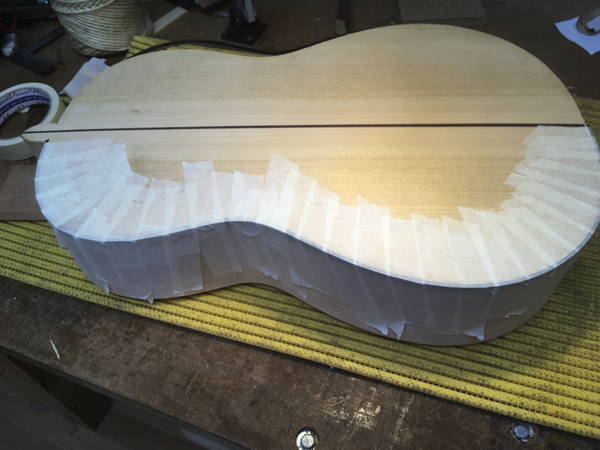
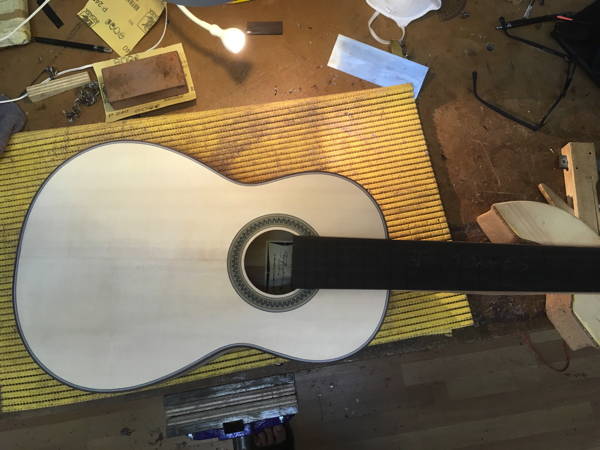
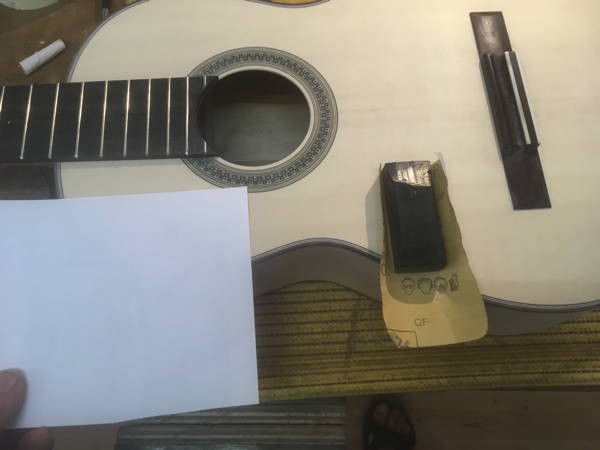
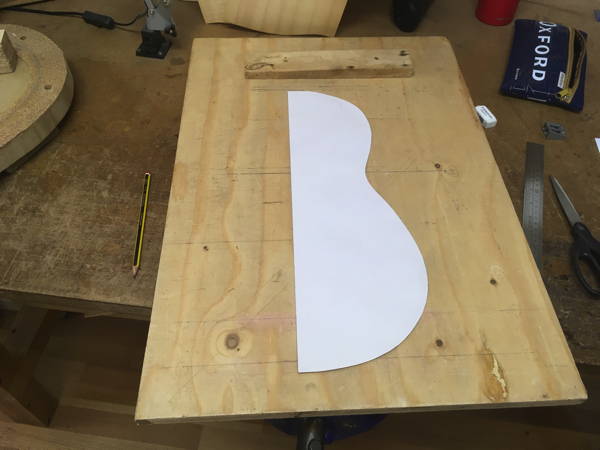
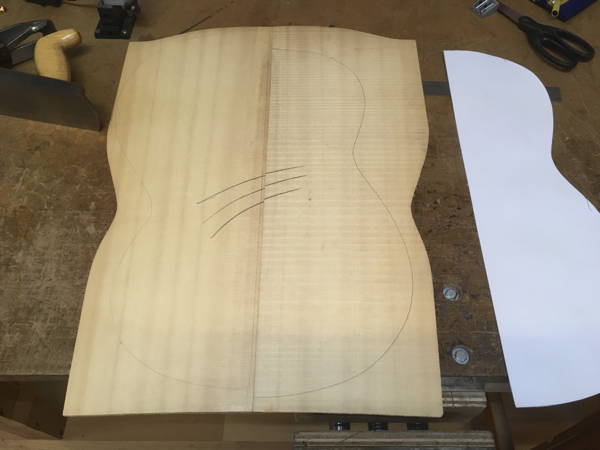
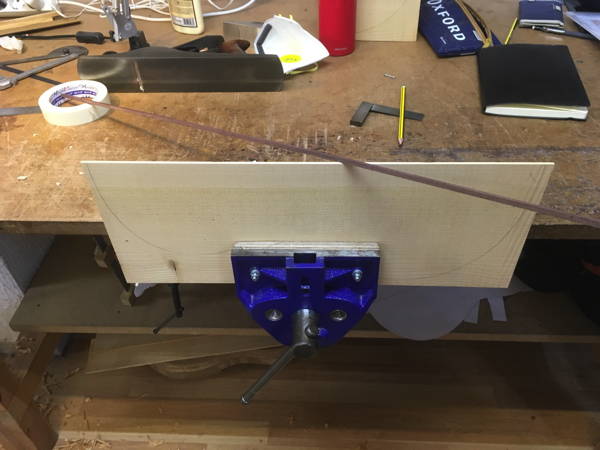
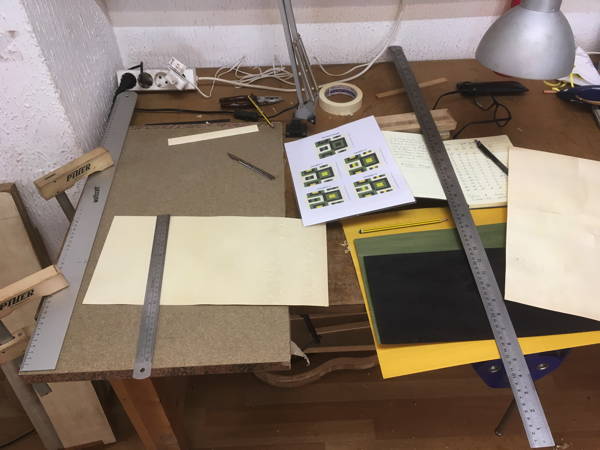
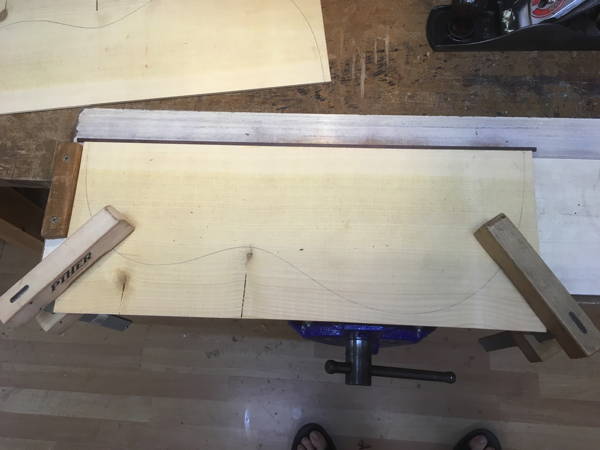
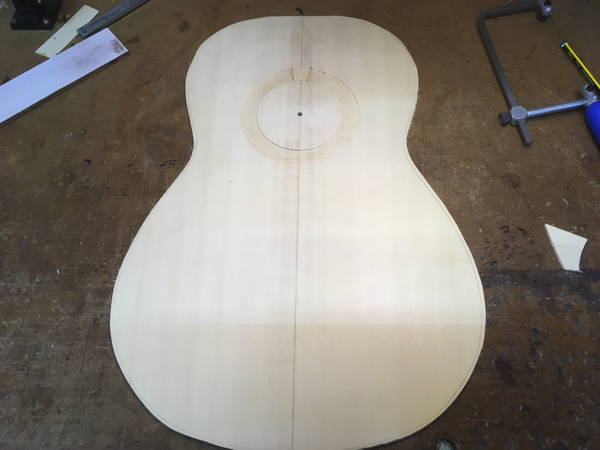
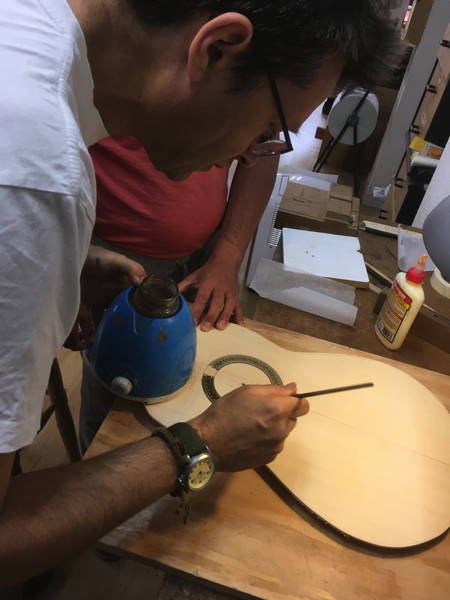
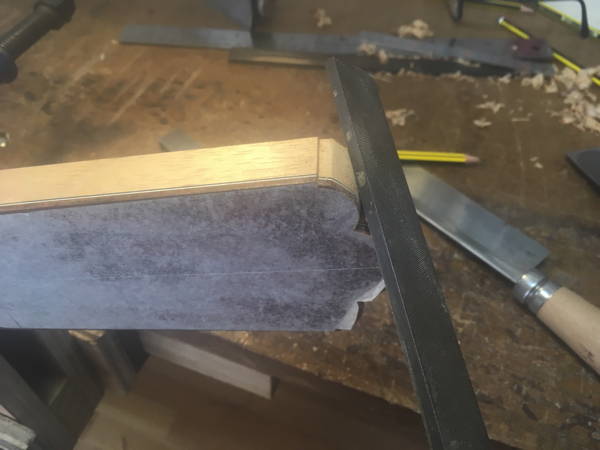
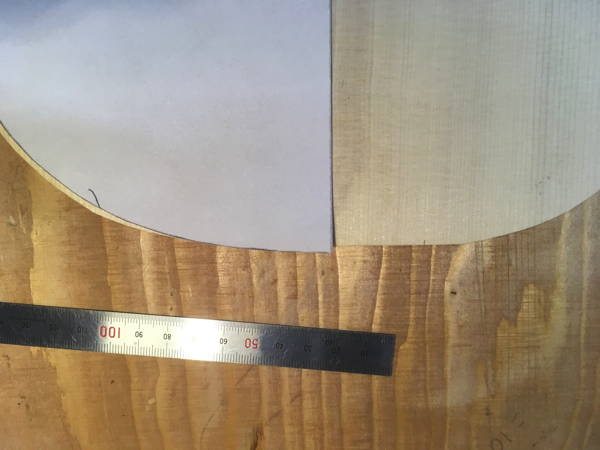
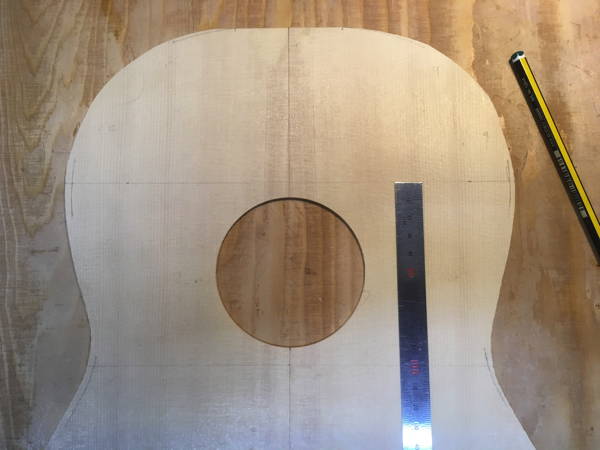
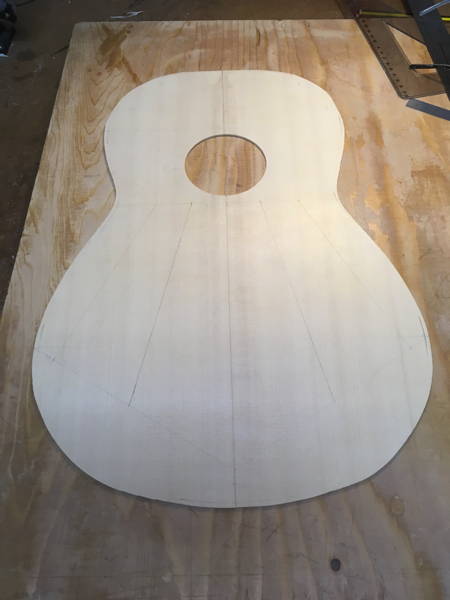
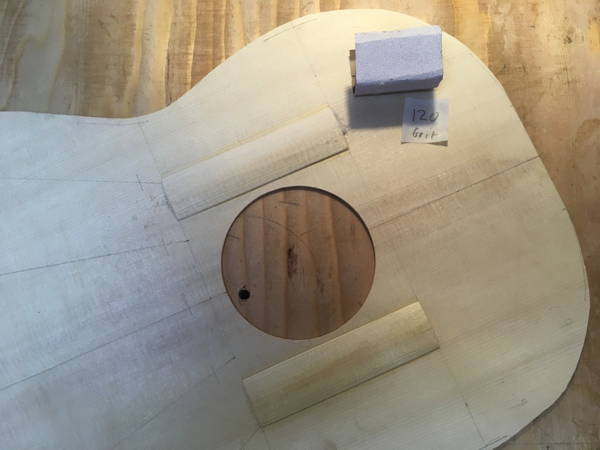
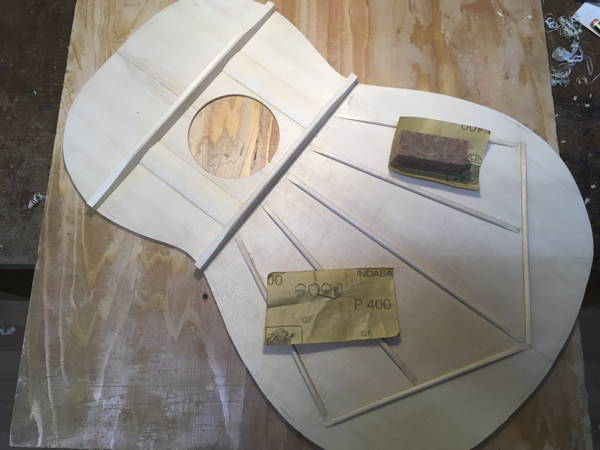
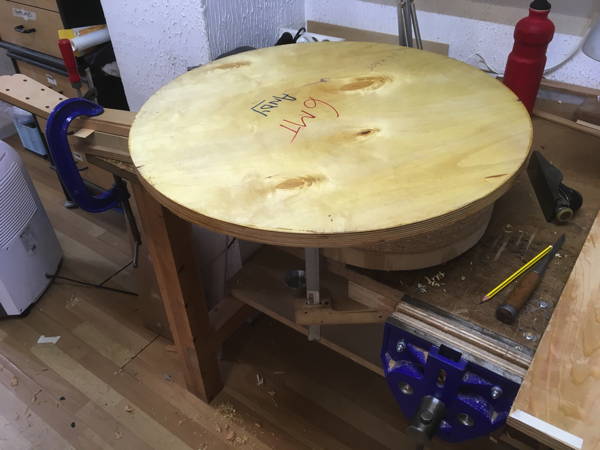
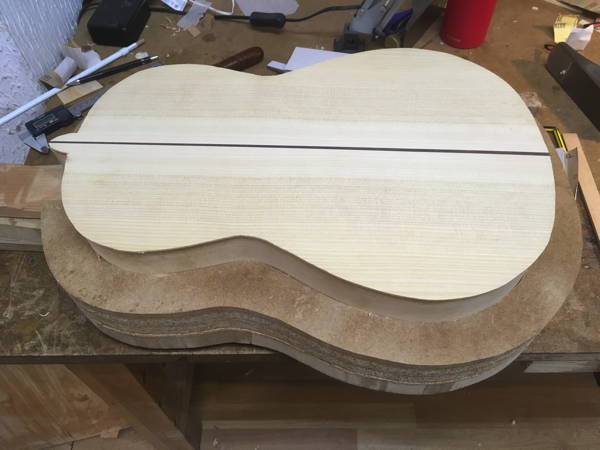
Next I had to get my template and mark out the front on the two pieces I had glued together. I then had to cut it out be very careful not to go too close to the line. I am now nervous using these machines. It's so easy to err! But I cut it out to my satisfaction, so it's now time to mark off where the sound hole will go.
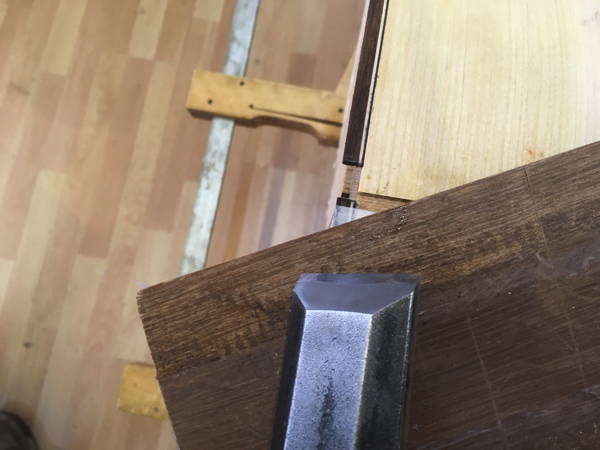
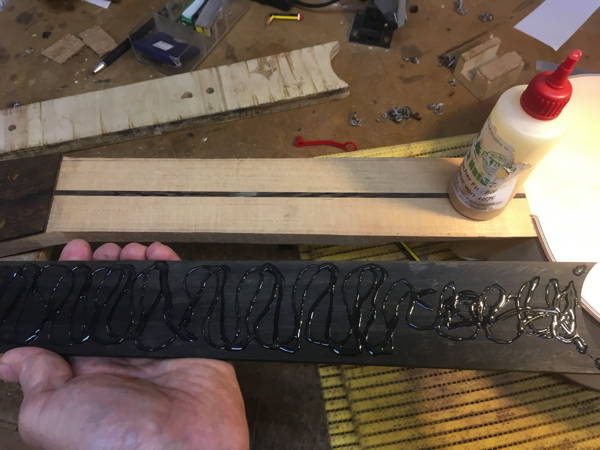
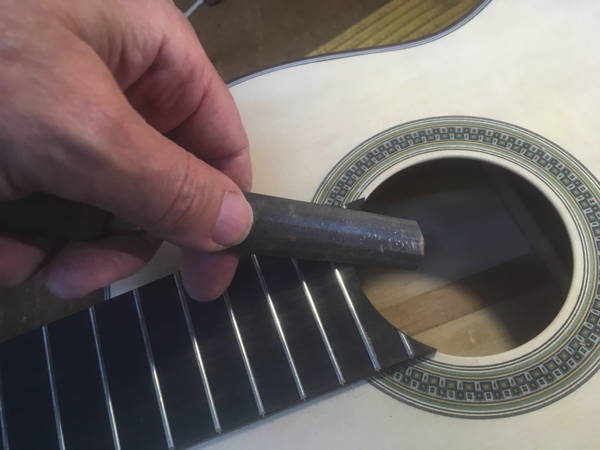
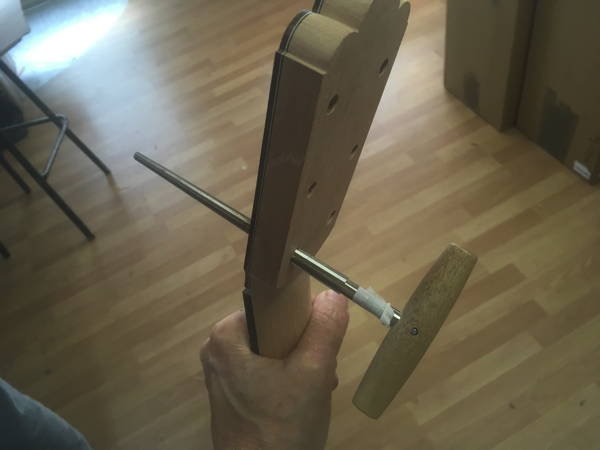
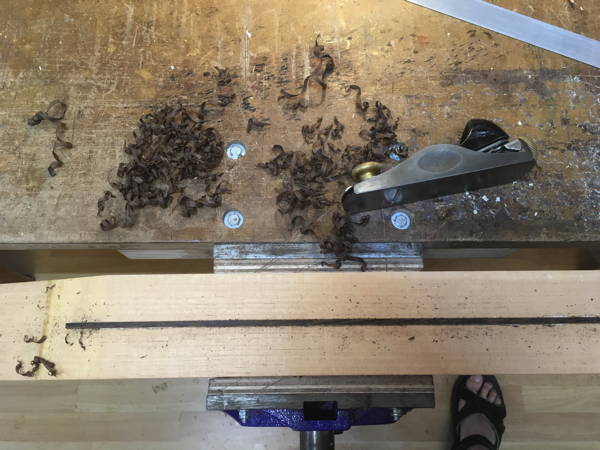
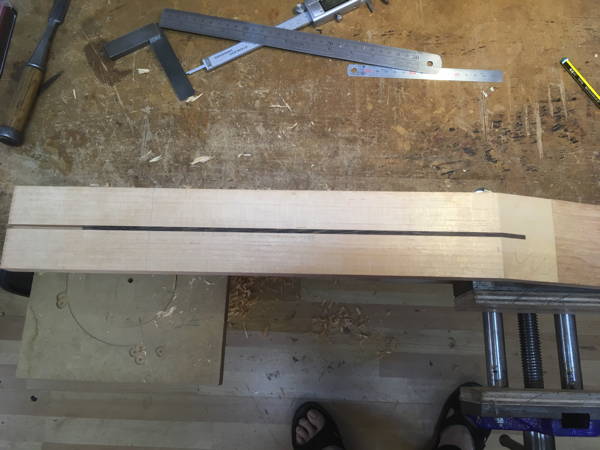
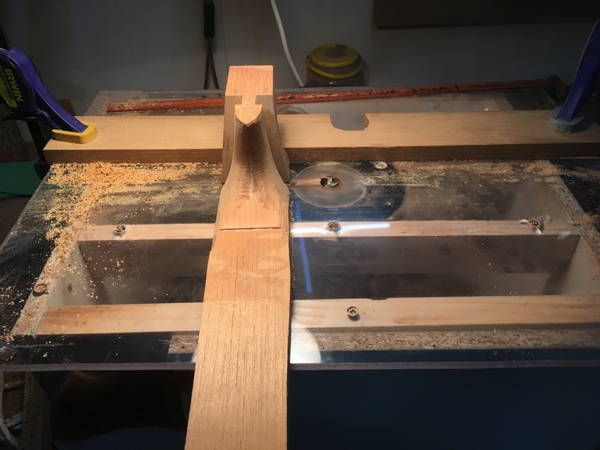
The neck had now glued solid, so I could add the neck reinforcement which is basically a strip of a very hard wood called Wenge. I had to route out a groove for it to slip into. There was special machine set up to do this. Once the groove was made, I could glue in the strip of wood the clamp it securely to dry.
I finished off the Rosette mosaic segments. Glue with a little water then brushed on to each strip and sandwiched in a press to be finally clamped to dry. I have six strips to work from which I will cut off to form the Rosette.
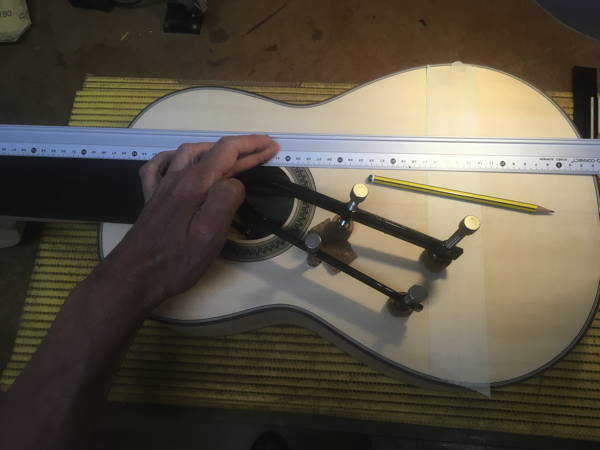
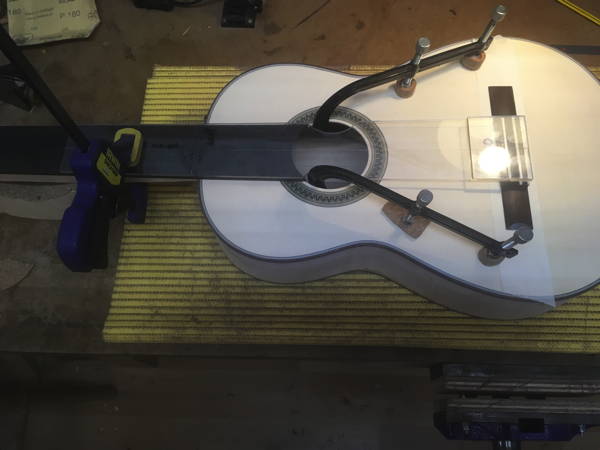
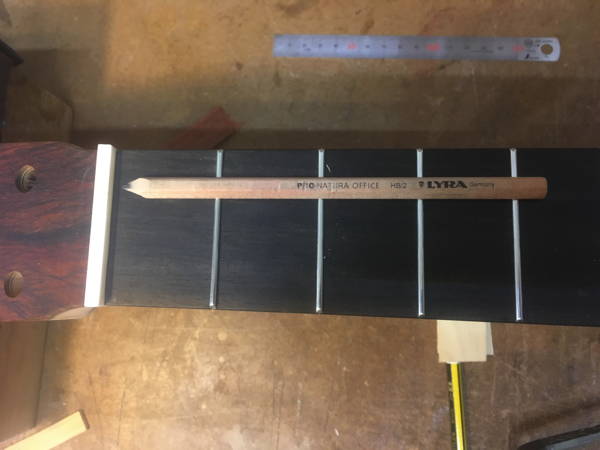
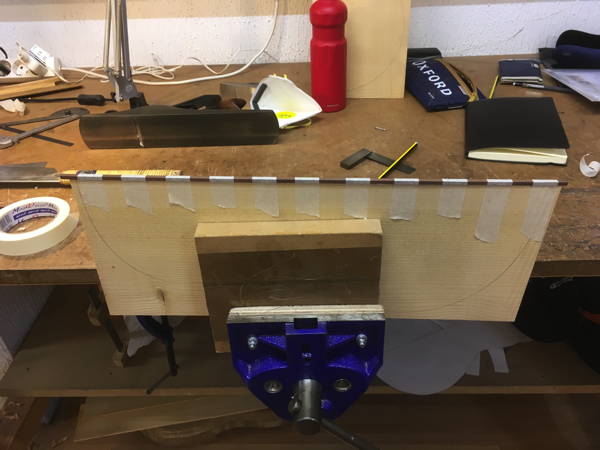
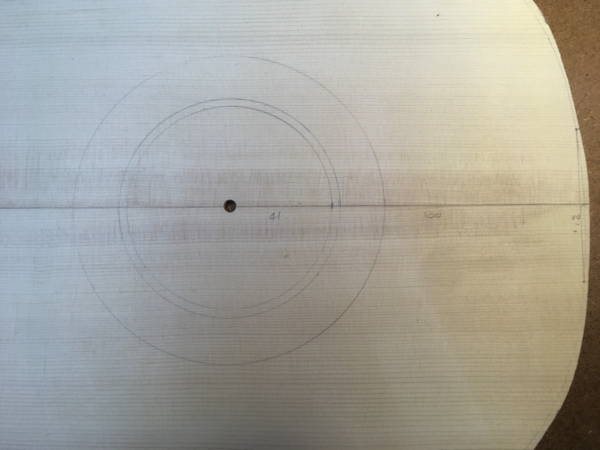
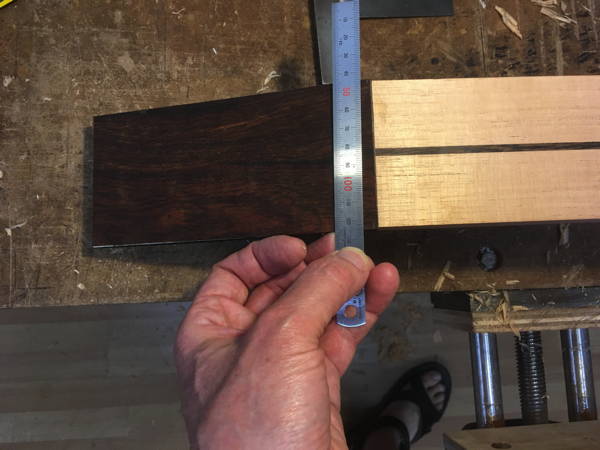
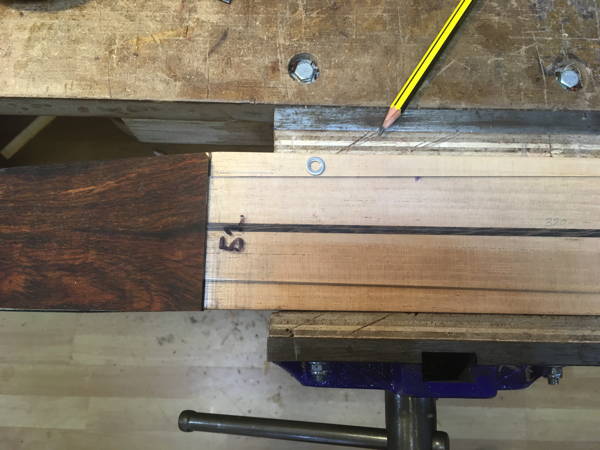
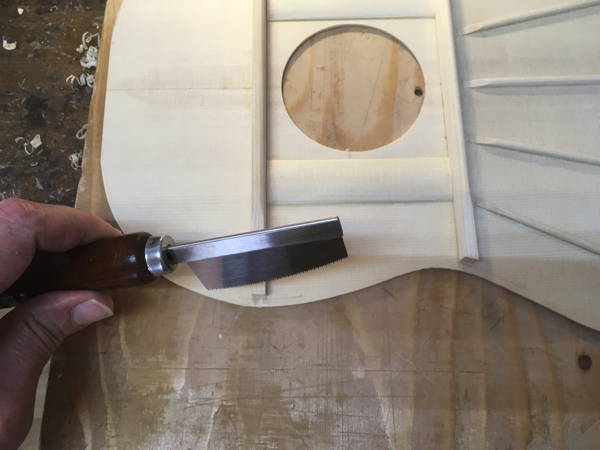
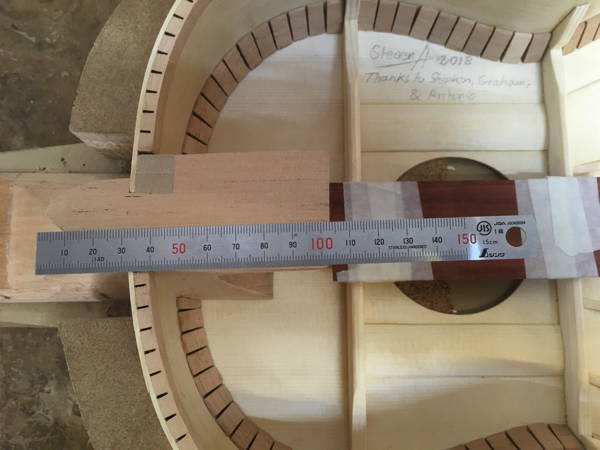
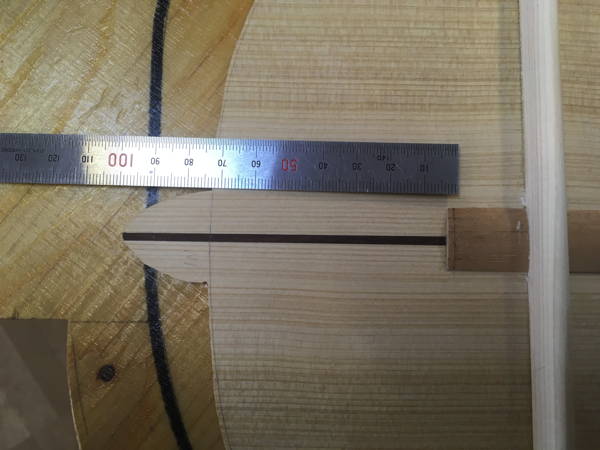
Back on to the top. A 31 x 31 mm line across the tip where the neck joins. Use a protractor. Then measure a perpendicular 100 mm line to the edge of the sound hole. Add 41mm the radius of the sound hole. (82 mm in diameter).
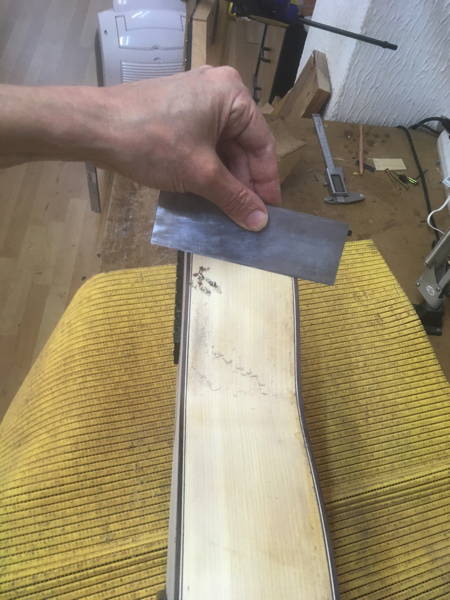
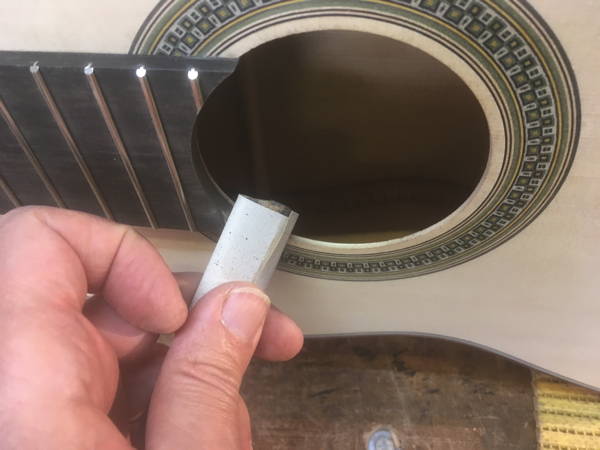
I planed and then scraped the reinforcer until flat.
On the smooth side mark four points at the centre of each side.
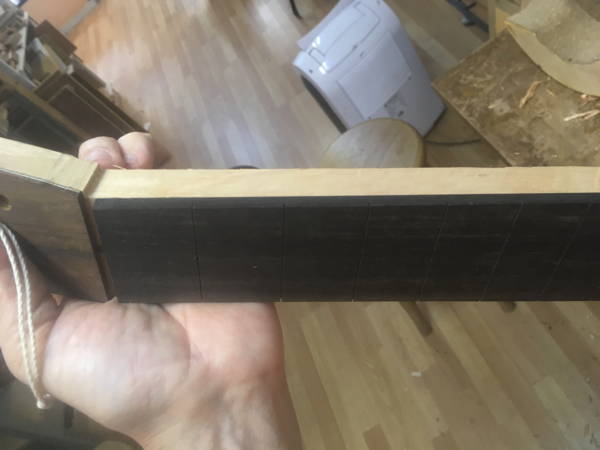
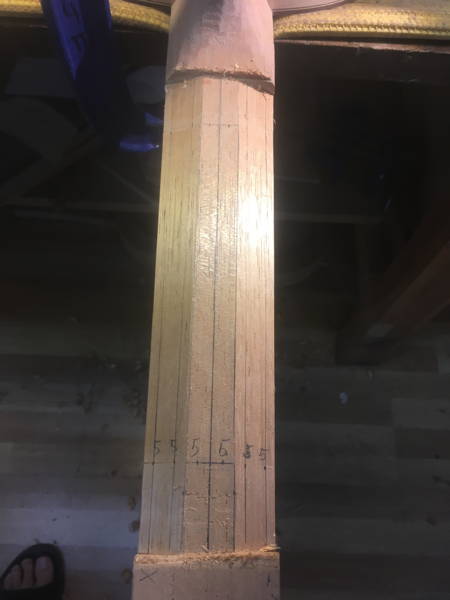
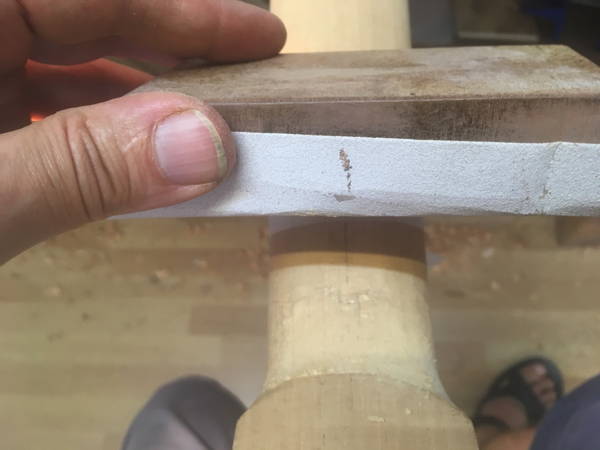
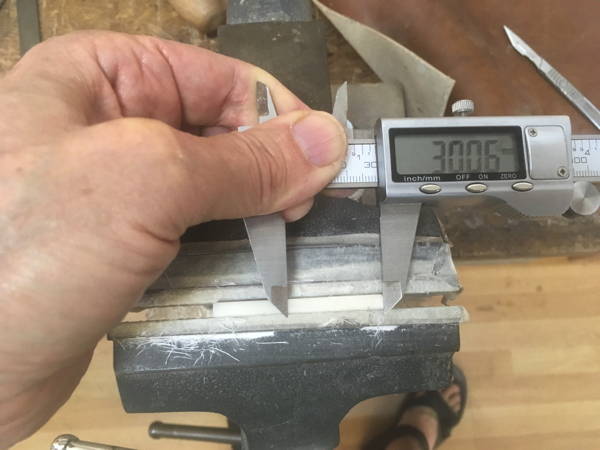
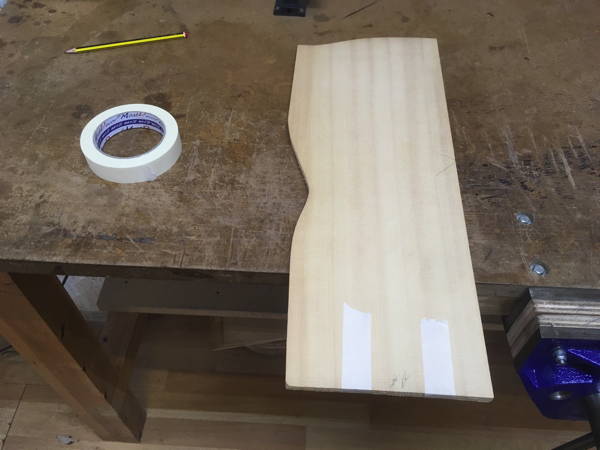
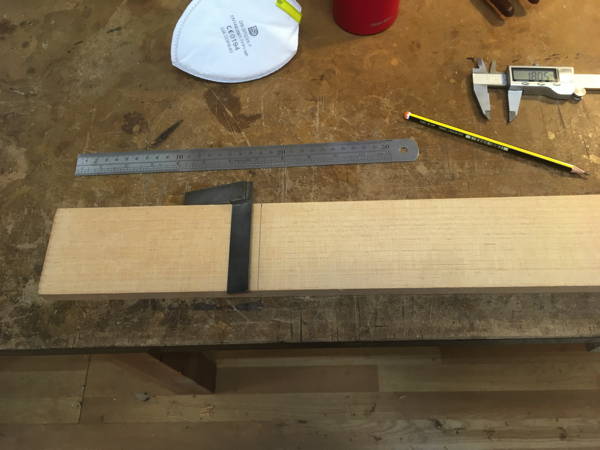
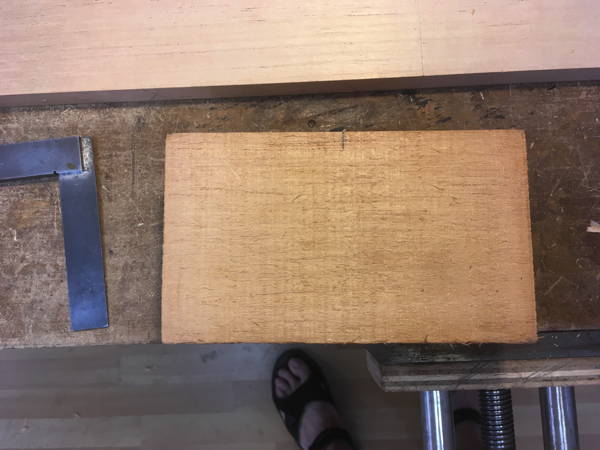
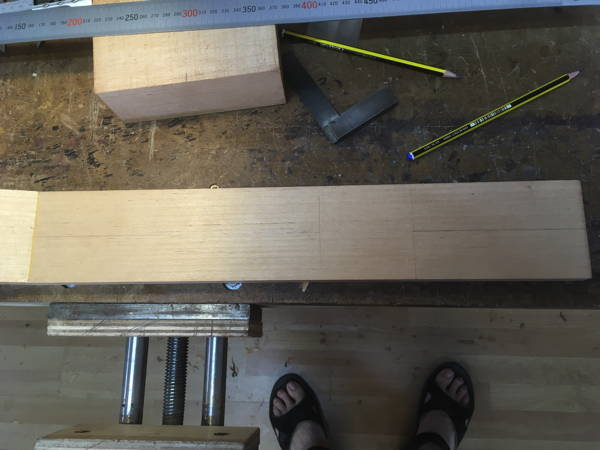
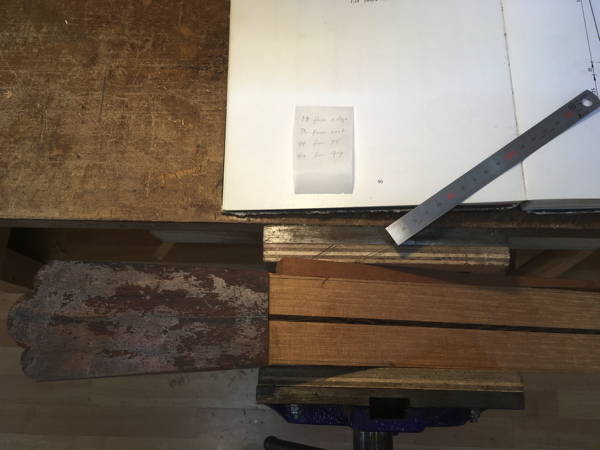
The Head needs to be 17mm thickness for a Romantic Guitar.
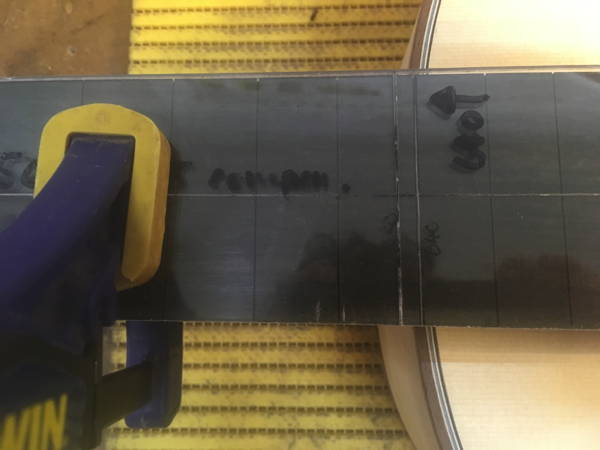
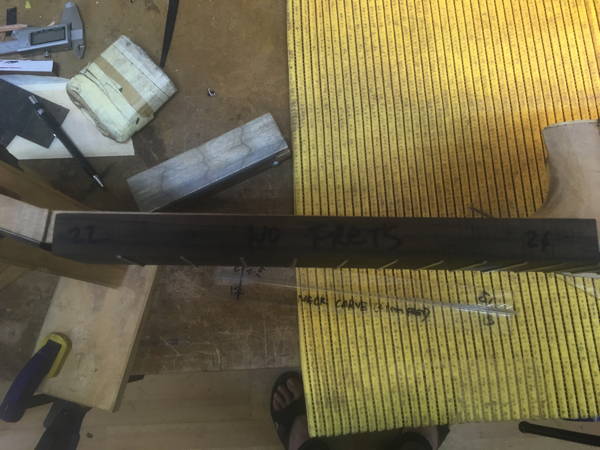
I marked a line at the nut - plus another line at 4mm (nut width). Then add 320mm to the 12th fret. At the 12th fret draw a line around the neck.
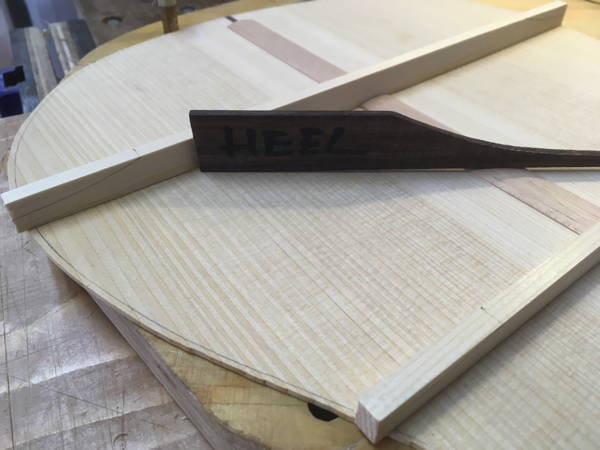
Then I drew a centre line on the back of the neck. NOTE: DON'T DRAW ACROSS HEEL BLOCK MARK. (The pencil mark will remain forever).
Glue and clamp heel block to marks using Fish Glue.
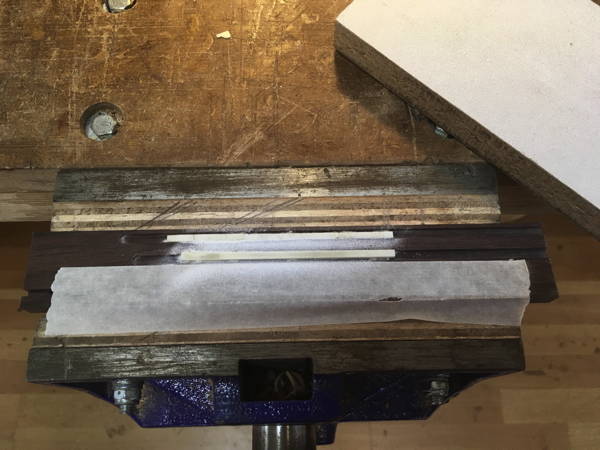
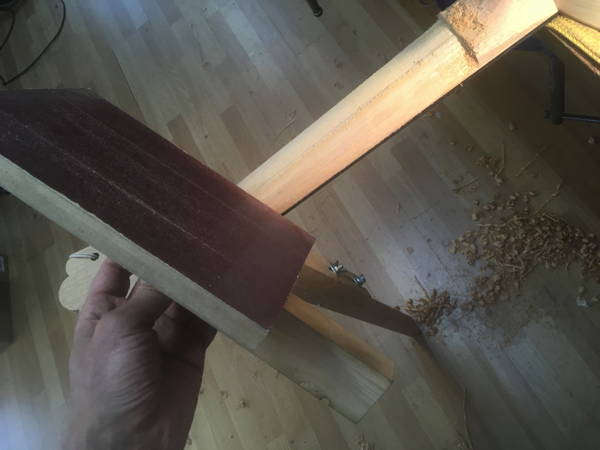
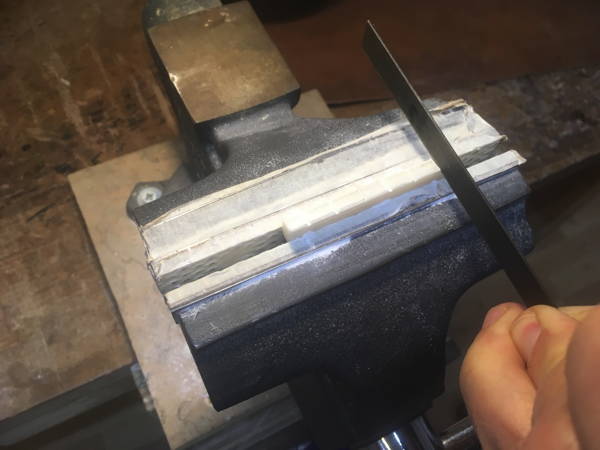
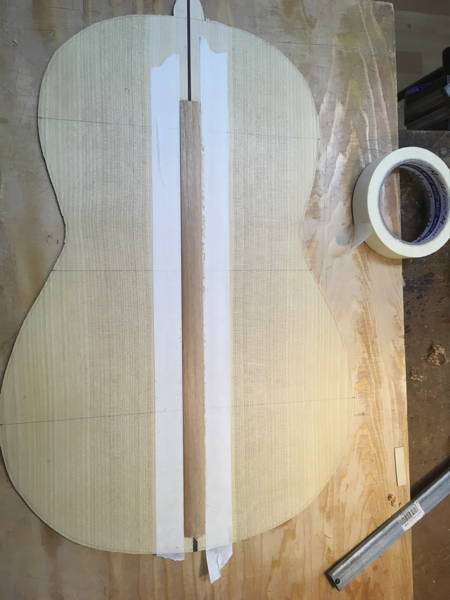
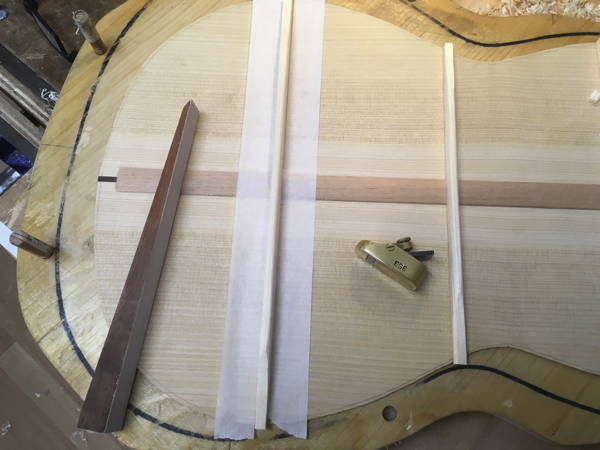
Taper Rosewood strip to a wedge shape using a shooting plane and block.
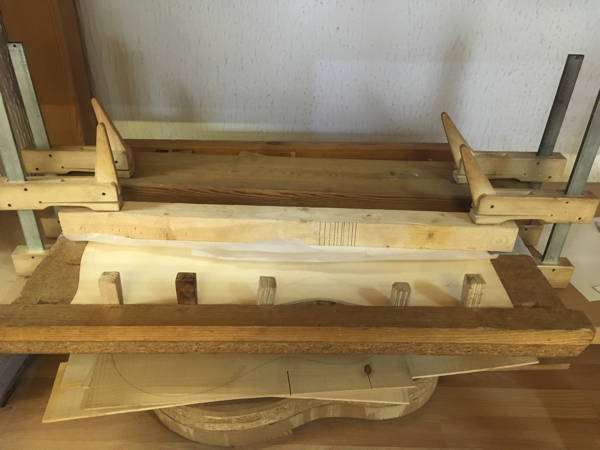
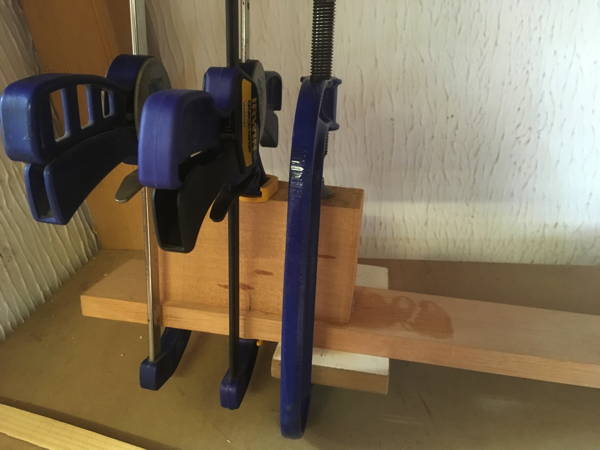
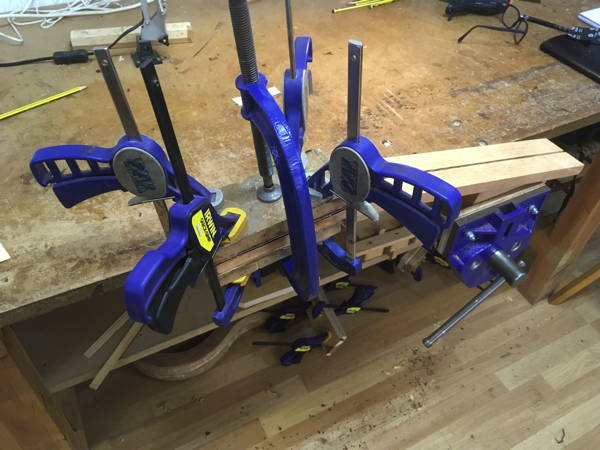
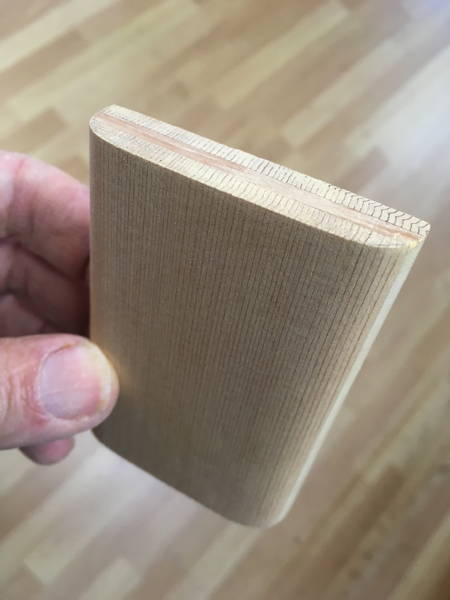
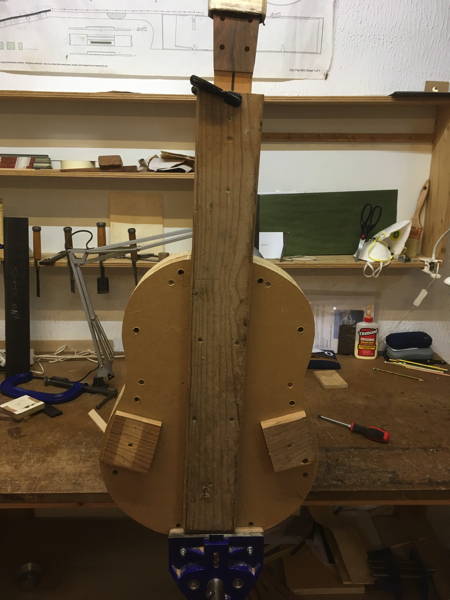
Place on pegboard and using weights and clamps, glue two backs halves together. Leave to set.
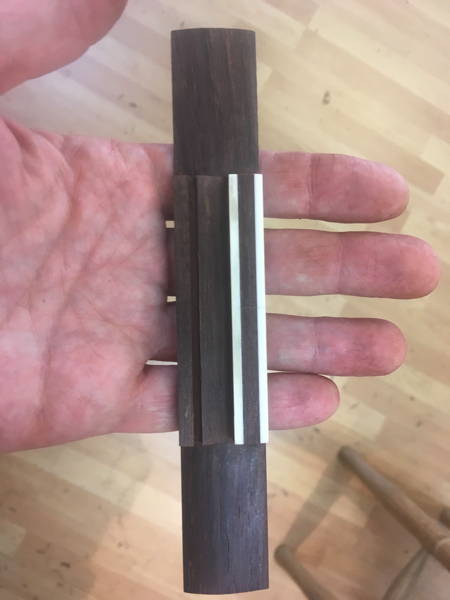
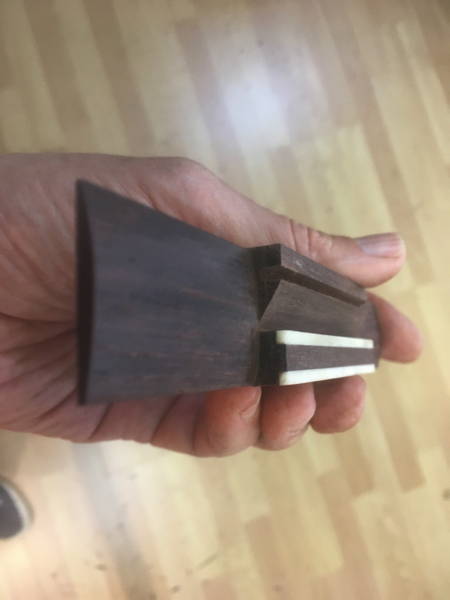
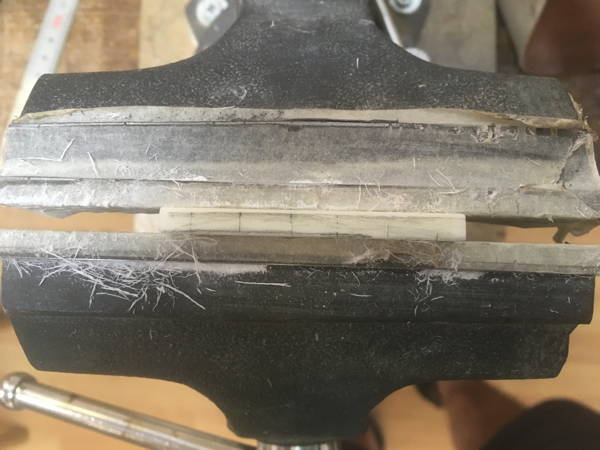
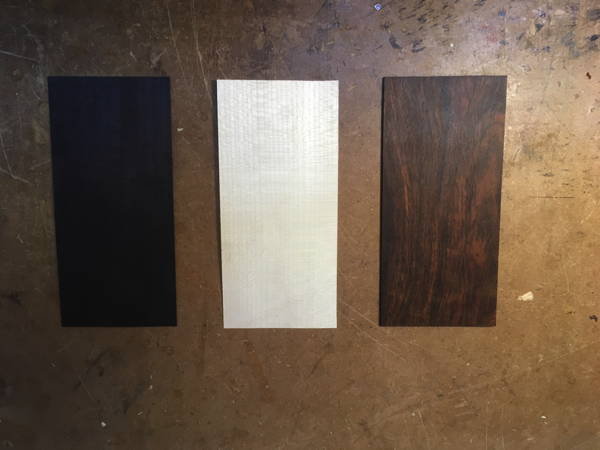
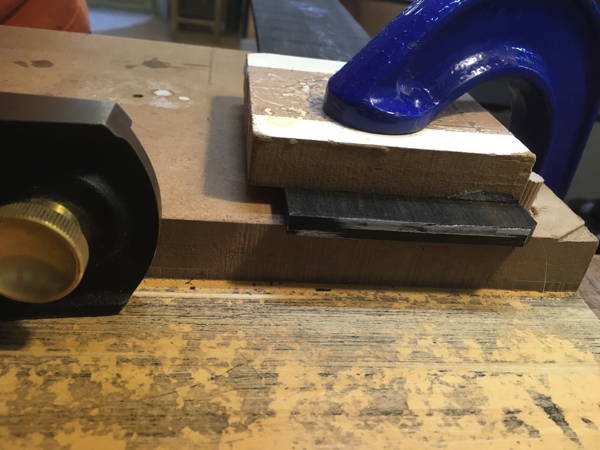
The top of the head is to be laminated with a hardwood and two veneers. For strength and decoration.
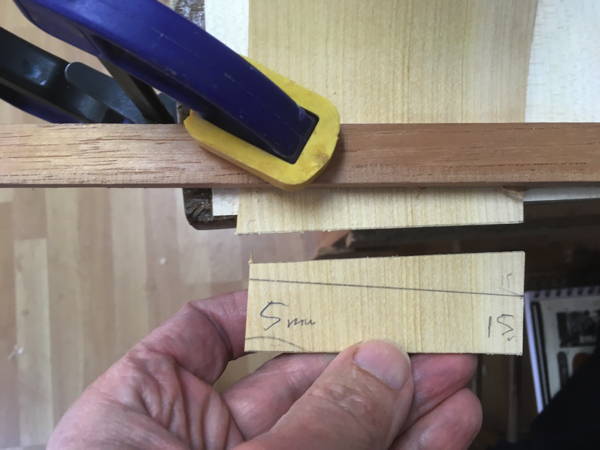
I chose a beautiful dark Cocobolo wood and beneath it would be sandwiched two veneers - a white and a black.
So it was glue on the black on the head, followed by the white and finally the Cocobolo section. These all had be cut to the size of the head including a slight overlap near the nut.
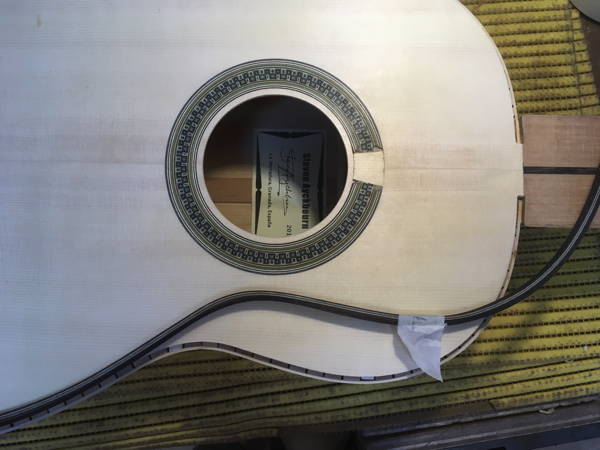
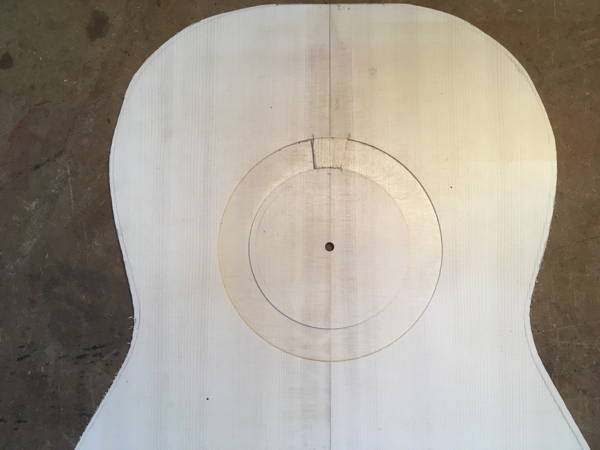
Time to route out the channel for the rosette pieces. As my guitar was a bit smaller than the standard size, the Rosette and sound hole would be a little smaller. This meant adjust to the router to the correct radius. It went into the previously drilled 5mm hole in the soundboard.
Using the router was straight forward though it was important to start it above the wood at 11am and route all the way round at a steady pace to end up at 1pm. The router had to stop COMPLETELY before being taken off. The channel was then sanded carefully to smooth it - being careful to keep the edges.
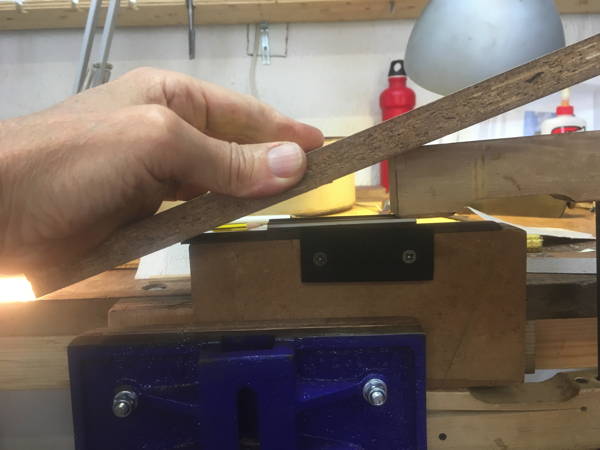
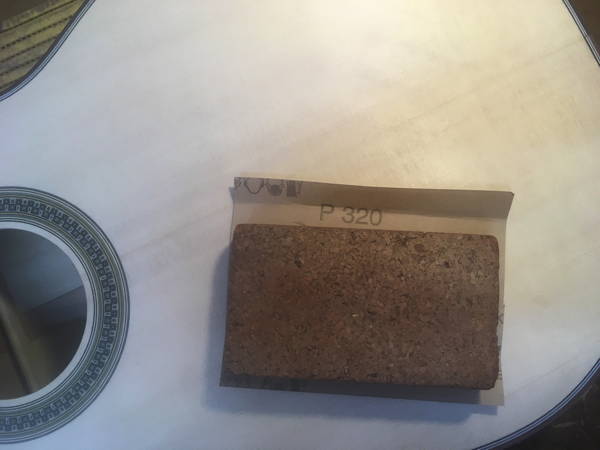
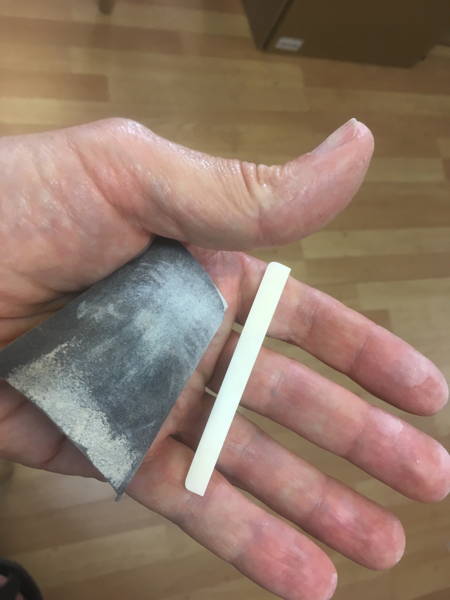
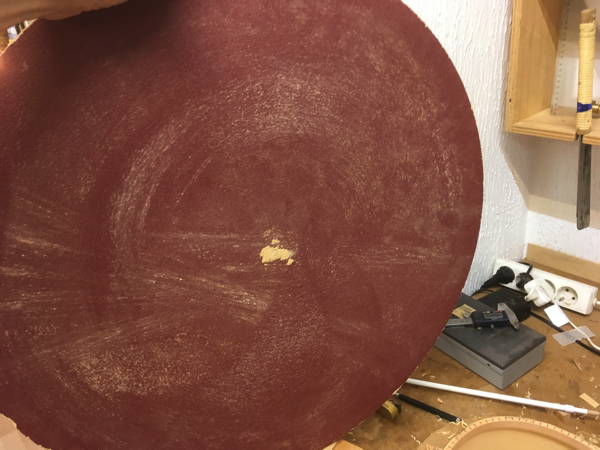
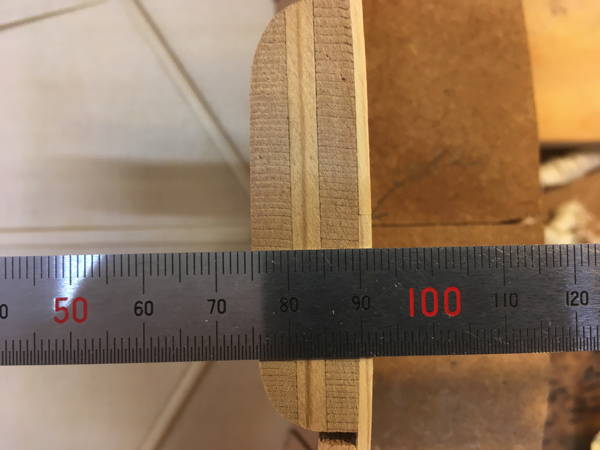
On to the Back. This had to be sanded using the large sander to a width of about 2.6mm. This is then finished with a very fine sandpaper.
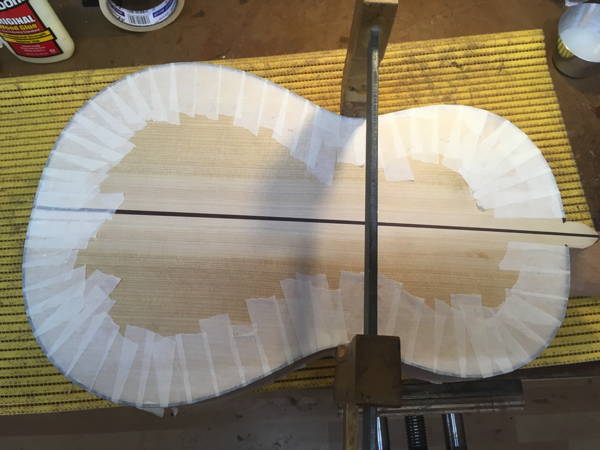
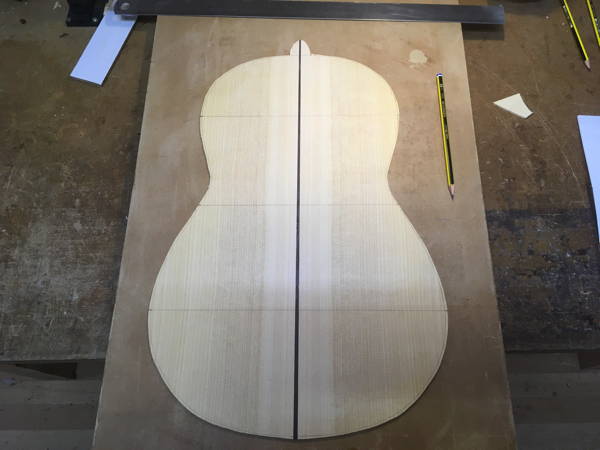
Next I drew thee lines between the upper and lower bouts and then a line equidistant between the two.
And that was the end of the third day.
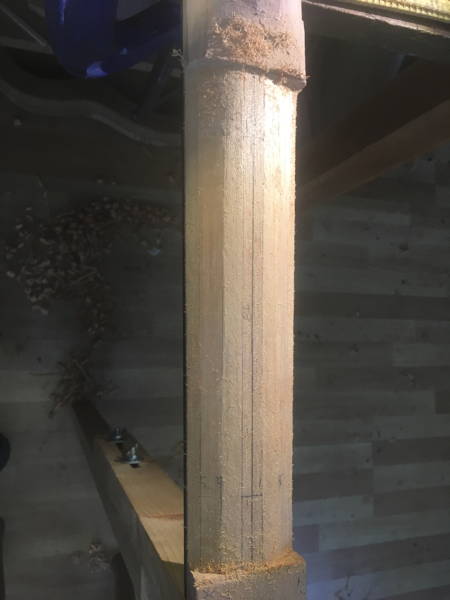
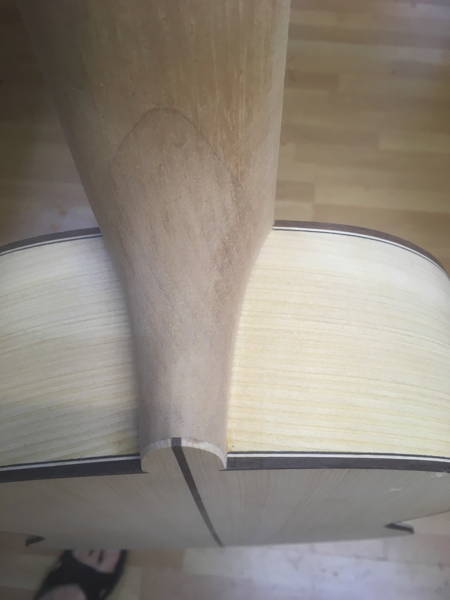
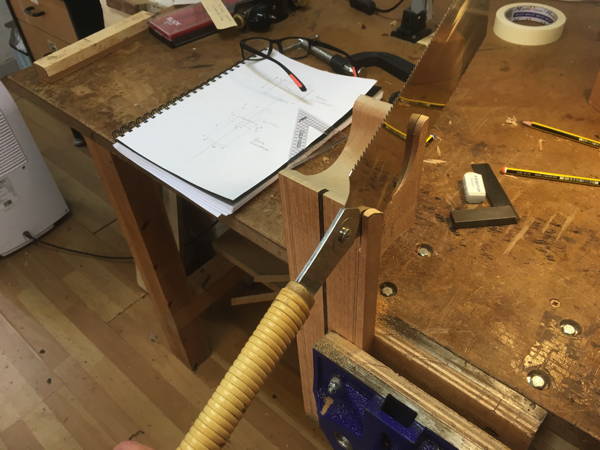
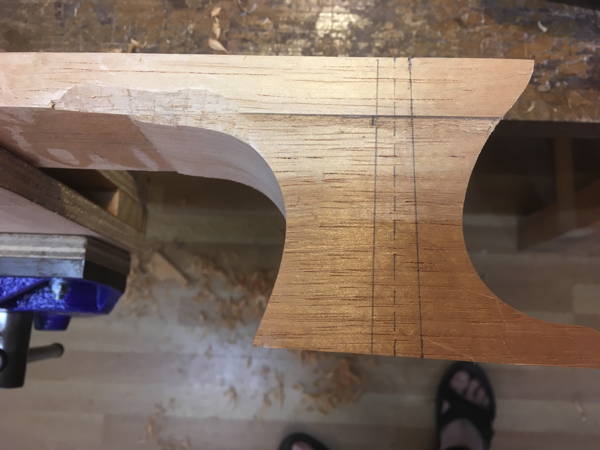
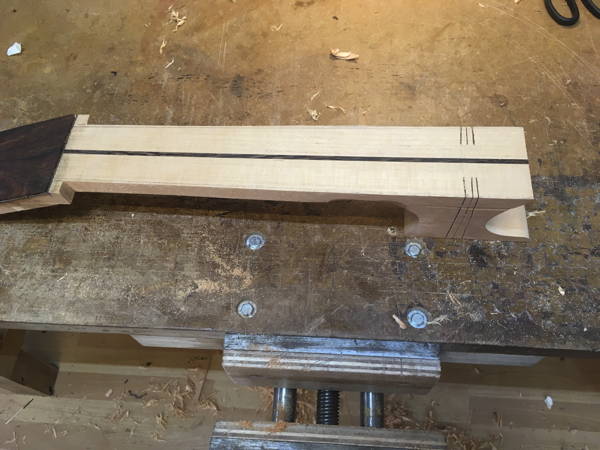
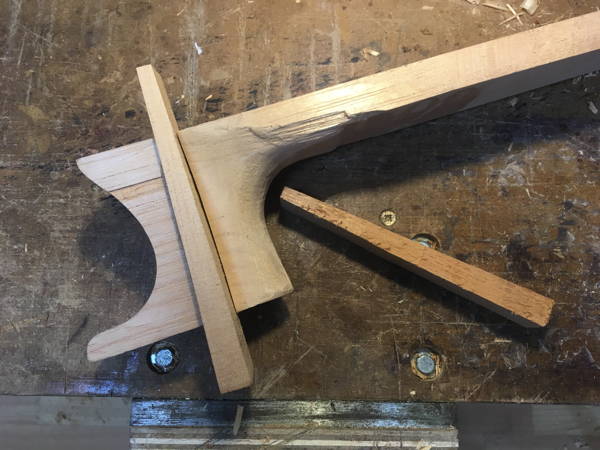
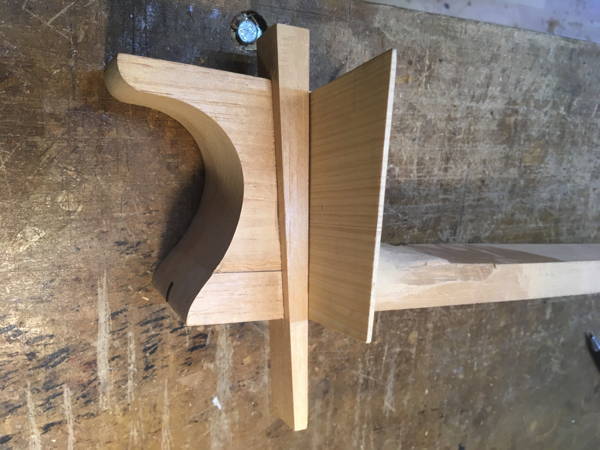
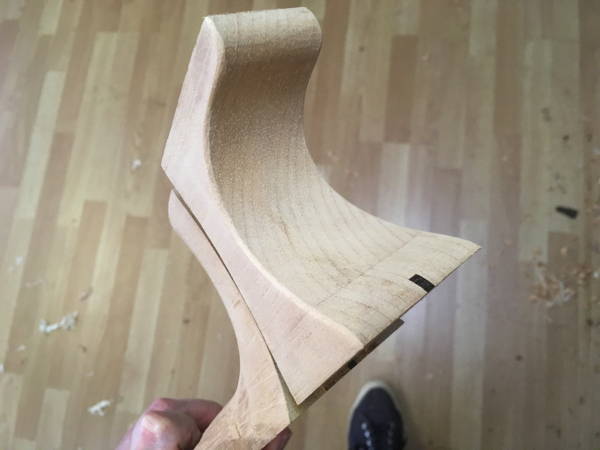
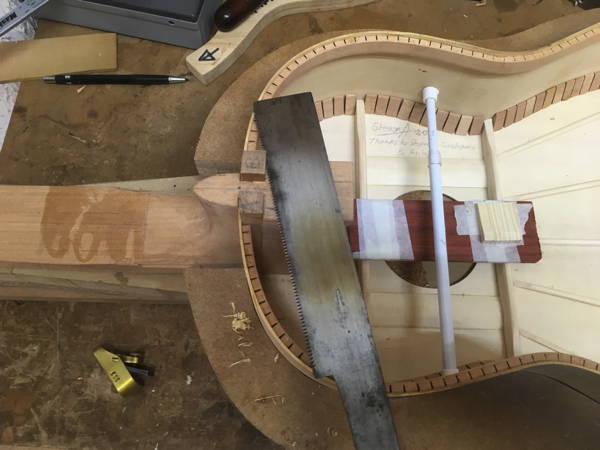
It was time to mark out the shape of the heel and then cut it out using the band saw. I also marked out the shape of the heel tip. There were some tricky angles and curves but I managed to a pretty decent job.
I then planed and chiselled out the sides of the heel to bring it down to the two guide lines.
It is necessary to remove some of the Cocobolo laminate on the head. It had to be cut at the position of the nut and carefully planed to remove any of the black and white laminate beneath.
I could now place a special guide on the centre of the fingerboard. The would provide a lines either side so I could cut out the width of the neck with a Japanese saw. The cutting line outside the guide line was achieve by putting a pencil in a washer. Clever.
With a Japanese saw I cut down either side of the heel and fret board to remove the excess keeping an eye on the two guidelines.
More lines to be drawn from the top to the bottom of the heel.
The I had to make two cuts with the Japanese saw - the part nearest the body and an extra centre cut.
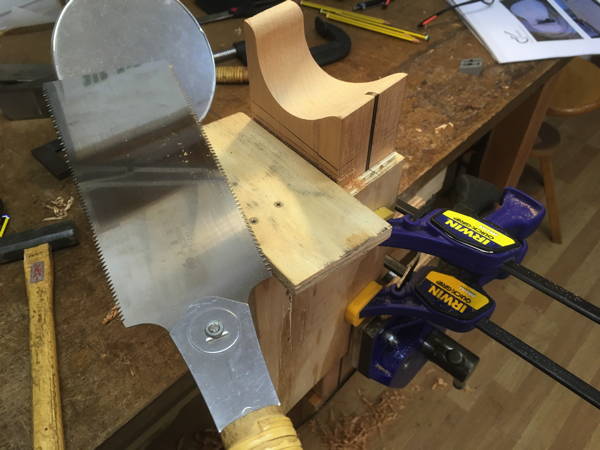
The final cut where the body was going to connect was made on a special jig to achieve complete accuracy.
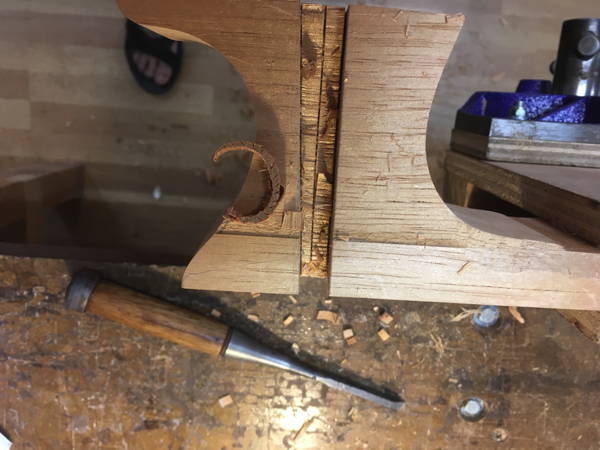
Next I chiselled out the wood where the cuts had been made, so I had two grooves - on on either side.
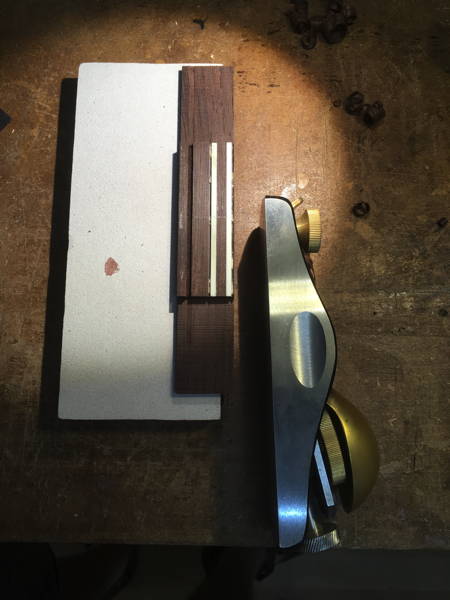
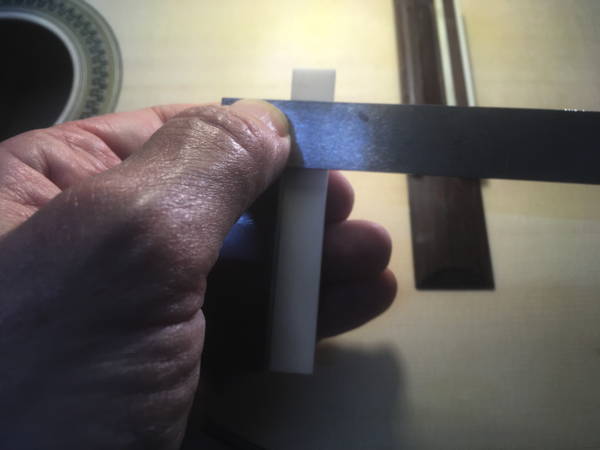
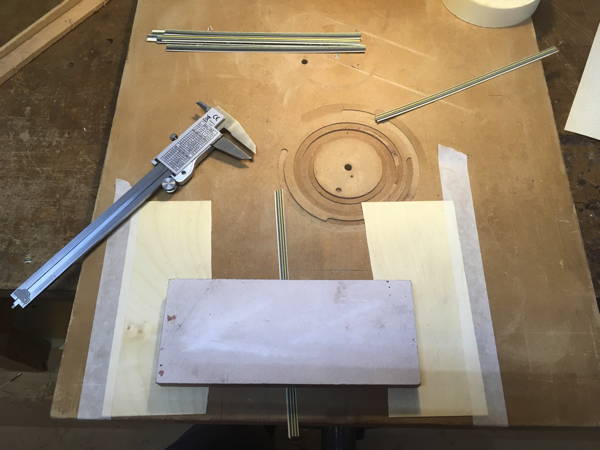
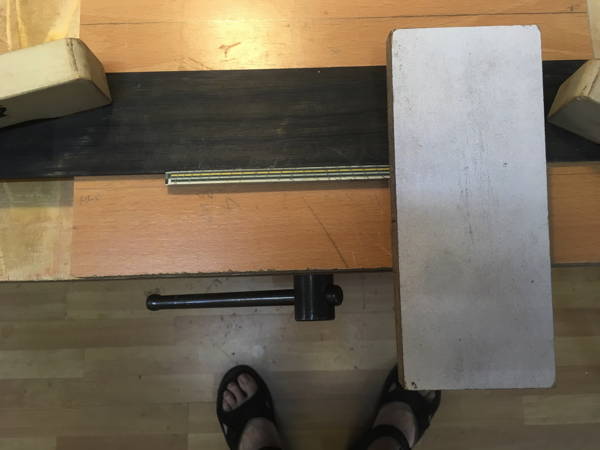
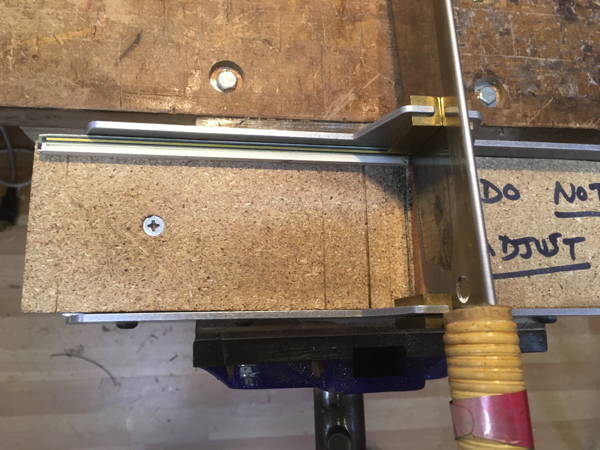
It was time to remove the layered veneers which would comprise the rosette. These were then planed with a block plane on a shooting board in order to get both sids 'completely' flat.
Flat sections (less than 1.0mm) can now be sliced from each side of the veneer strip. The slices were then placed between two veneers taped to a board to establish a thickness of about 0.5mm and then sanded evenly.
And that was the end of another day.
In the morning I consulted the book 'Antonio de Torres' by Jose L Romanillos. I am looking for a head design where I could pay homage to the great guitar maker who had so influenced the design of this guitar i.e. its proportions, size and rosette.
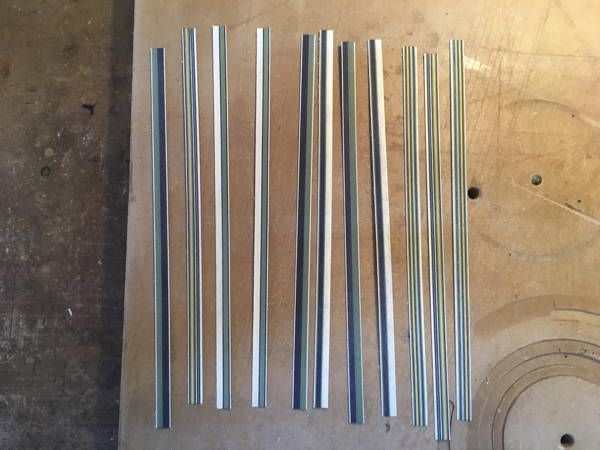
At the workshop I continued sanding the strips that would form the rosette motif.
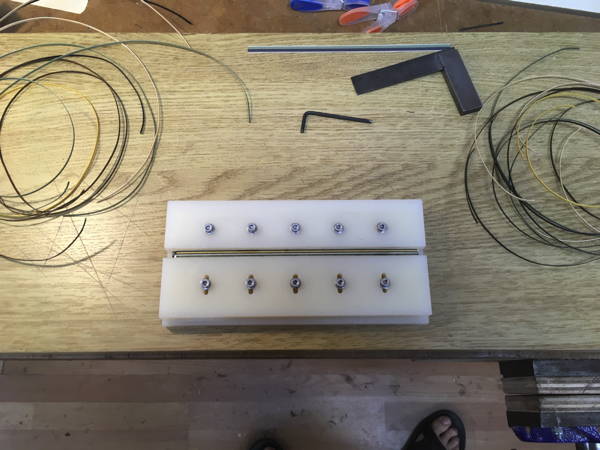
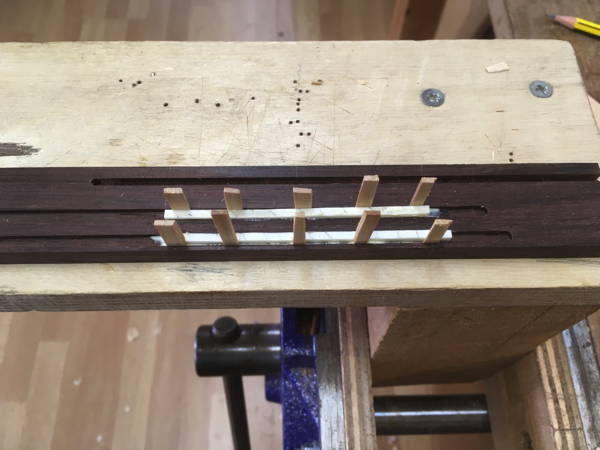
When they were an even thickness, they had to be loaded into a press in the correct order.
This was done in a similar manner to making the lines. Glue brushed on (not diluted), and flipped on on top of each other until a stack had been created then pressed and squeezed to keep the pattern.
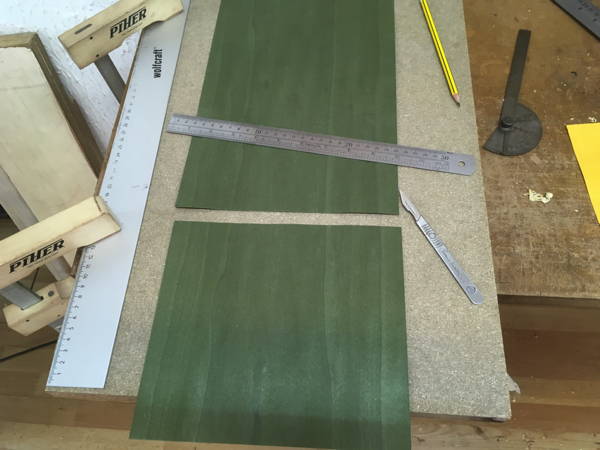
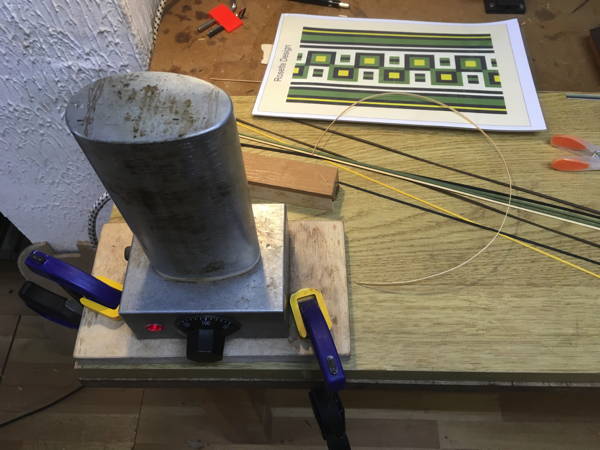
Next came the lines around the rosette. These comprised thin strips of veneer. The were pre cut, though I had to cut the greens from the original green sheet as I wanted the olive green.
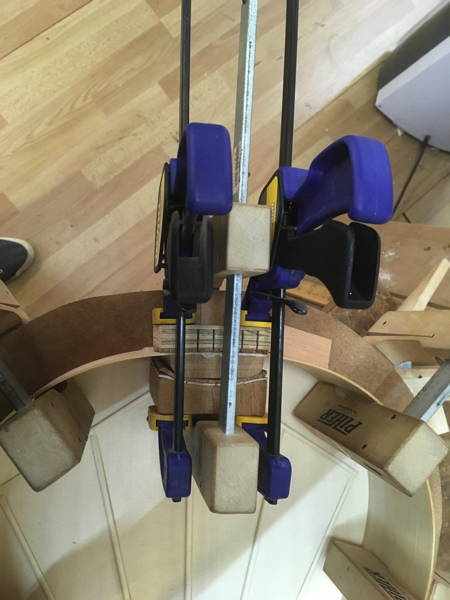
Once I'd decided upon the order, each was bent on a bending iron to establish a circle. This was very tricky given the fragility of the strip - especially the blacks!
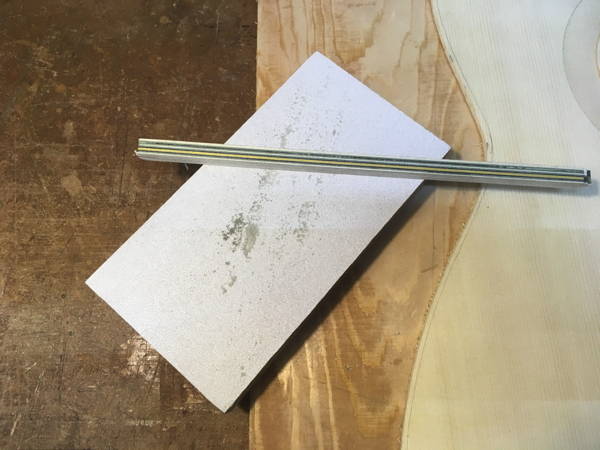
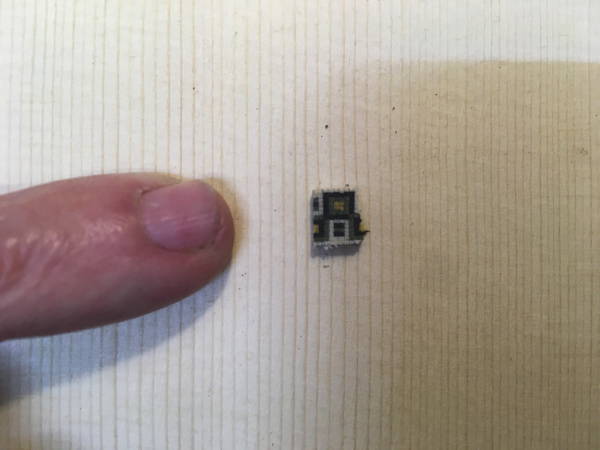
It was time to remove the mosaic block from the mould. These were then sanded lightly to remove any glue.
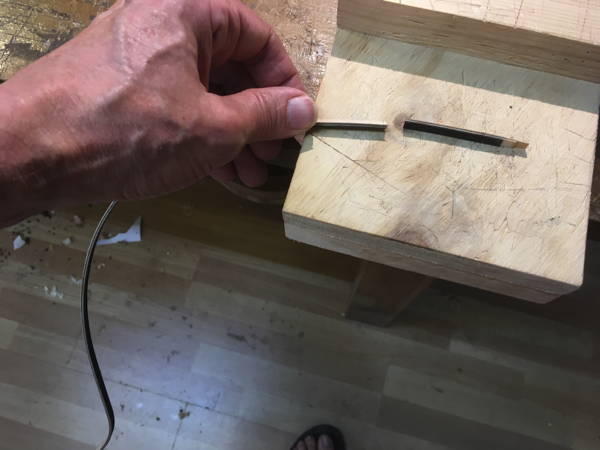
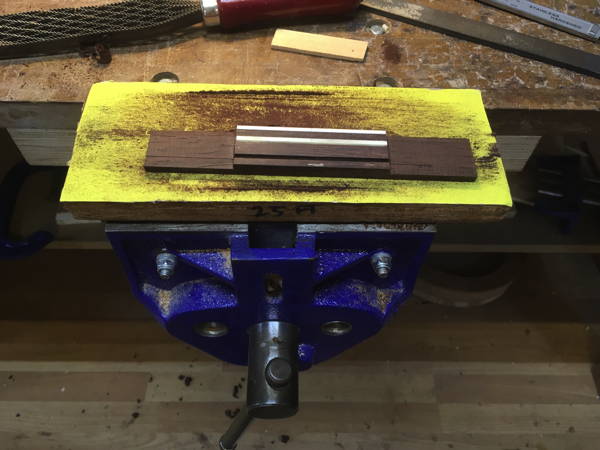
Given the curvature of the rosette, the mosaic block had to be sanded on two sides to create a wedge shape. This was achieved by using a board on which two lines are drawn. By placing the block above the top line the sanding block will be at the correct angle (half the total for two sides). The block is then lowered to the bottom line and turned over. This will ensure the planing angle is correct.
Pencil lines are drawn along the blocks. Once they are sanded away, the correct angle has been established.
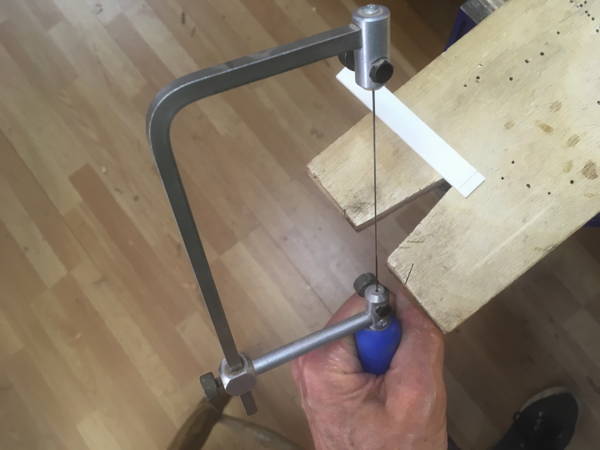
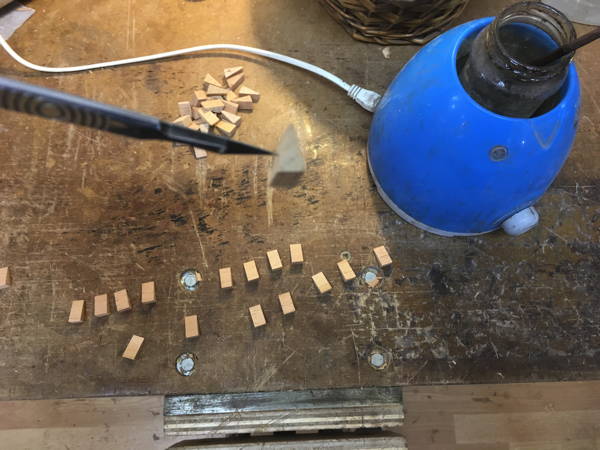
Using a special cutting jig and a Japanese saw I could then cut the mosaic blocks into the segments which would go to forming the rosette.
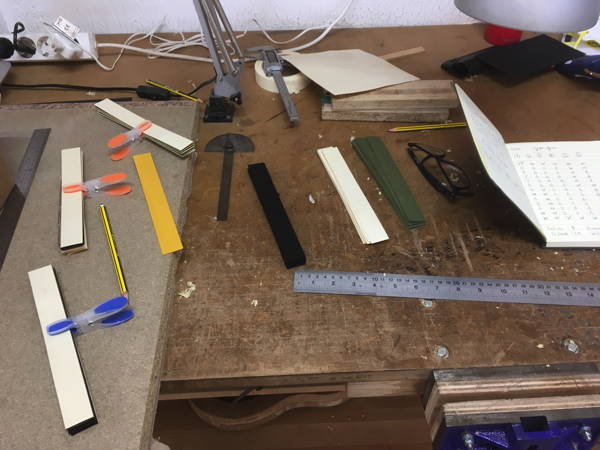
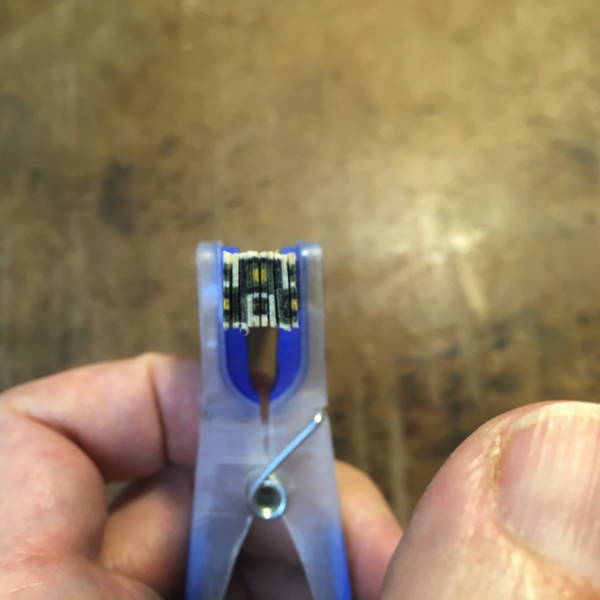
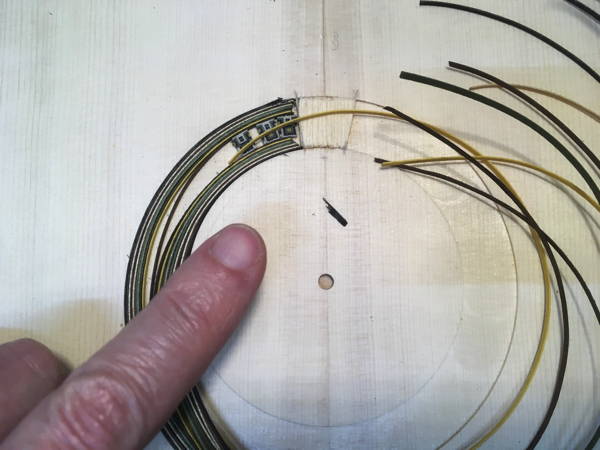
I now selected the order of the veneer strips which would form the circles either side of the mosaic pattern. I chose a variety of colours: gold, olive, mahogany, black and white, in order to compliment the mosaic design. They had to mirror each other. I clipped them together with pegs.
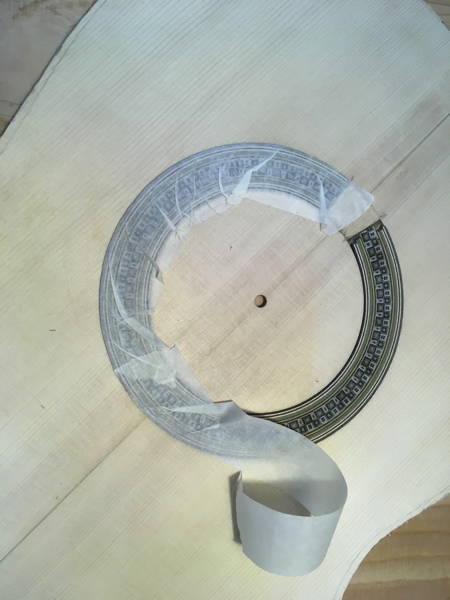
It was time to make a start on the rosette. Given my rosette was smaller than the typical larger guitars I was going to set it in place (instead of a mould). It was tricky to get started, but once the mosaic blocks wedged in the strips it became quite firm. I had to lightly sand each wedge to take off any excess material.
My main concern were the black strips as they were extremely fragile and could easily snap.
So I had started the rosette, but week one had finished. I decided I would come in on Saturday and complete it.
I arrived at the workshop at around 10am.
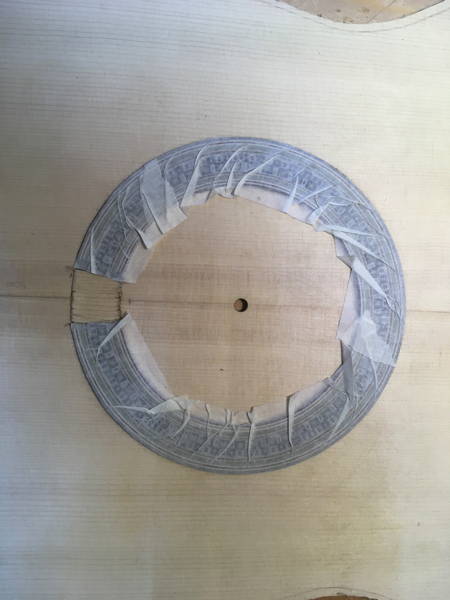
I continued forming the rosette. Clipping the ends of the strips was the trickiest part - without disturbing and bending them. I was still wary of the fragile black strips. I also had to cut some extra mosaic pieces.
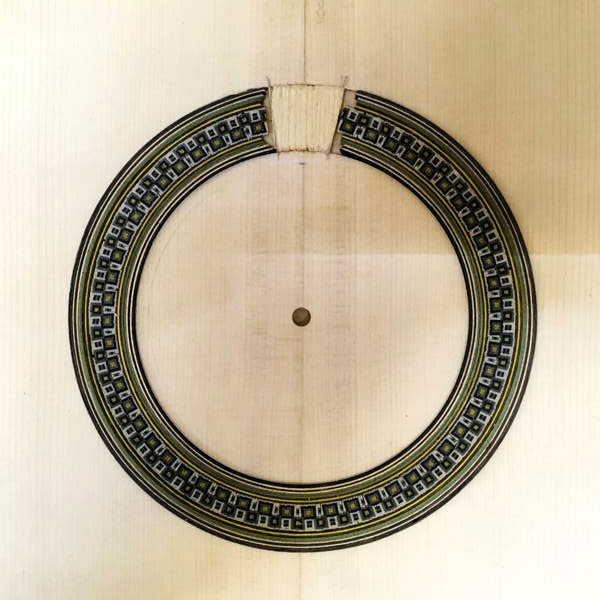
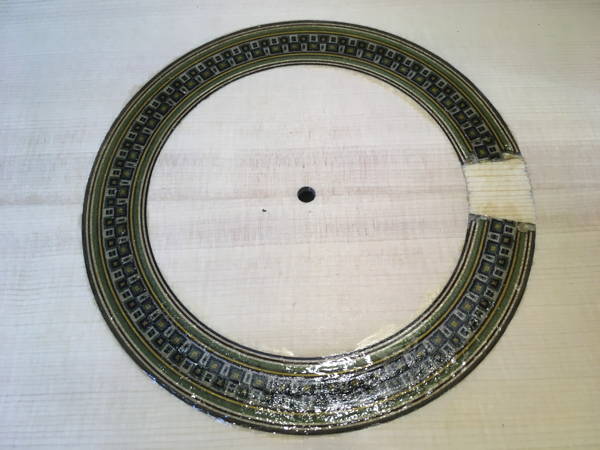
I then discovered the pieces fitted in a particular way to form the pattern correctly. It was a fiddly job but very satisfying but I was delighted with the finished design.
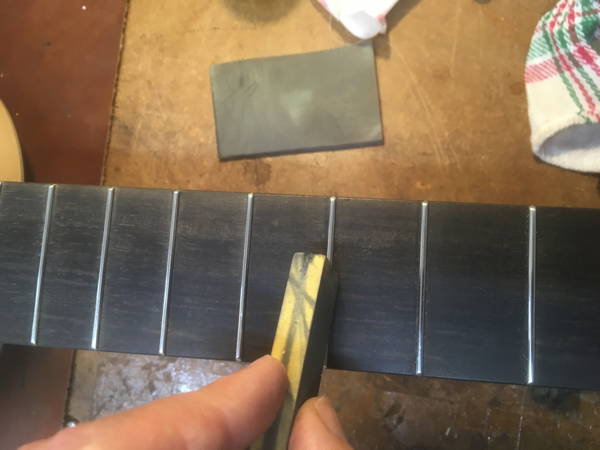
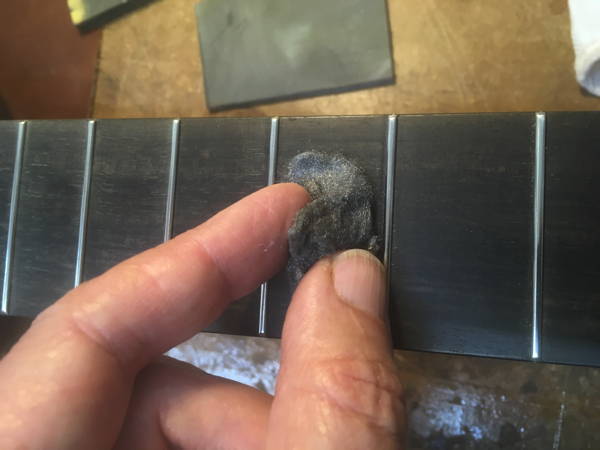
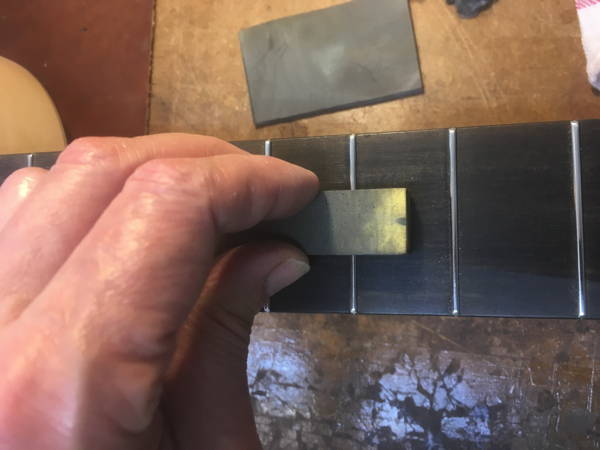
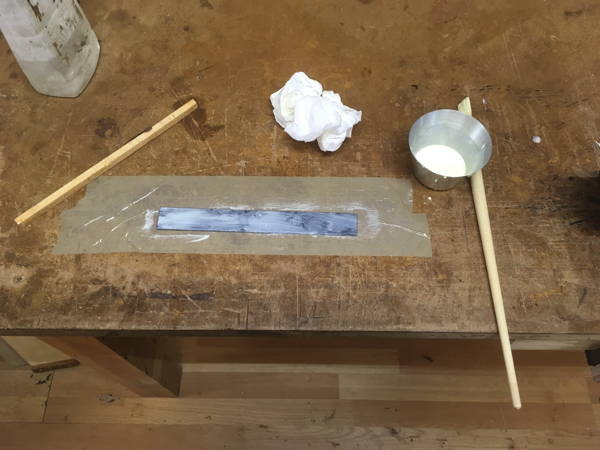
First it is necessary to level the rosette with a sandpaper block and brush off the dust.
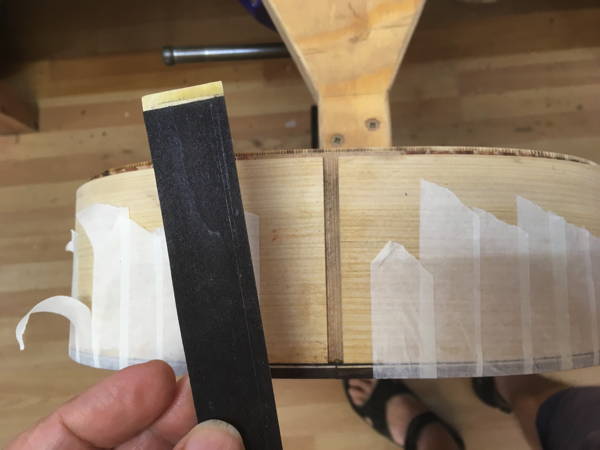
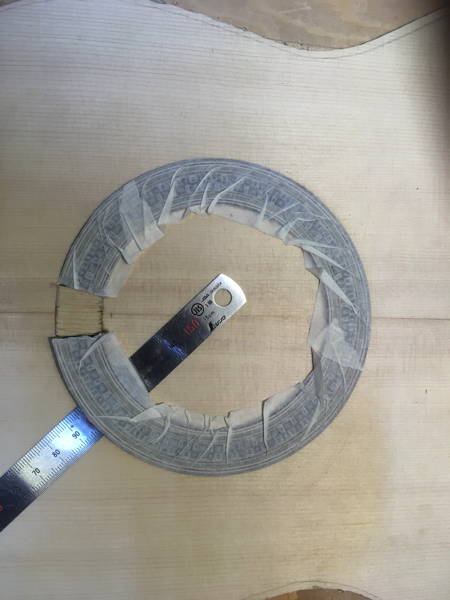
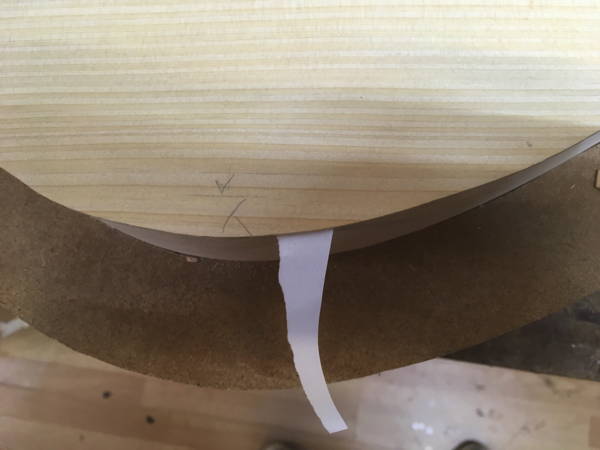
Masking tape is then attached to the outmost edge and pressed down firmly - working around the rosette.
The rosette can then be lifted carefully by sliding a ruler underneath.
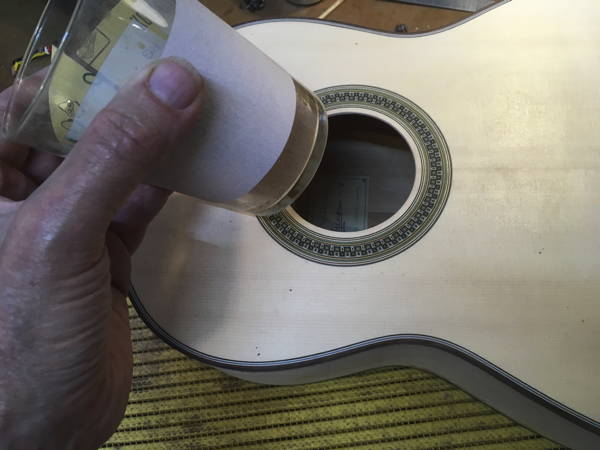
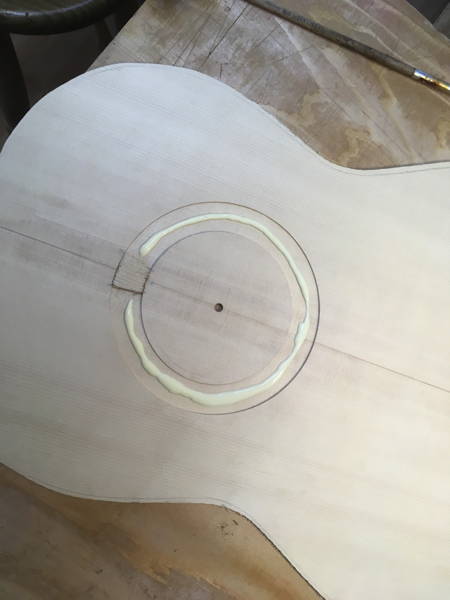
Glue is then spread in the rosette channel and the rosette is carefully eased into place.
Because of the dampness of the glue beneath, some hot glue is applied to the top to compensate.
The rosette is then covered with non stick paper and the soundboard / rosette is clamped between to piece of wood
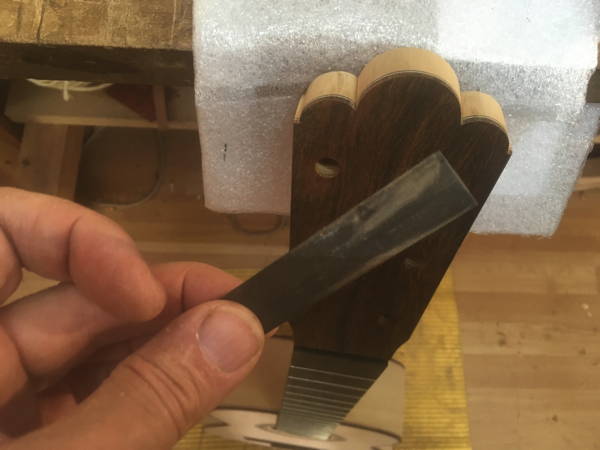
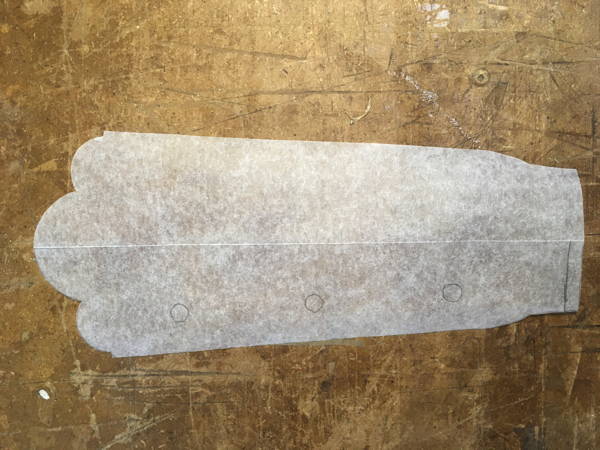
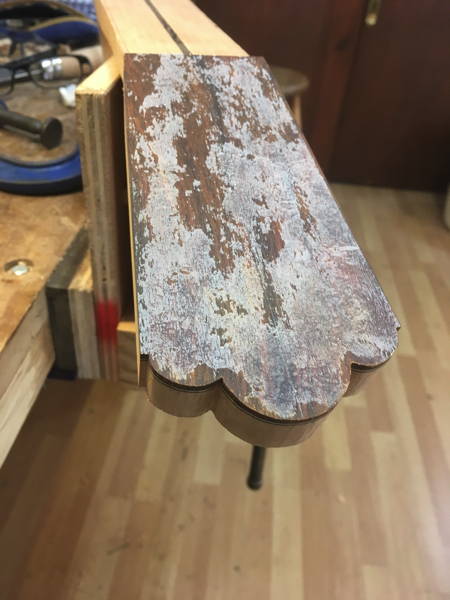
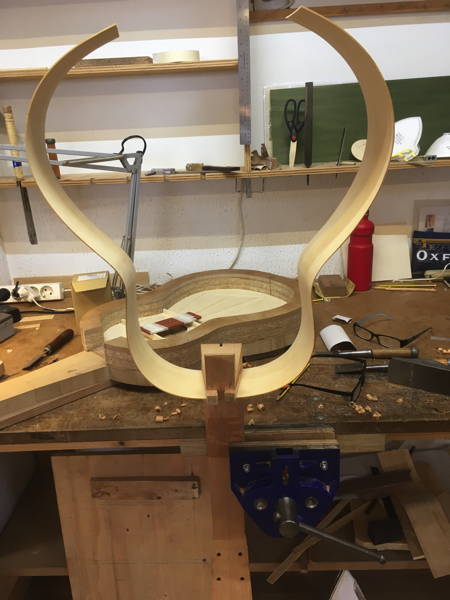
I have decided to give my guitar a Torres style head design as an homage to the great guitar maker. His is a distinctive head design comprising three arches - the centre one being larger than the outer two.
I folded a piece of tracing paper in half placed it on the centre line of the drawing of the Torres head I was going to incorporate. I then traced around one side, folded it back in half and cut out the two halves.
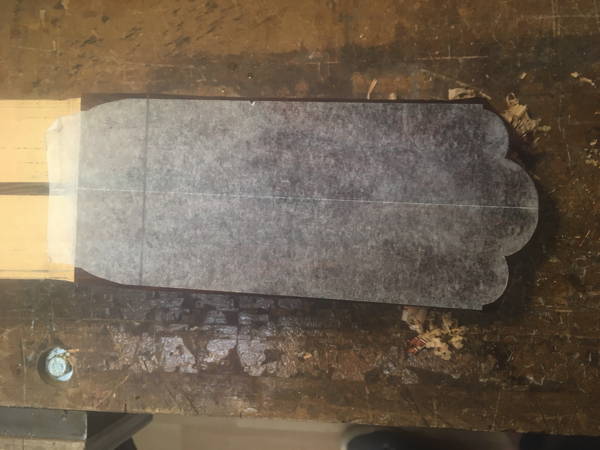
The tracing is now glued with a tackly glue on to the head.
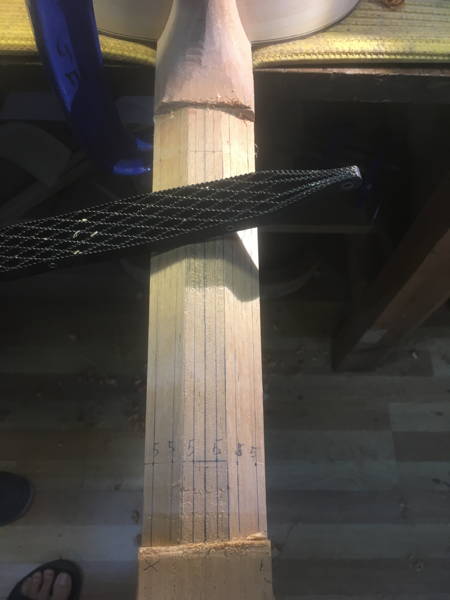
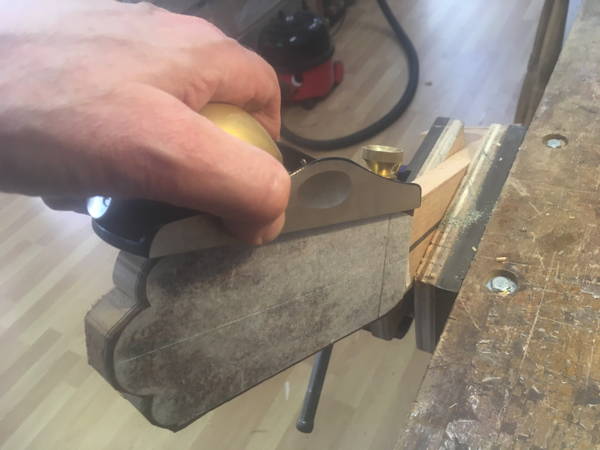
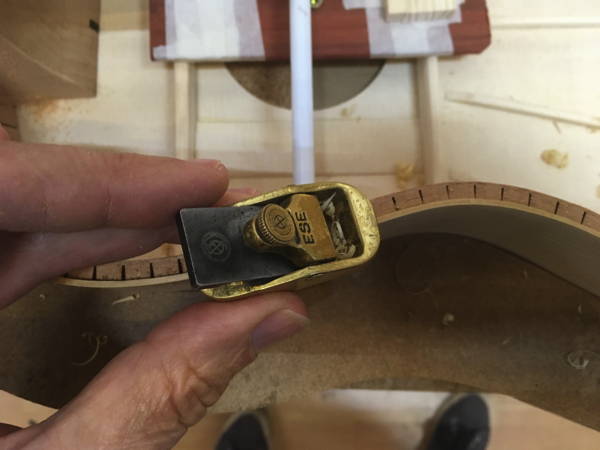
The head can now be planed, sanded and filed to the traced outline.
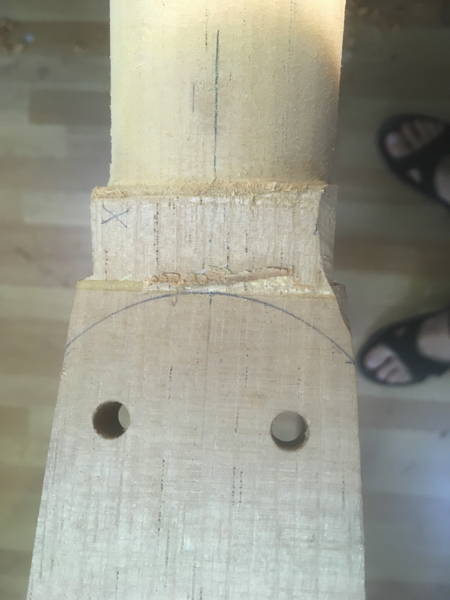
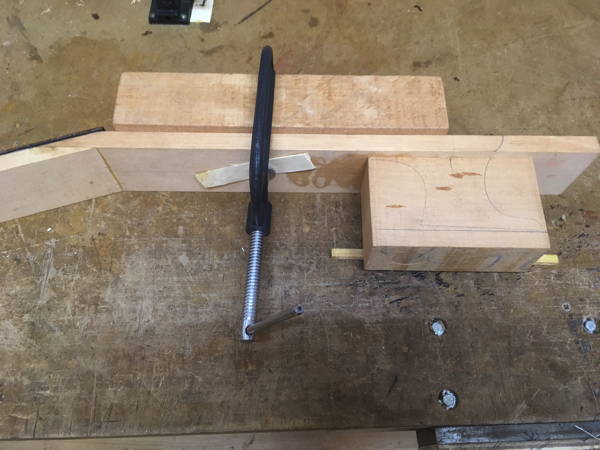
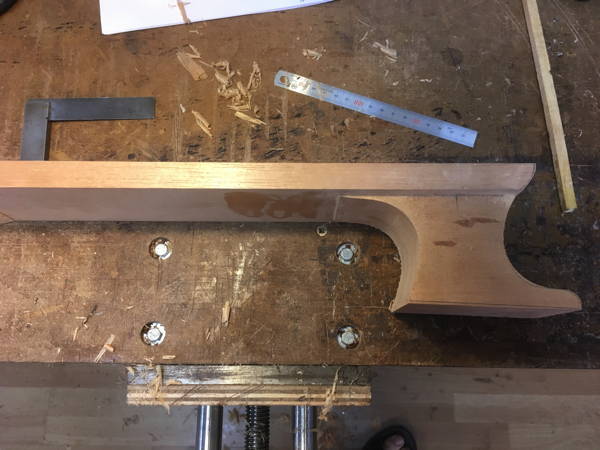
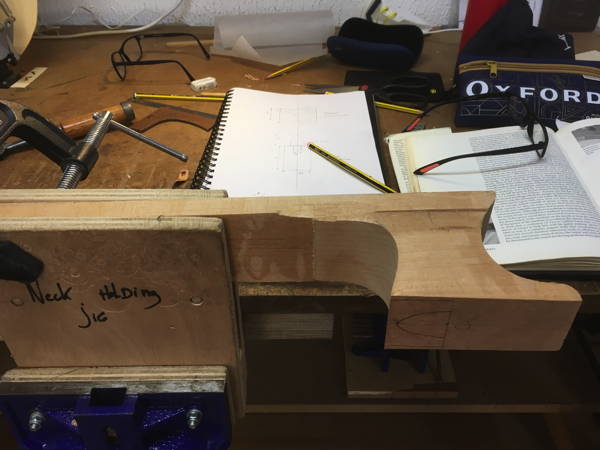
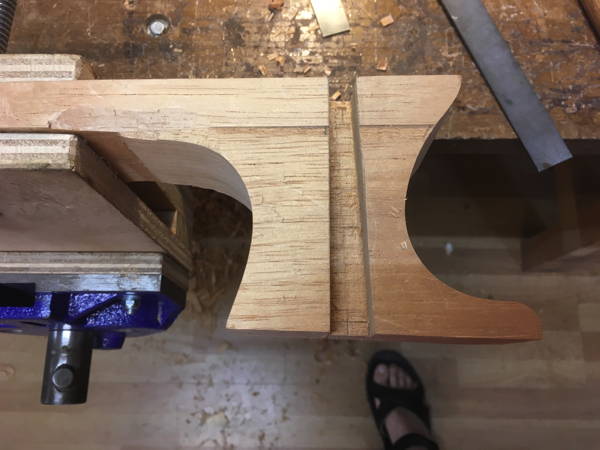
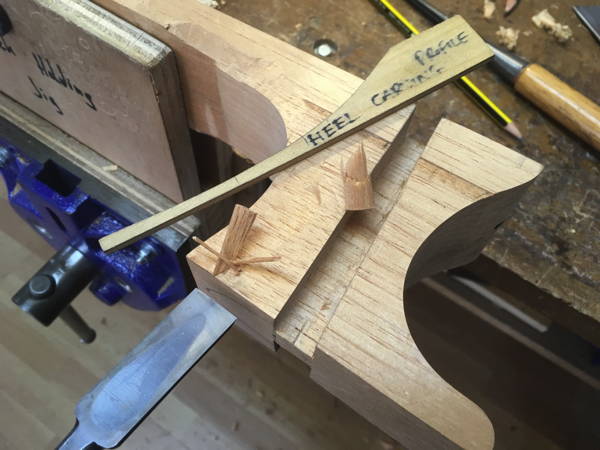
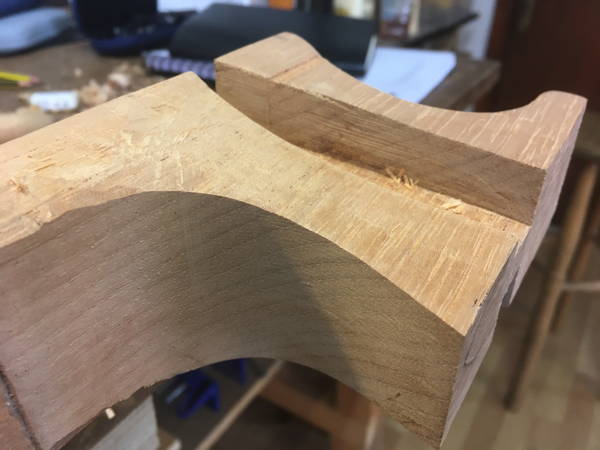
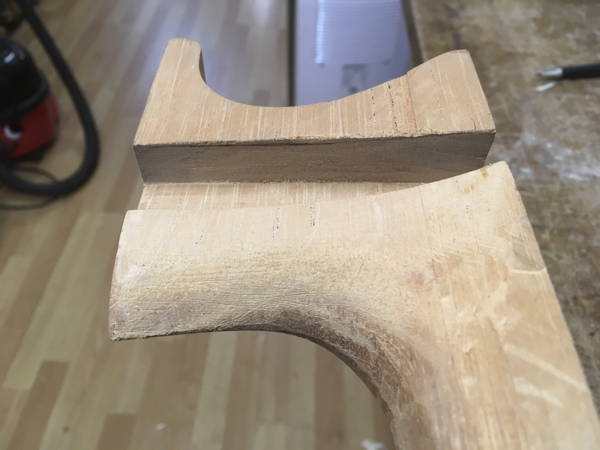
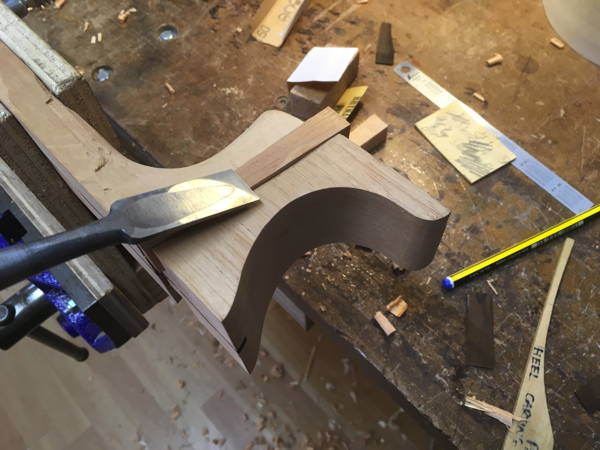
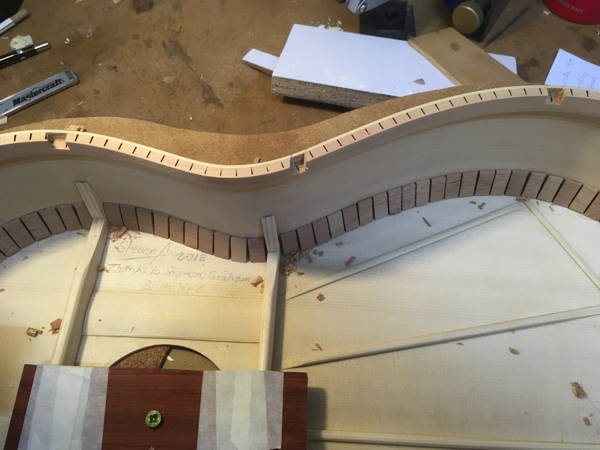
First I had to mark out two lines with a template. This would act as a guide to provide the curve of the heel block.
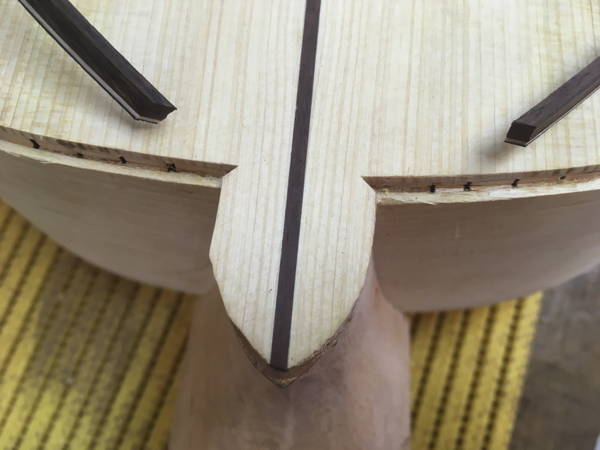
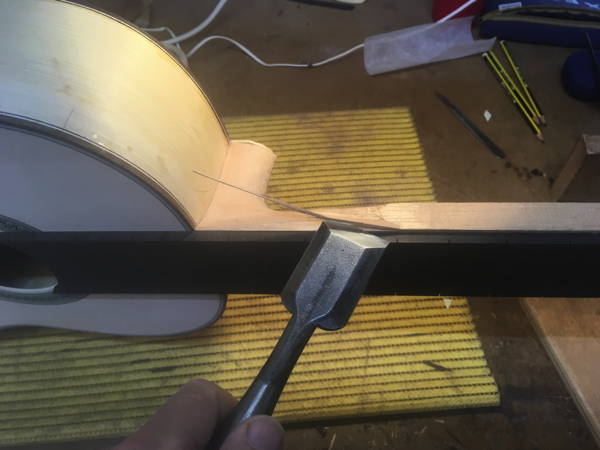
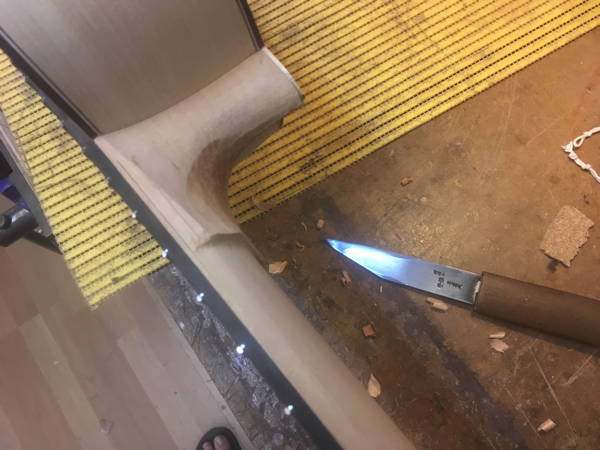
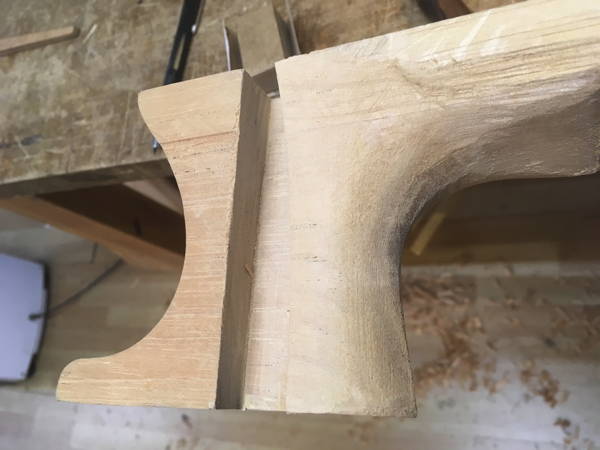
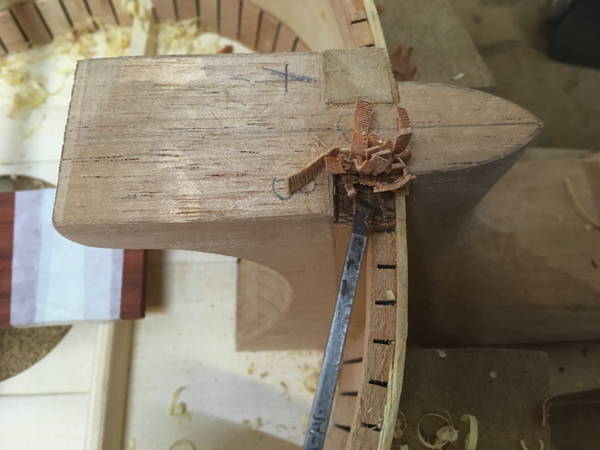
The heel block is carved beginning with a chisel.
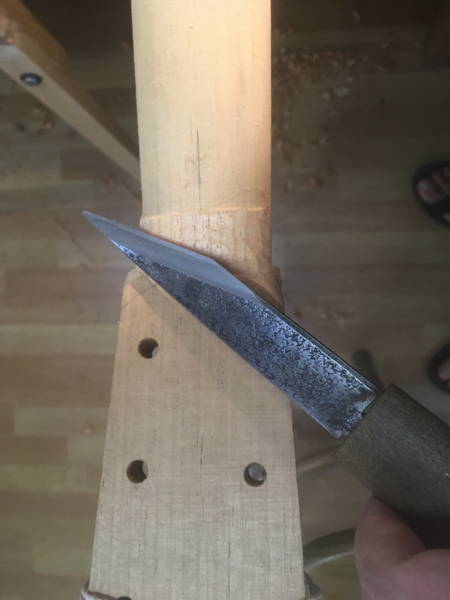
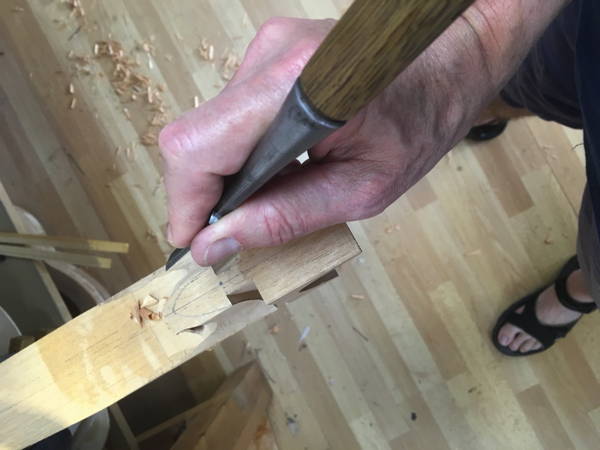
The point is carved with a Japanese knife.
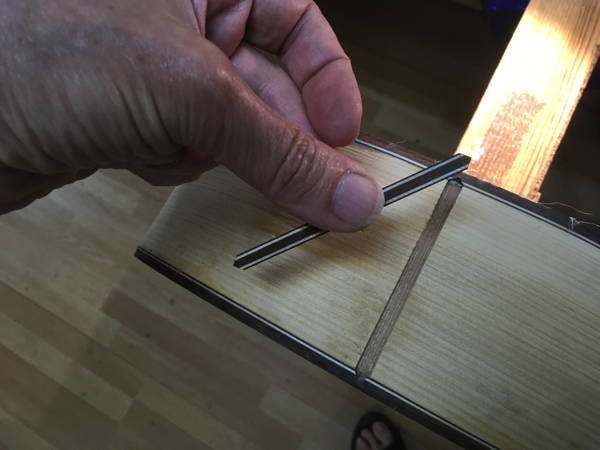
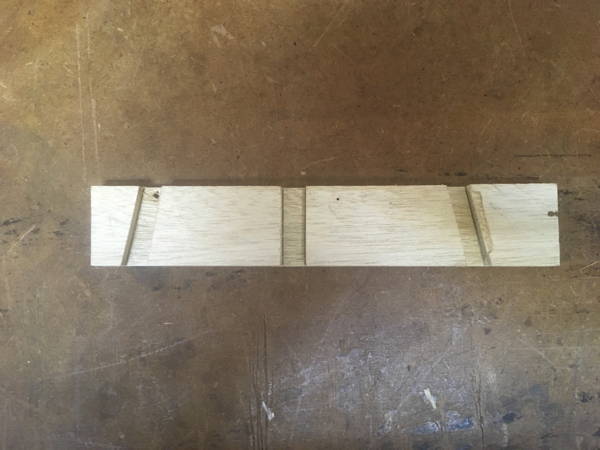
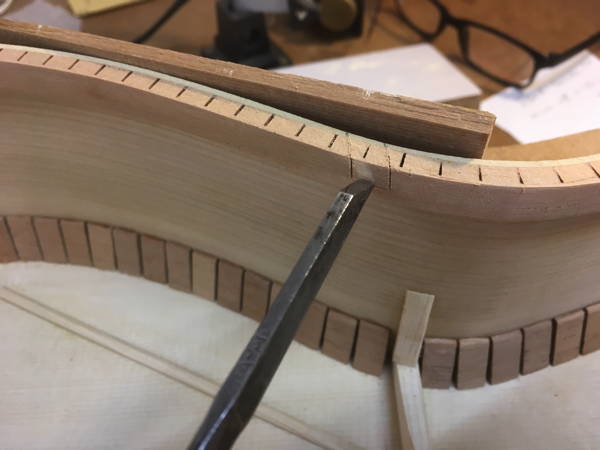
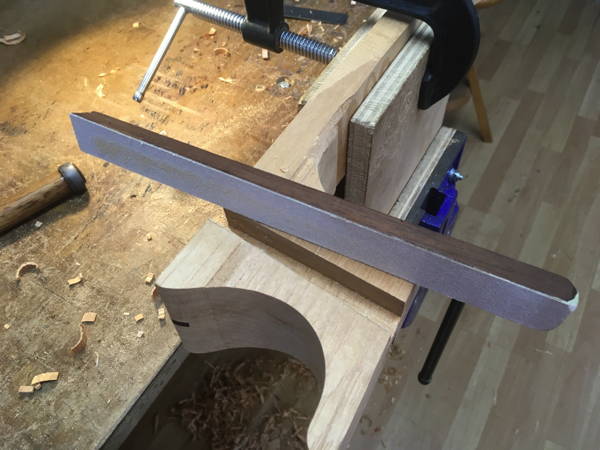
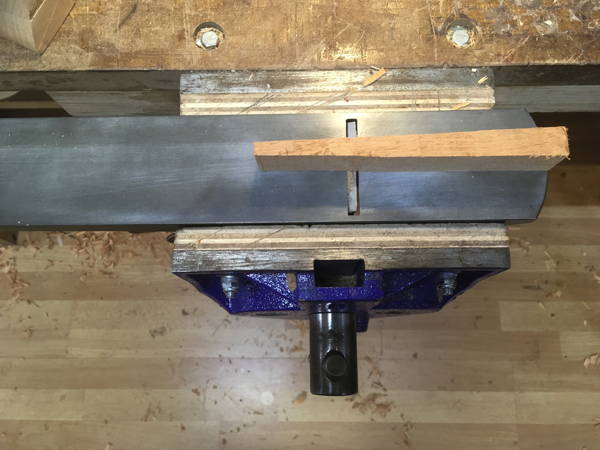
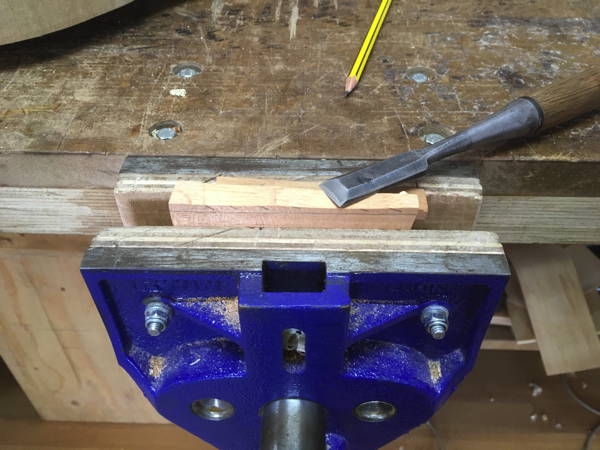
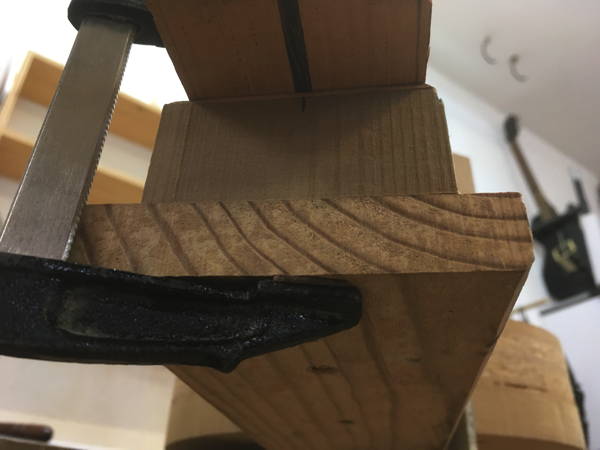
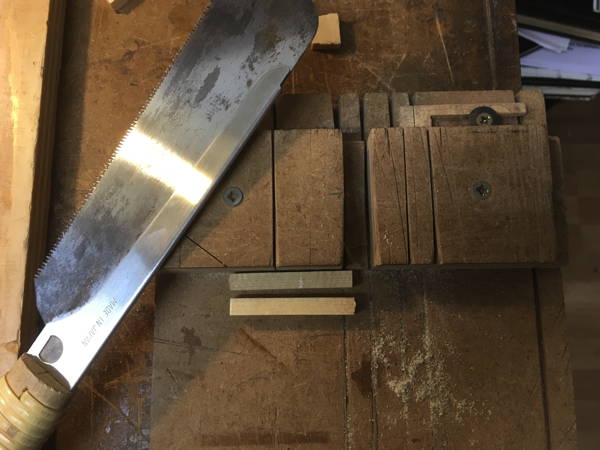
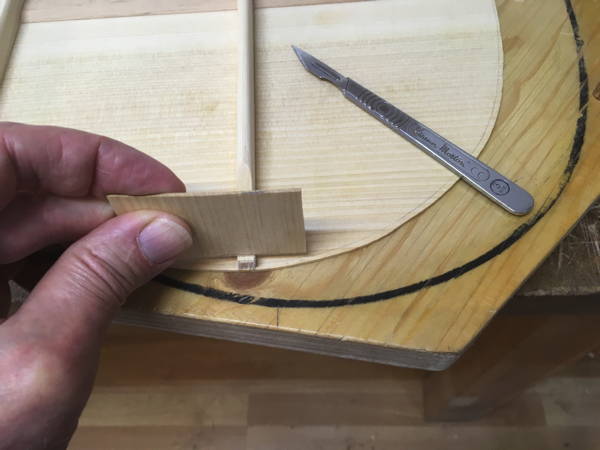
The ribs of the guitar will be held in place by the use of wedges. The alternative is to fix them into cut groves. I cut out two wedges on the band saw.
These are then planed and sanded to create a tight fit with the inserted side.
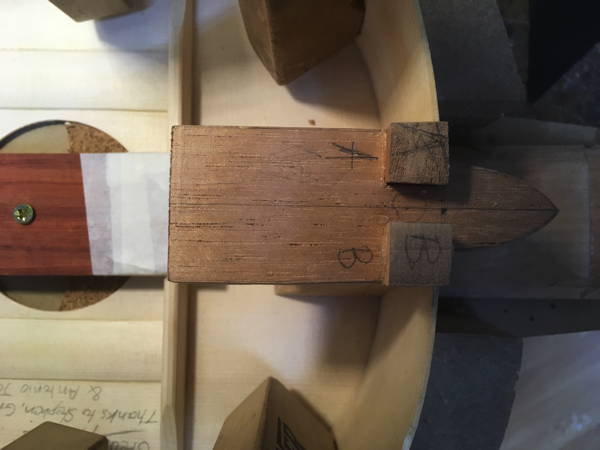
In order to remember which way the wedge is inserted - the letters A and B are marked on the wedges and the heel respectively. A for one side, B for the other.
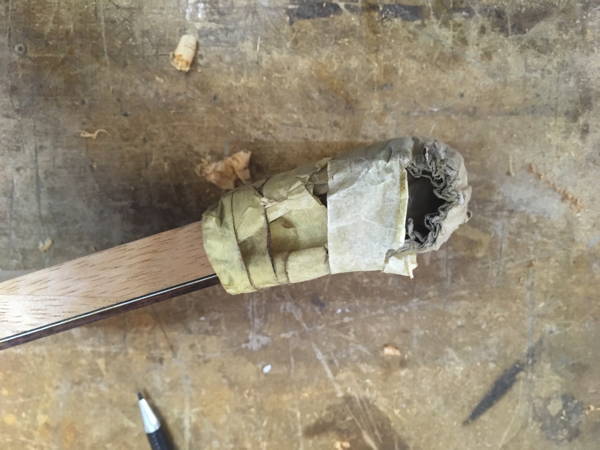
It is a a wise idea to protect the head with a padded sheath.
This brought Day 6 to a close.
Sanding the rosette and then applying hot glue.
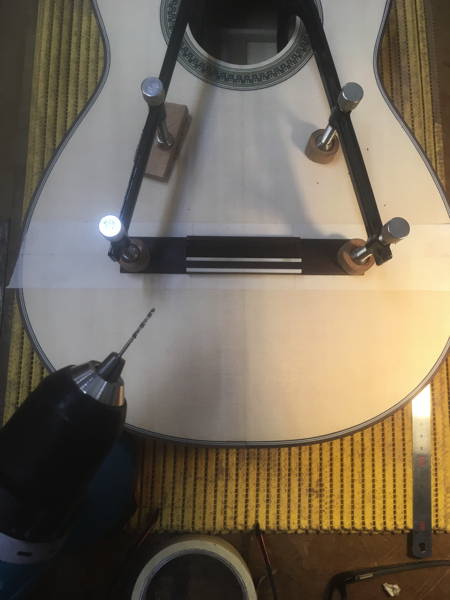
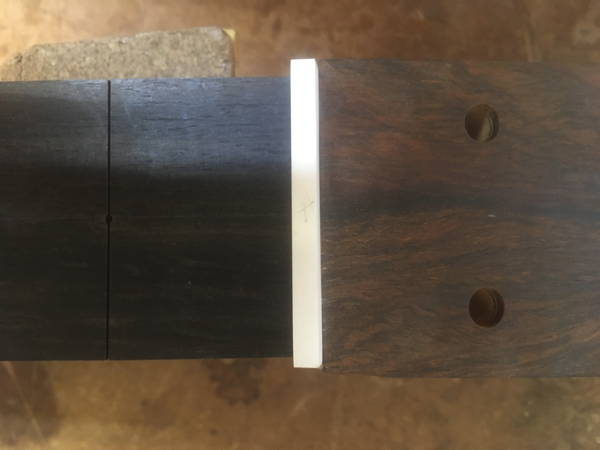
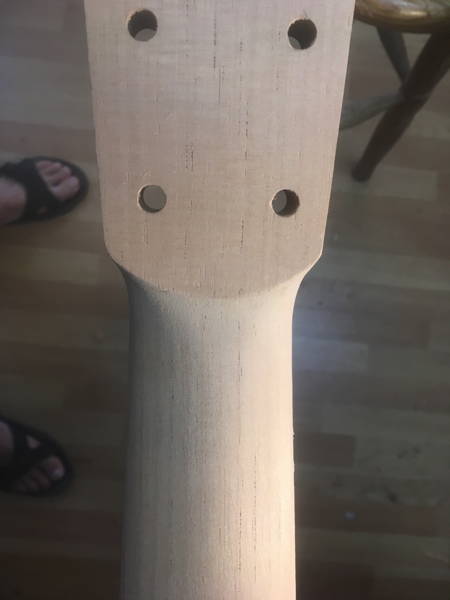
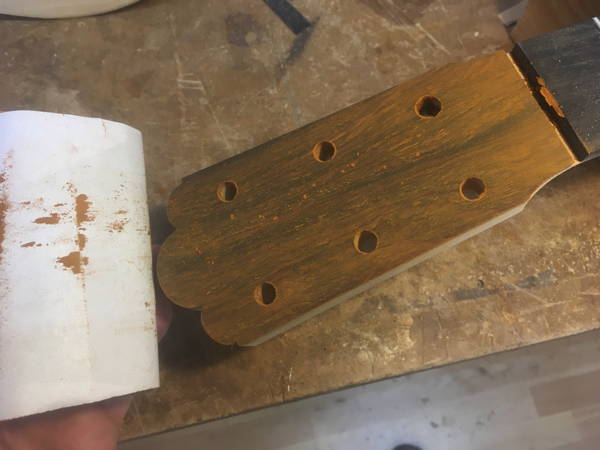
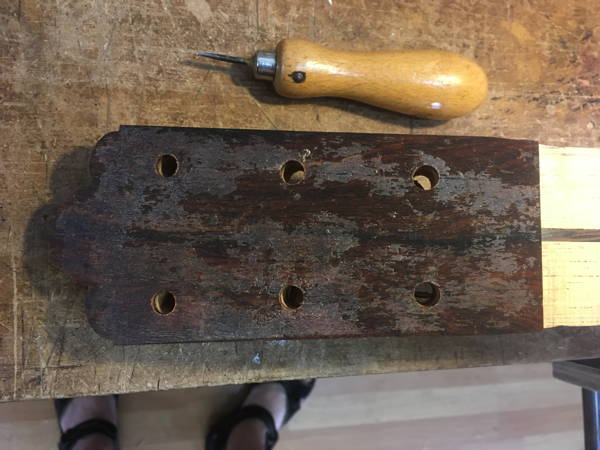
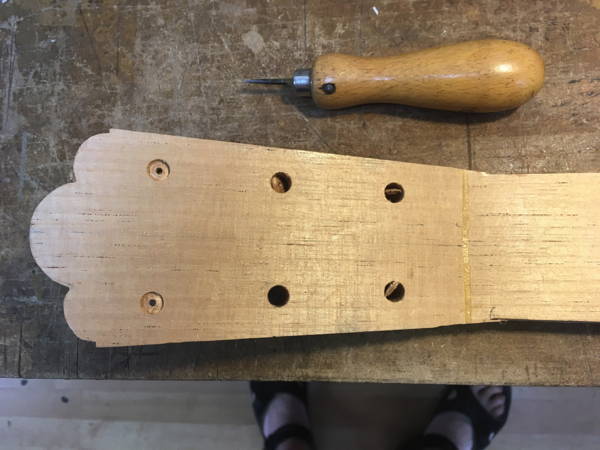
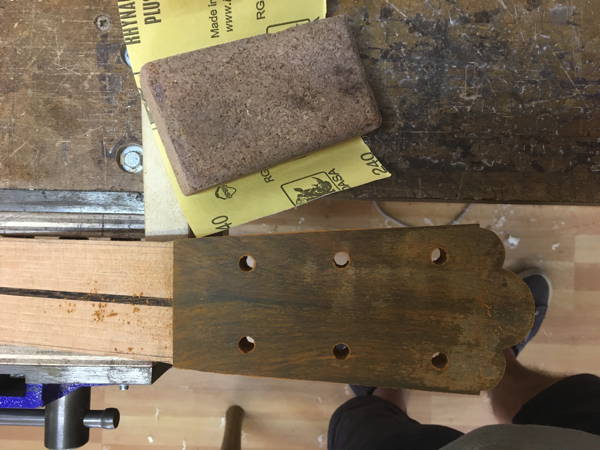
The guitar will have geared pegs so the six holes need to be marked out on the head. The holes are marked at 14mm from edge; 35mm from nut for high and low E string holes; Then 44mm for A and B string holes; plus 44mm for D and G string holes.
The six holes are drilled out with an 8mm bit.
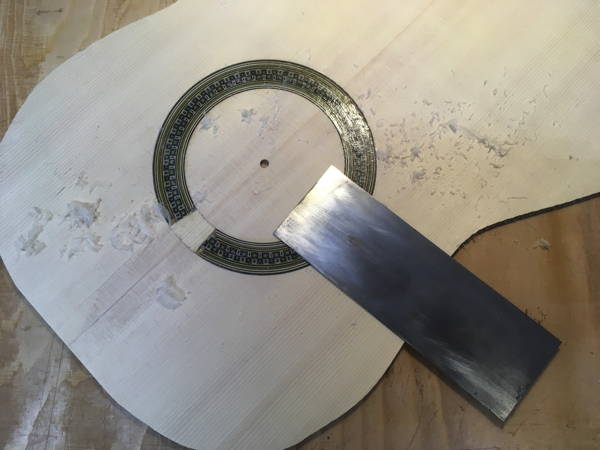
The glue on the rosette is now scraped off with a scraper being careful not to scrape any of the spruce top.
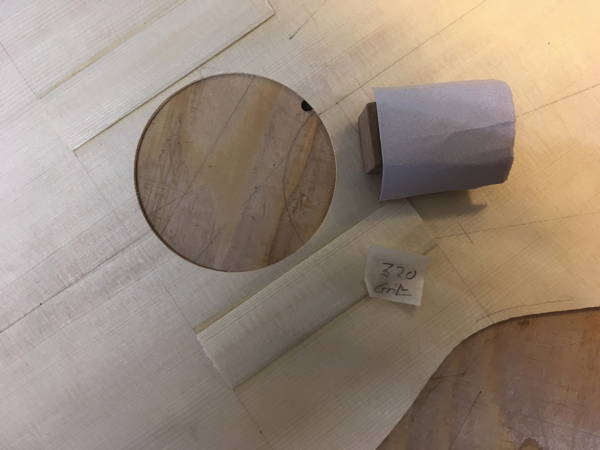
The rosette is then sanded with 160 grit and and then 240 grit sandpapers which produces a smooth finish. Pencil marks are drawn on the top to indicate how much to sand i.e. when they disappear it is sufficient.
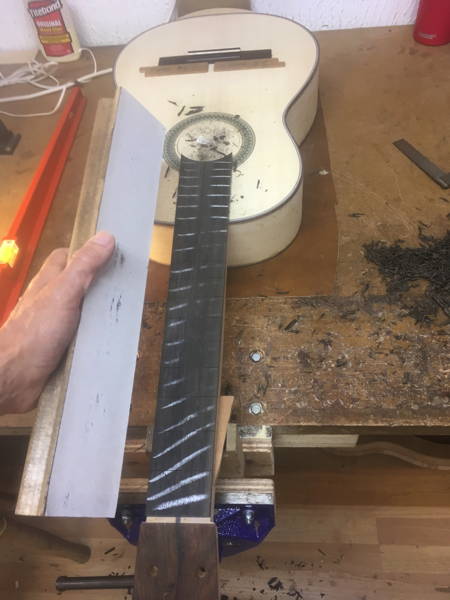
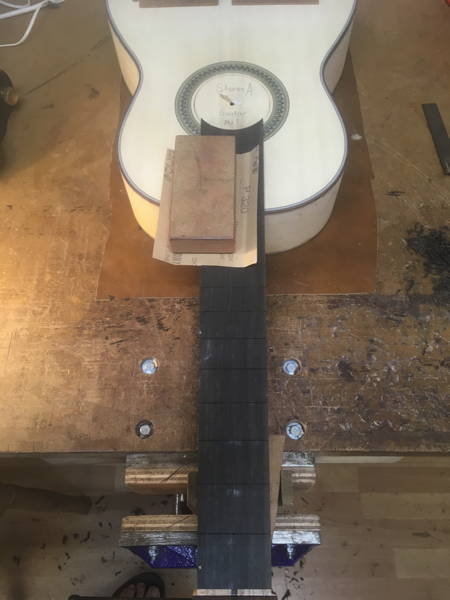
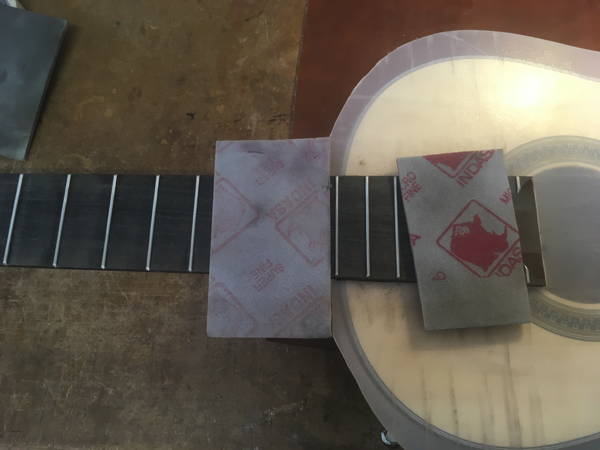
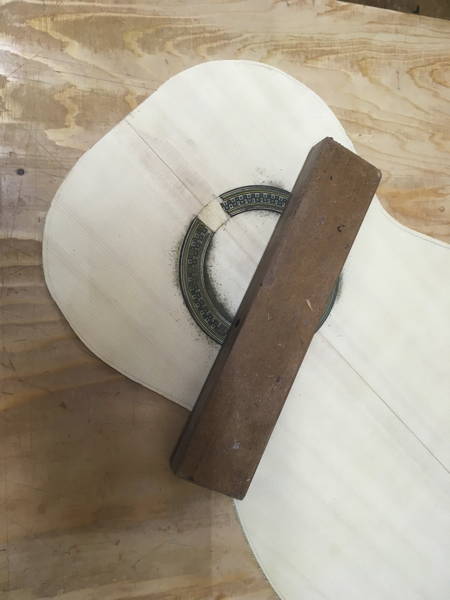
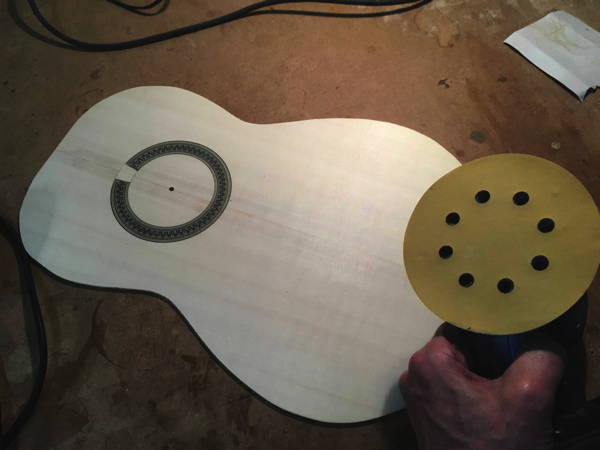
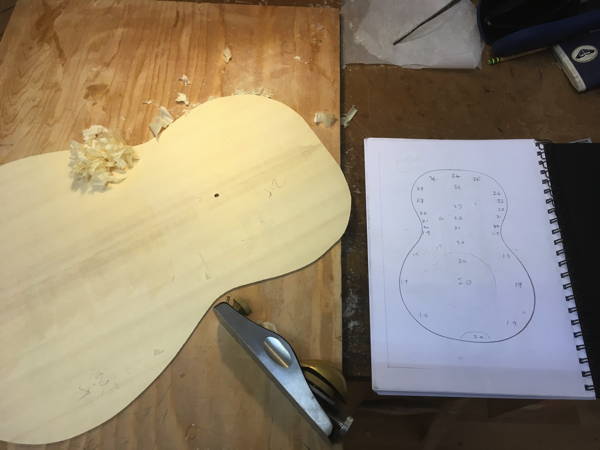
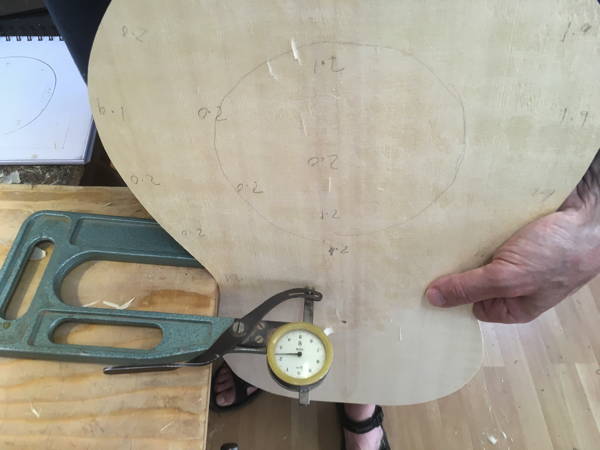
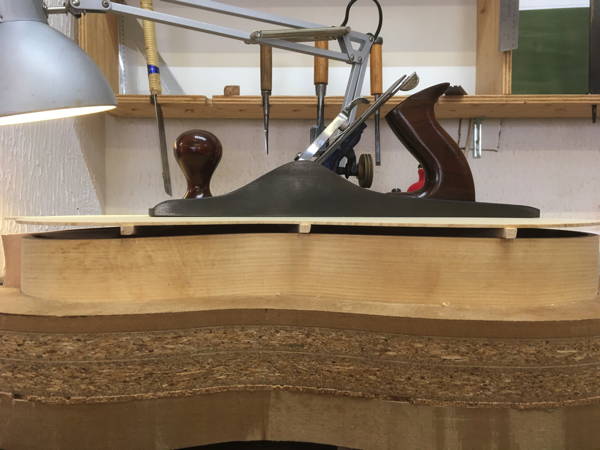
The soundboard is reduced to an overall thickness of 2.5mm using the large planer. A diagram of the soundboard is then marked with the various thicknesses as they will vary over the whole area. The middle will be about 2.0mm while the edges will be about 1.8mm. It will gain in thickness toward the fingerboard to about 2.4mm
A block plane is used to establish the various areas of thickness. It is very important to plane across the grain of the wood.
Measurements are taken at regular intervals with a depth guage and the various thickness can be marked on the top to indicate where areas need attention.
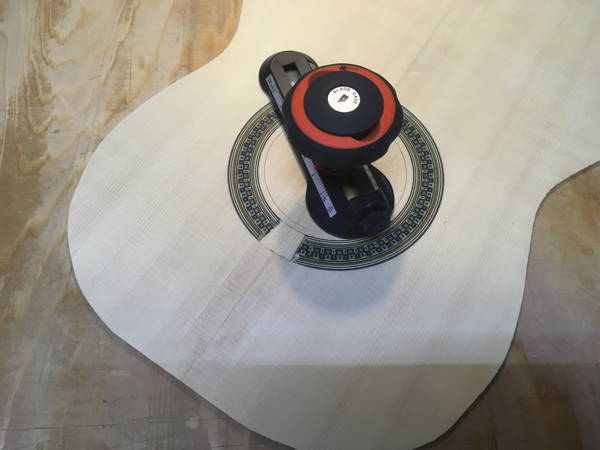
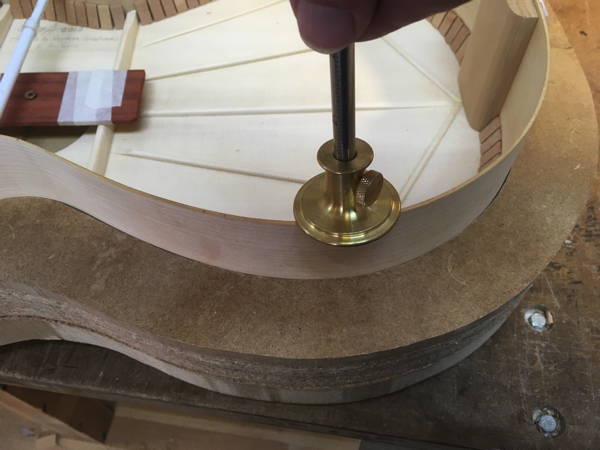
A special rotary cutter with a sharp blade is used to cut out the hole. The cutter is place through the hole in the centre and into a hole in the board beneath. When half the wood is cut, the soundboard is turned over and the hole is cut from the reverse until the centre piece pops out.
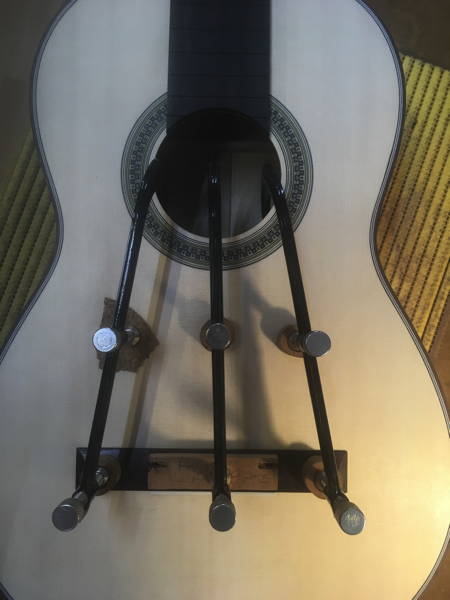
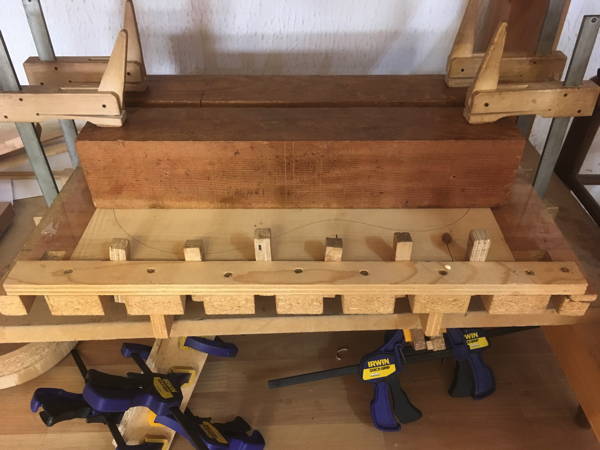
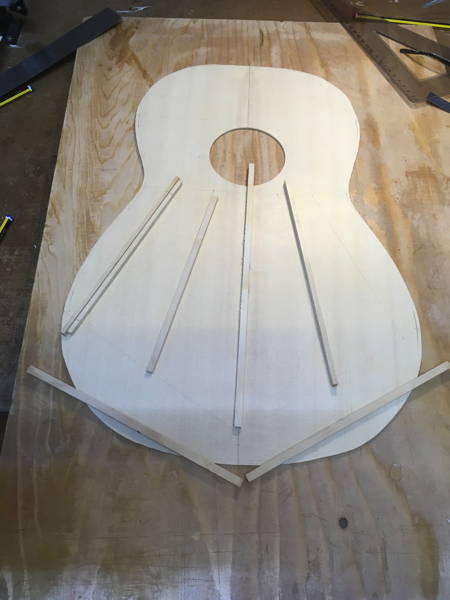
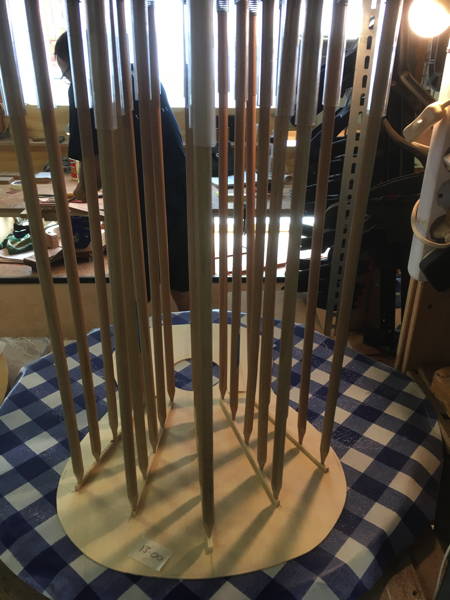
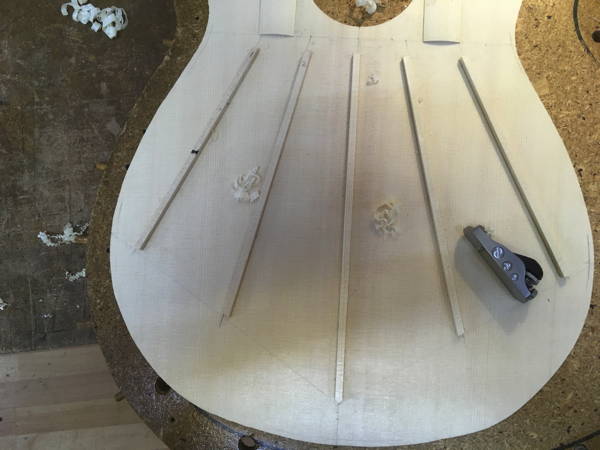
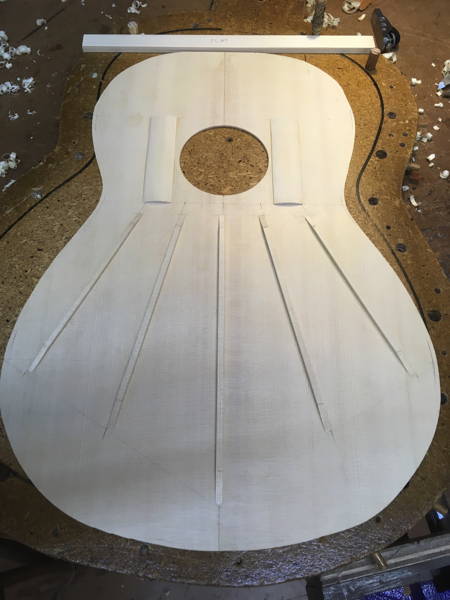
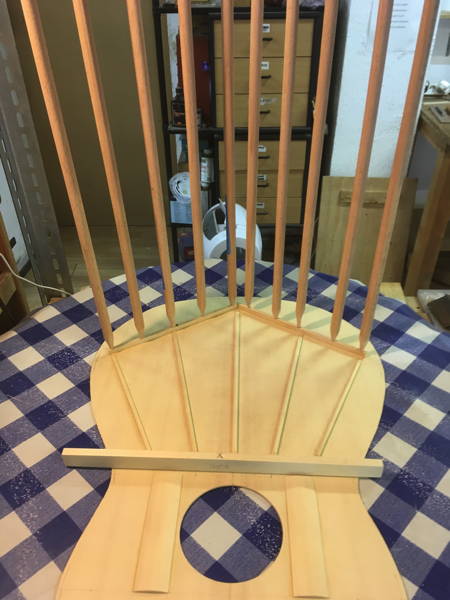
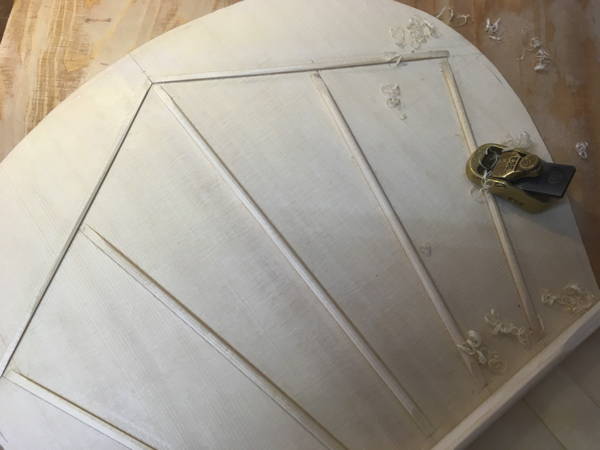
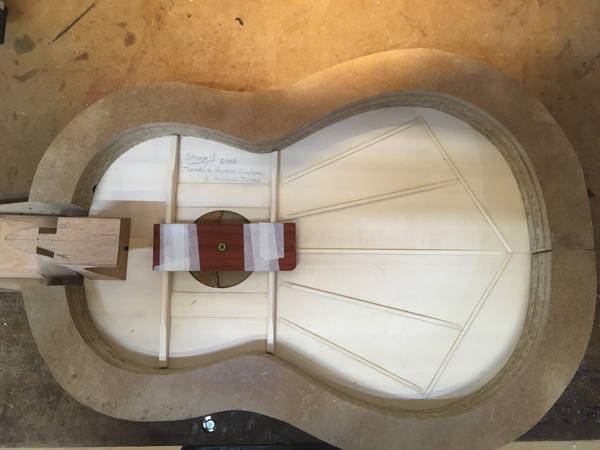
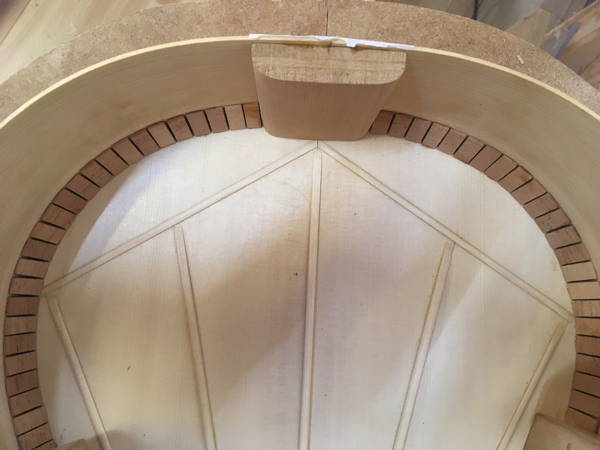
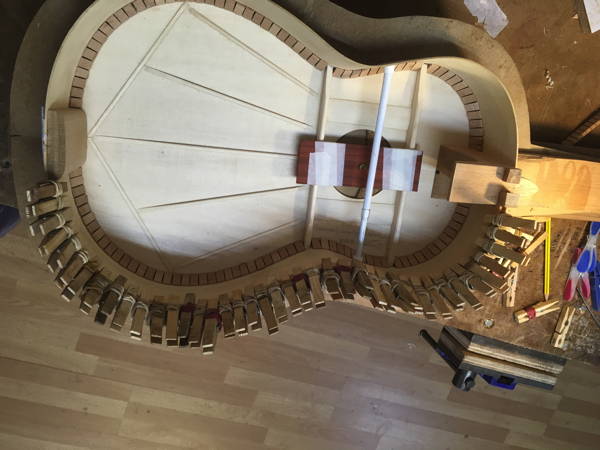
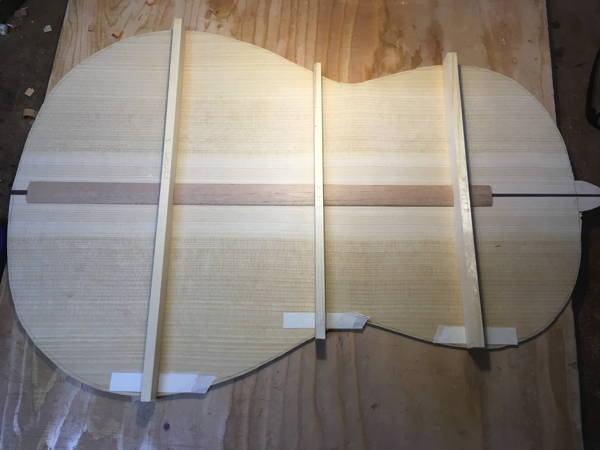
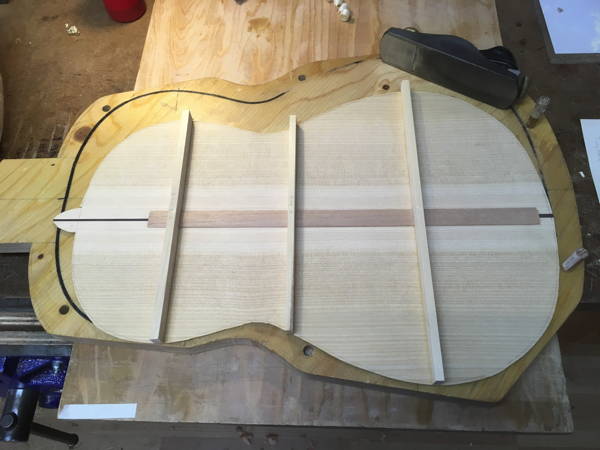
I am going to use a Torres kite system with five fan braces. The point of convergence is equidistant between the top of the soundhole and the where the top meets the fret board. The five struts then spread out equally across the top. Careful measurements had to be made using the template and the centreline as a guide and the position of the struts drawn on to the underside of the soundboard.
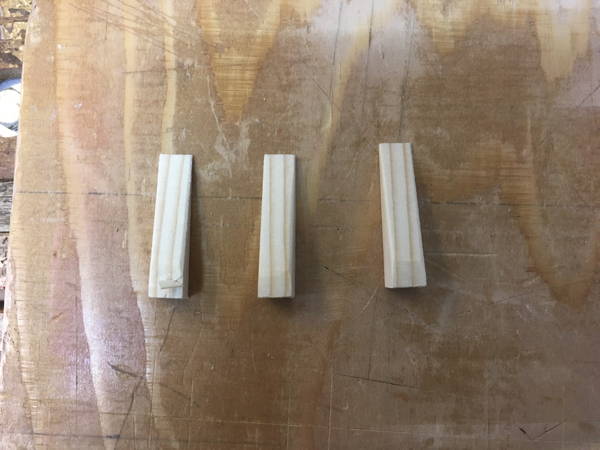
CUTTING THE STRUTS
Pine struts are then cut to the sit on the lines which have been measured out.
End of day seven.
Top of Page
Wednesday 16th May - Day 8
CONTINUING WITH THE STRUTS
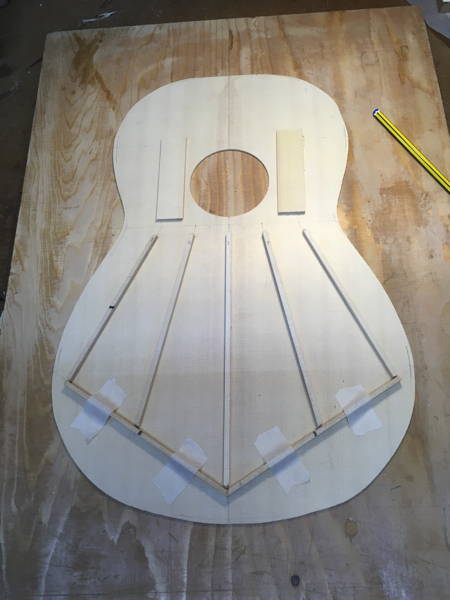
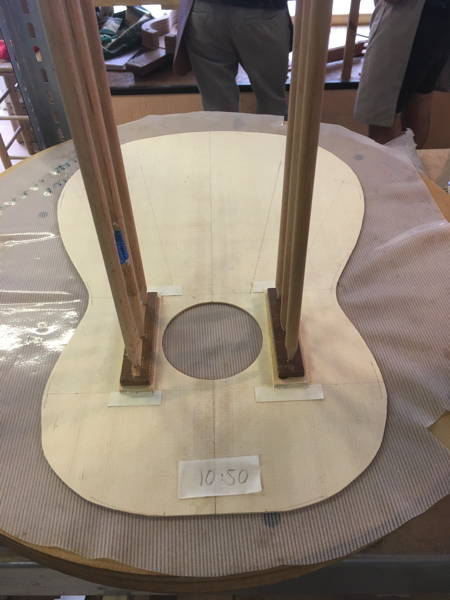
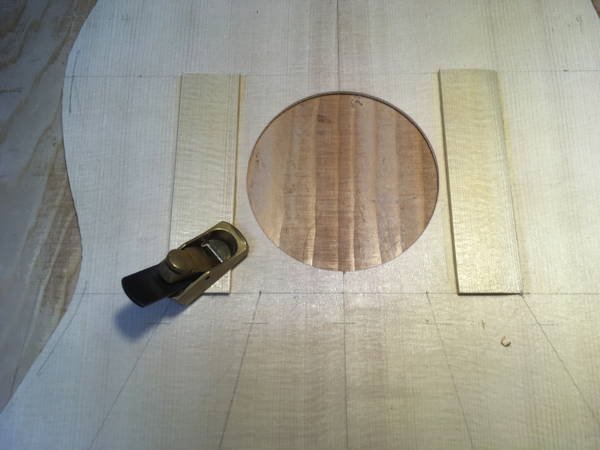
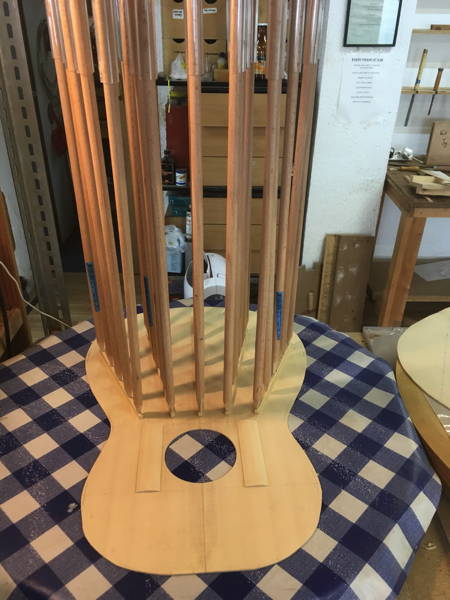
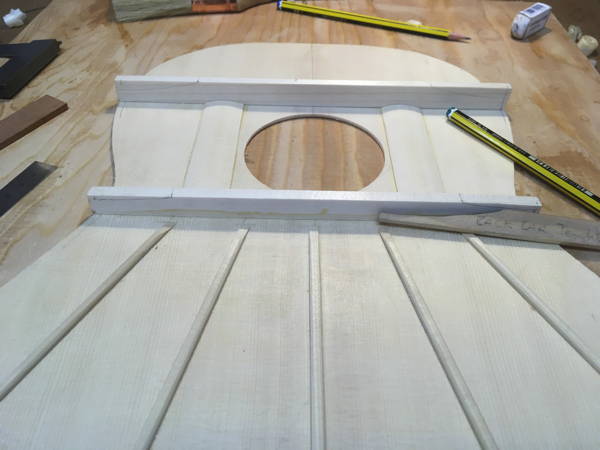
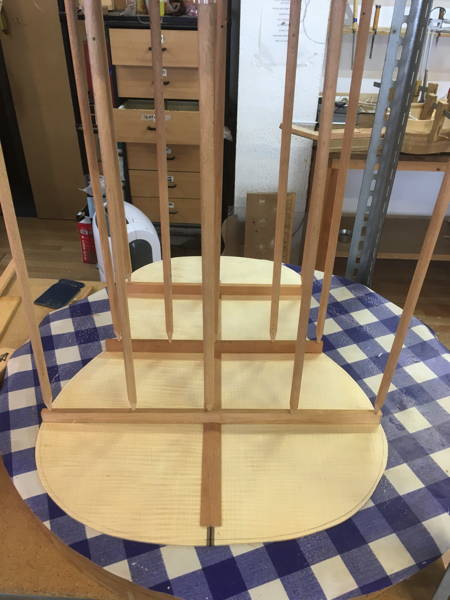
The struts are placed in position and cut. Two soundhole reinforcing bars of 25mm width are placed each side of the soundhole. These are then glued on using the the solera - a slightly concave form to give the top a sligthly domed shape - mostly for strength. Spring loaded sticks are used to provide a firm pressure. Three layers of masking take are used to stop the bars from moving.
Once dry - about an hour - the reinforcing bars are shaped with a mini plane into two speed bump shapes. Then finished with sandpaper - 240 and 320 grit respectively.
It was now time to glue on the struts. Once again the pressure sticks were used to press the struts into the solera. All excess glue is wiped off. Note: Stephen thought the fan was a tad wide, so I made it narrower by glueing the struts inside the lines instead of directly on them.
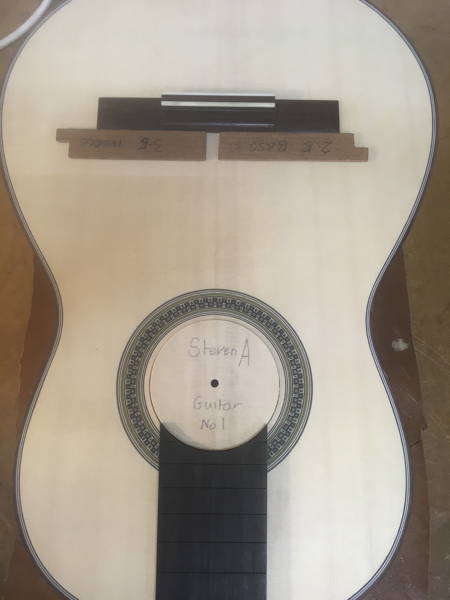
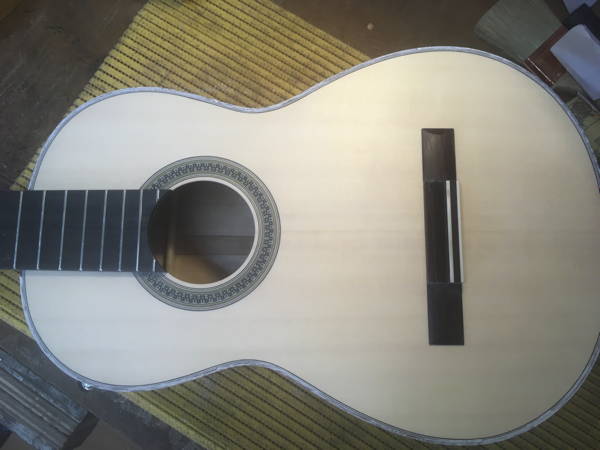
THE BRIDGE
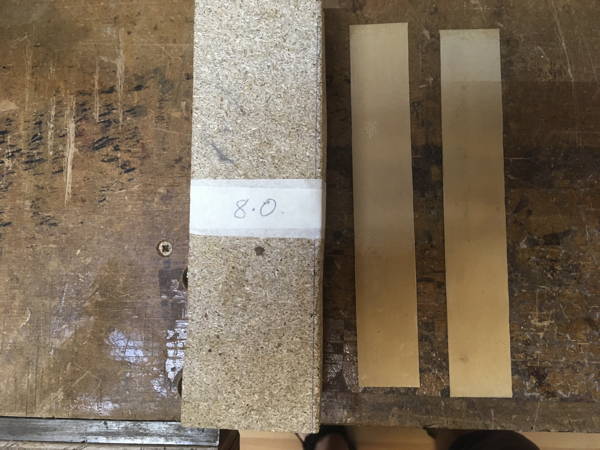
I'm am going to go for a bridge design with two strips of bone below the saddle. It is a traditional design, though probably not as popular as a single flat piece of bone, but I think it will suit the guitar. Currently it will be 170mm wide, but it may be slightly narrower as the guitar is on the smaller side. The wood is a beautiful piece of Madagascan Rosewood.
The bone is placed in the specially cut grooves and small wedged are made to wedge the bone on place when it is glued. The saddle will be 80mm in width.
SHAPING THE STRUTS
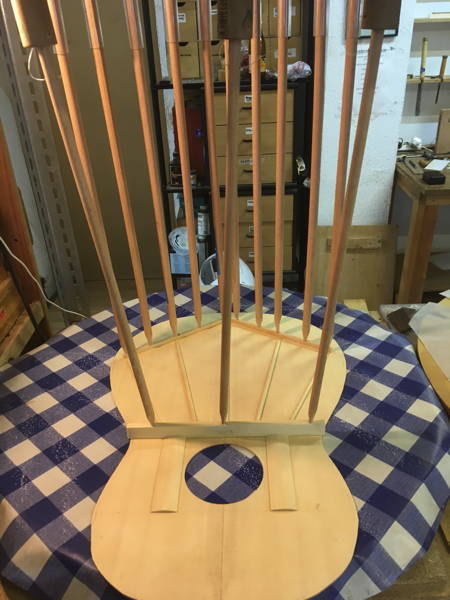
The mini plane is then used to bring down the height of the struts. From the middle which is 4.0mm, it goes to 3.5mm and then 3.0mm
The ends of each strut are then worked with a chisel to create a slight curve to the sound board
Then with the mini plane each strut is rounded using a pattern of strokes. 1 pass along the side to remove any glue; 7 passess at a 45 degrees diagonal; 2 passes to smooth of the top edge of the diagonal: 3 passes at about 30 degrees to smooth the bottom edge.
Once completed, the closing bars (struts near the end block) of the kite shape can be glued in position
Two harmonic bars are going above and below the sound hole.
First they have to be cut to the edge of the soundboard and then glued so they butt up against the two bars either side of the sound hole. The harmonic bar below the soundhole has to be secured in place with the spring sticks to allow for the curve, while the harmonic bar on the flat area above can be secured by clamps.
Top of Page
Thursday 17th May - Day 9
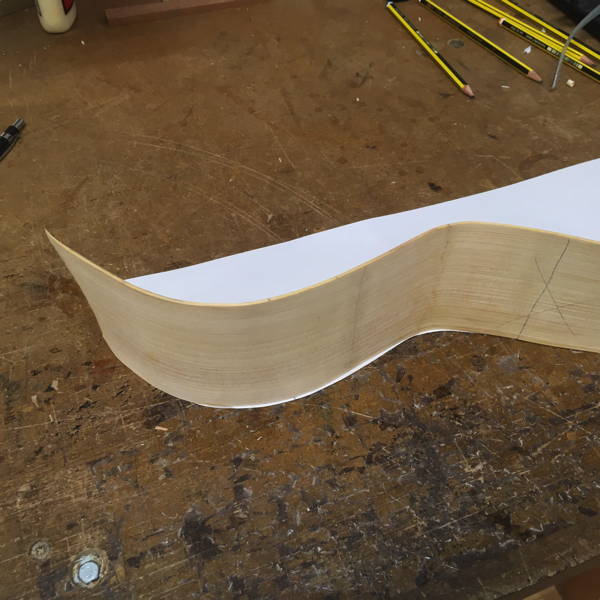
BENDING THE RIBS
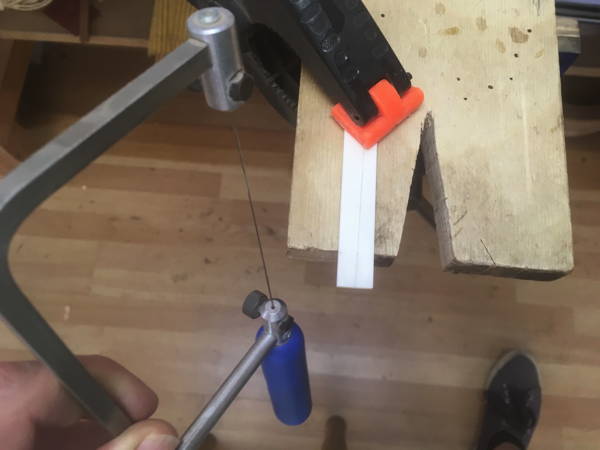
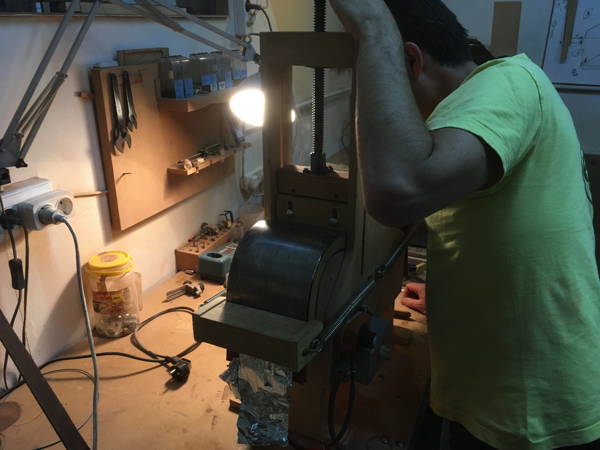
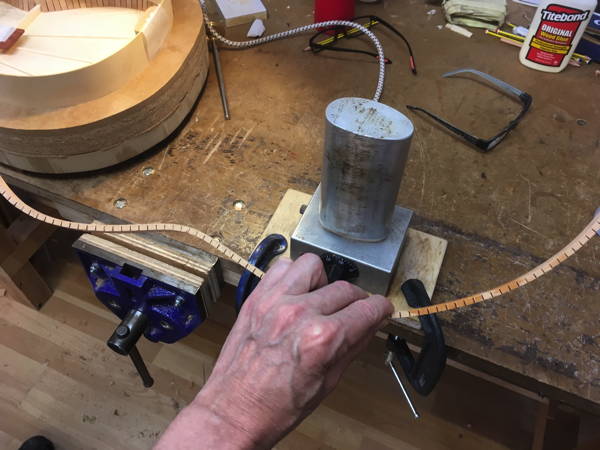
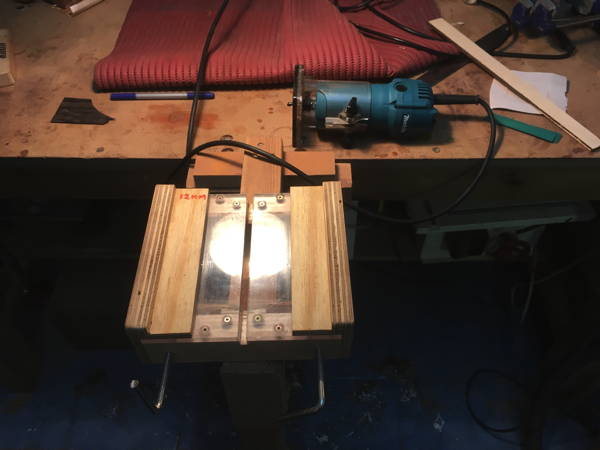
As I was making a slightly smaller guitar I was going to have to bend the ribs using a bending iron as opposed to the bending machine. The latter acted like a press pushing the side against a form creating the required shape.
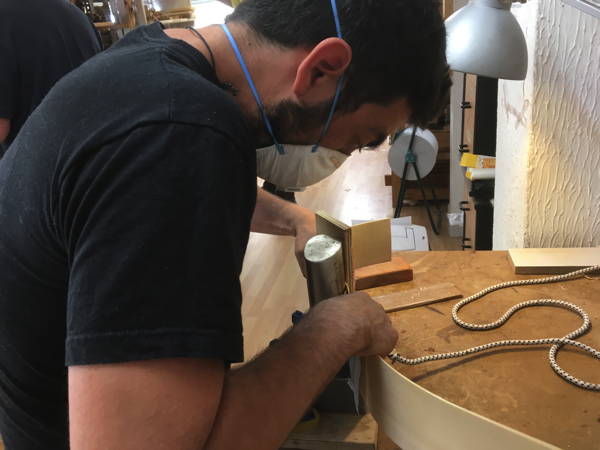
After a presentation by Stephen Hill on the art of side bending, I started off by practicing on the first set of ribs I'd already ruined. I kind of got the hang of it. But it's really difficult judging the curvature. I managed to create something which conformed to the plan of the guitar.
Unfortunately when it came to working on the actual ribs, I encountered no ends of a problems. I just could not get the Cypress wood to bend cleanly without leaving a flat area. Even Stephen and Graeme encountered problems with that particular section of wood, so that made me feel a bit better.
The photos depict Graeme Eames trying to get the b*****s to bend!
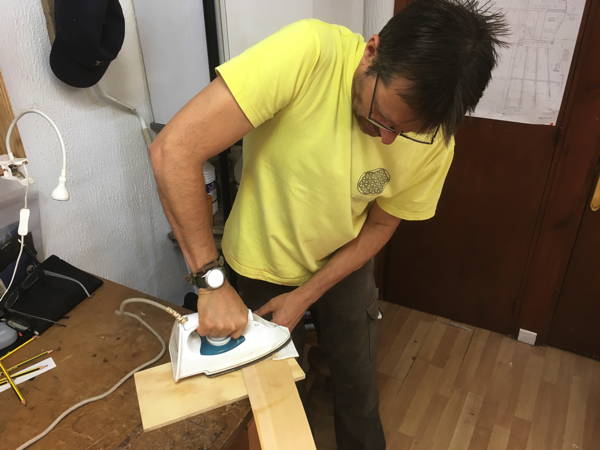
Finally it was decided to put them into the bending machine and see what that would do. But first they had to be ironed as flat as possible.
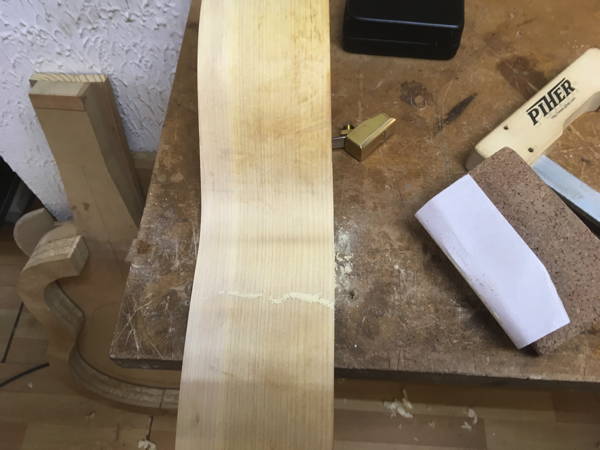
The bending machine did a pretty amazing job - certainly something no human was able to do. The ribs had the correct curve at the waist. Unfortunately there were still the burns from the bending iron which means the ribs had to be thinned even more - down to 1.2mm. Fortunately the waist is the strongest part of the guitar so the ribs can be very thin. But they'll definitely be on the limit.
SHAPING THE BARS AND CLOSING BARS
The two harmonic bars situated above and below the sound hole need to be planed down to 13mm and 15mm respectively. Then they are given scalloped edges with a chisel and rounded off with a block plane. The two closing bars (bottom struts) are taken down to 3mm and also scalloped and rounded off. The whole surface is then sanded with 400 grit paper. First the struts, then the sound board underside with a block.
The end of an intense day.
Top of Page
Friday 18th May - Day 10
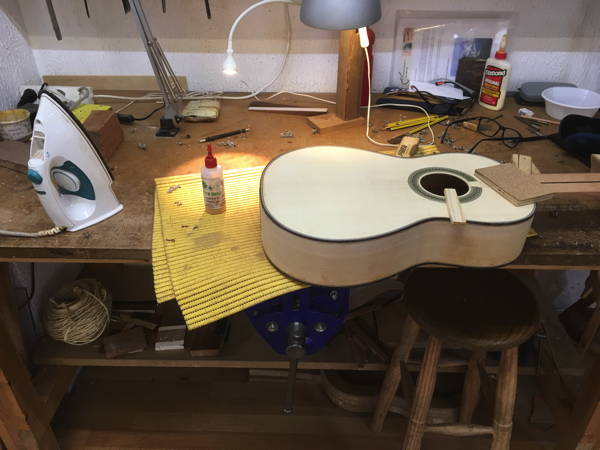
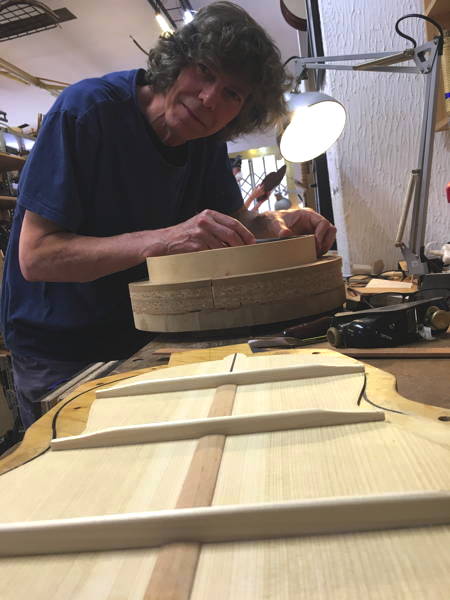
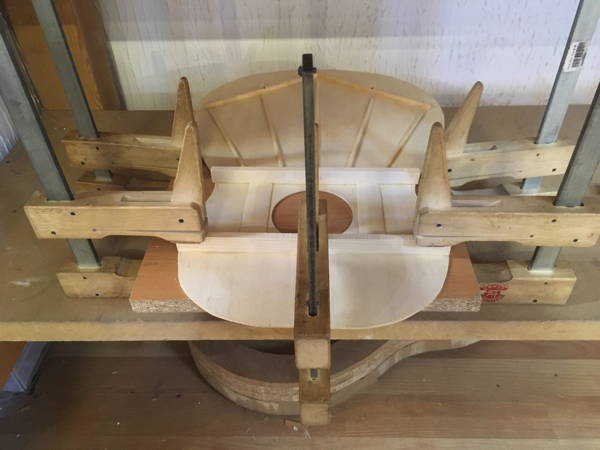
THE SOLERA
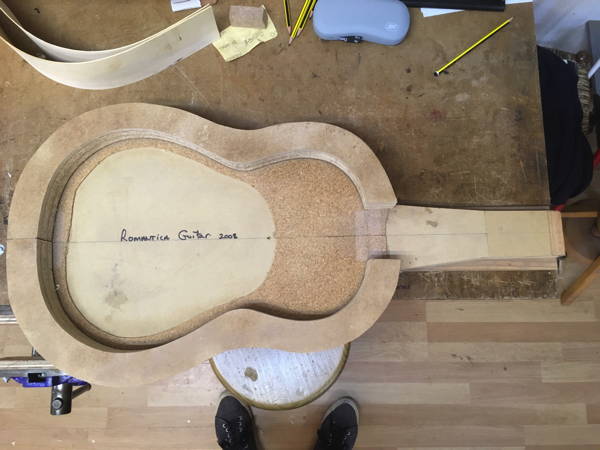
The Solera is is basically the workboard on which a guitar is built. It provides the necessary angles and heights of the specific guitar being constructed. I was using one of Stephen Hill's Soleras for a Romantic Guitar.
I now had to cut the excess wood off the ribs with a Japanese saw so they would form a perfect join at the back and butt up against the heel section where they would be wedged in place. Always working off the centre line. To get an accurate measurement the ribs need to be clamped against the solera.
Where the ribs meet the heel the ribs will be cut at an angle - 5mm to 15mm - whereas at the back it's just a straight cut.
Before putting the top into the bottom of the Solera, Stephen felt that the two outer struts and the closing bars needed to be reduced in size to give the top more flexibility. The three struts in the centre are also structural. This was done with the mini plane, then the area sanded with a very fine 400 grit sand paper.
Next the two harmonic bars top and bottom of the sound hole had to be cut at the length to fit. This was about 1-2mm inside the profile edge of the instrument.
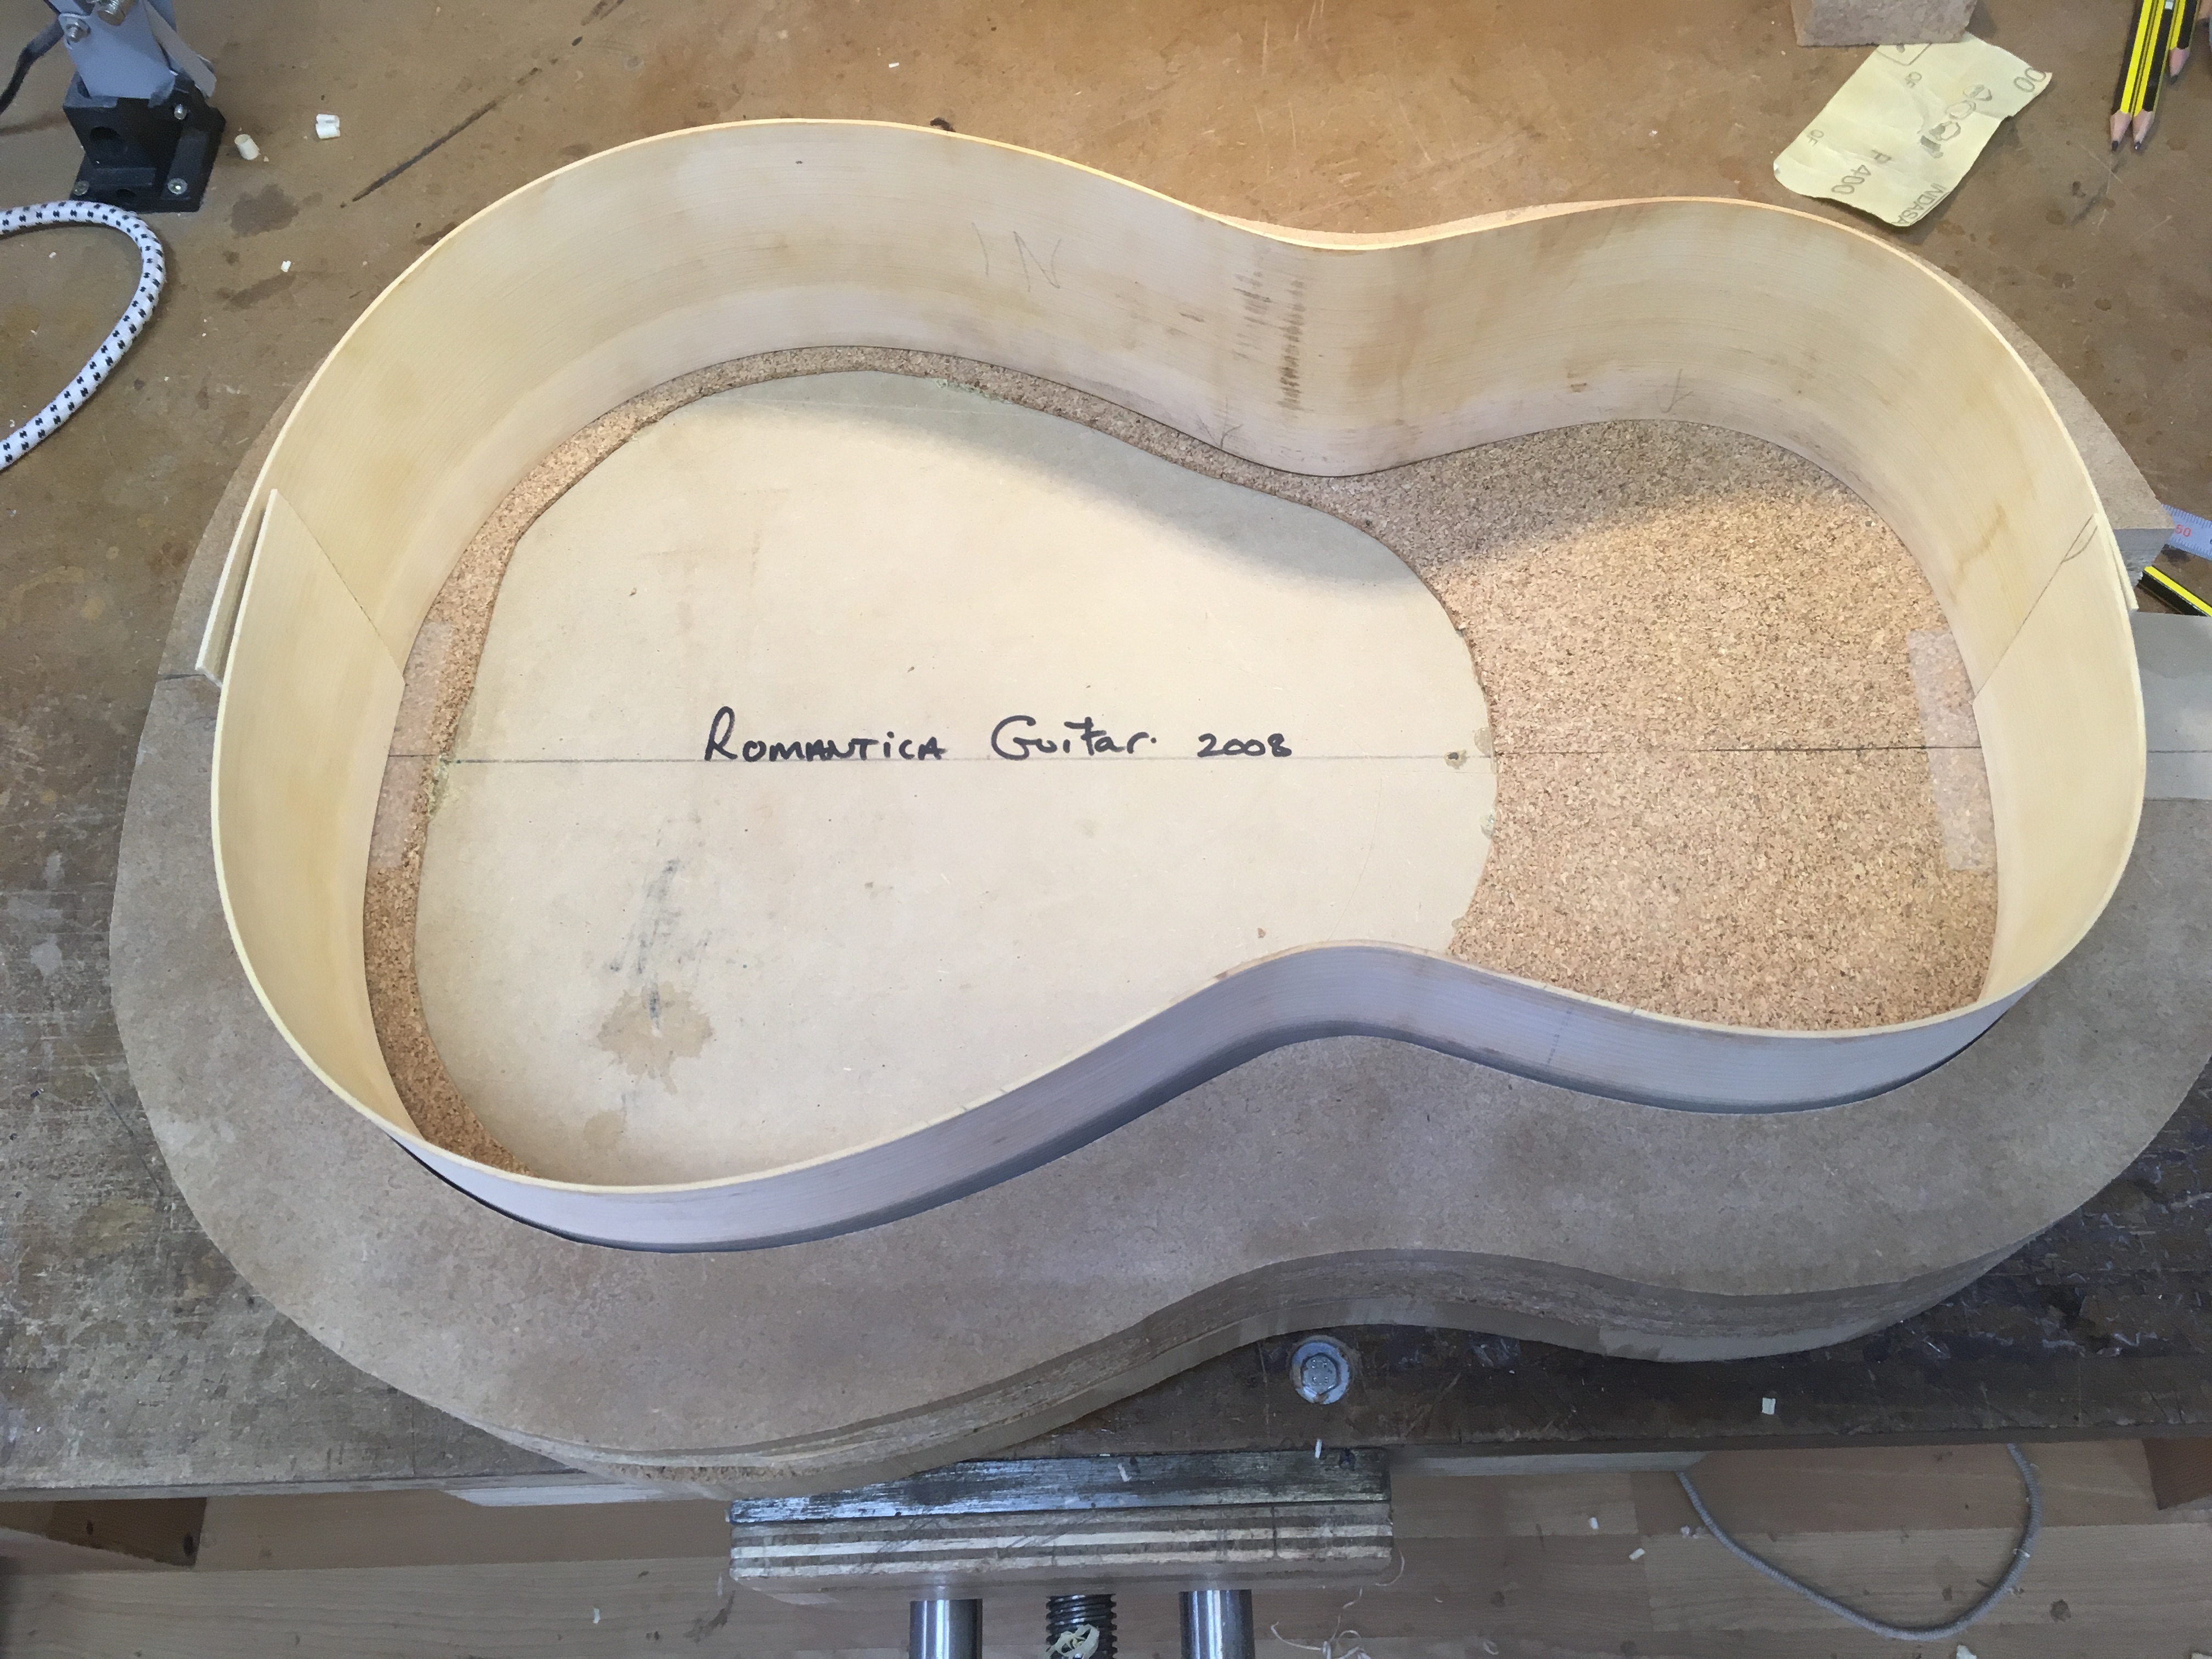
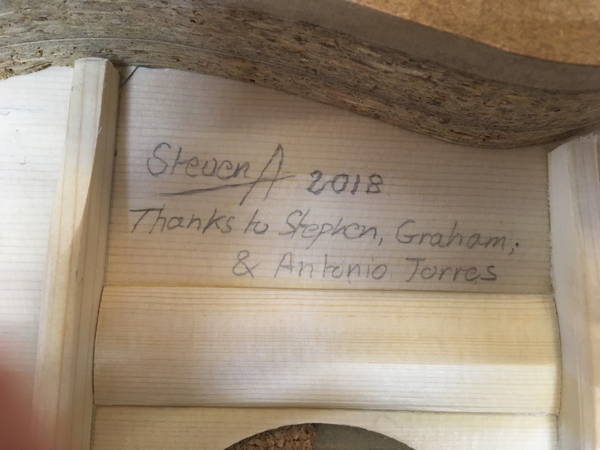
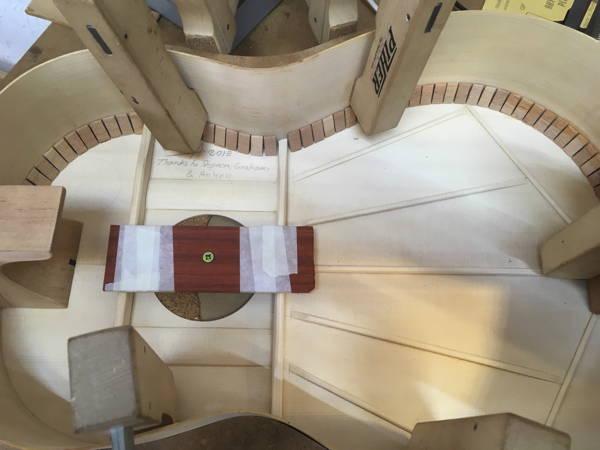
It is then customary to place a dedication on the underside of the guitar soundboard even though no one will be able to see it. I dedicated it to Stephen (Hill) and Graham (Emes) for guiding me through the process - and Antonio (de Torres), the great Spanish lutier, for providing the inspiration for the style of guitar.
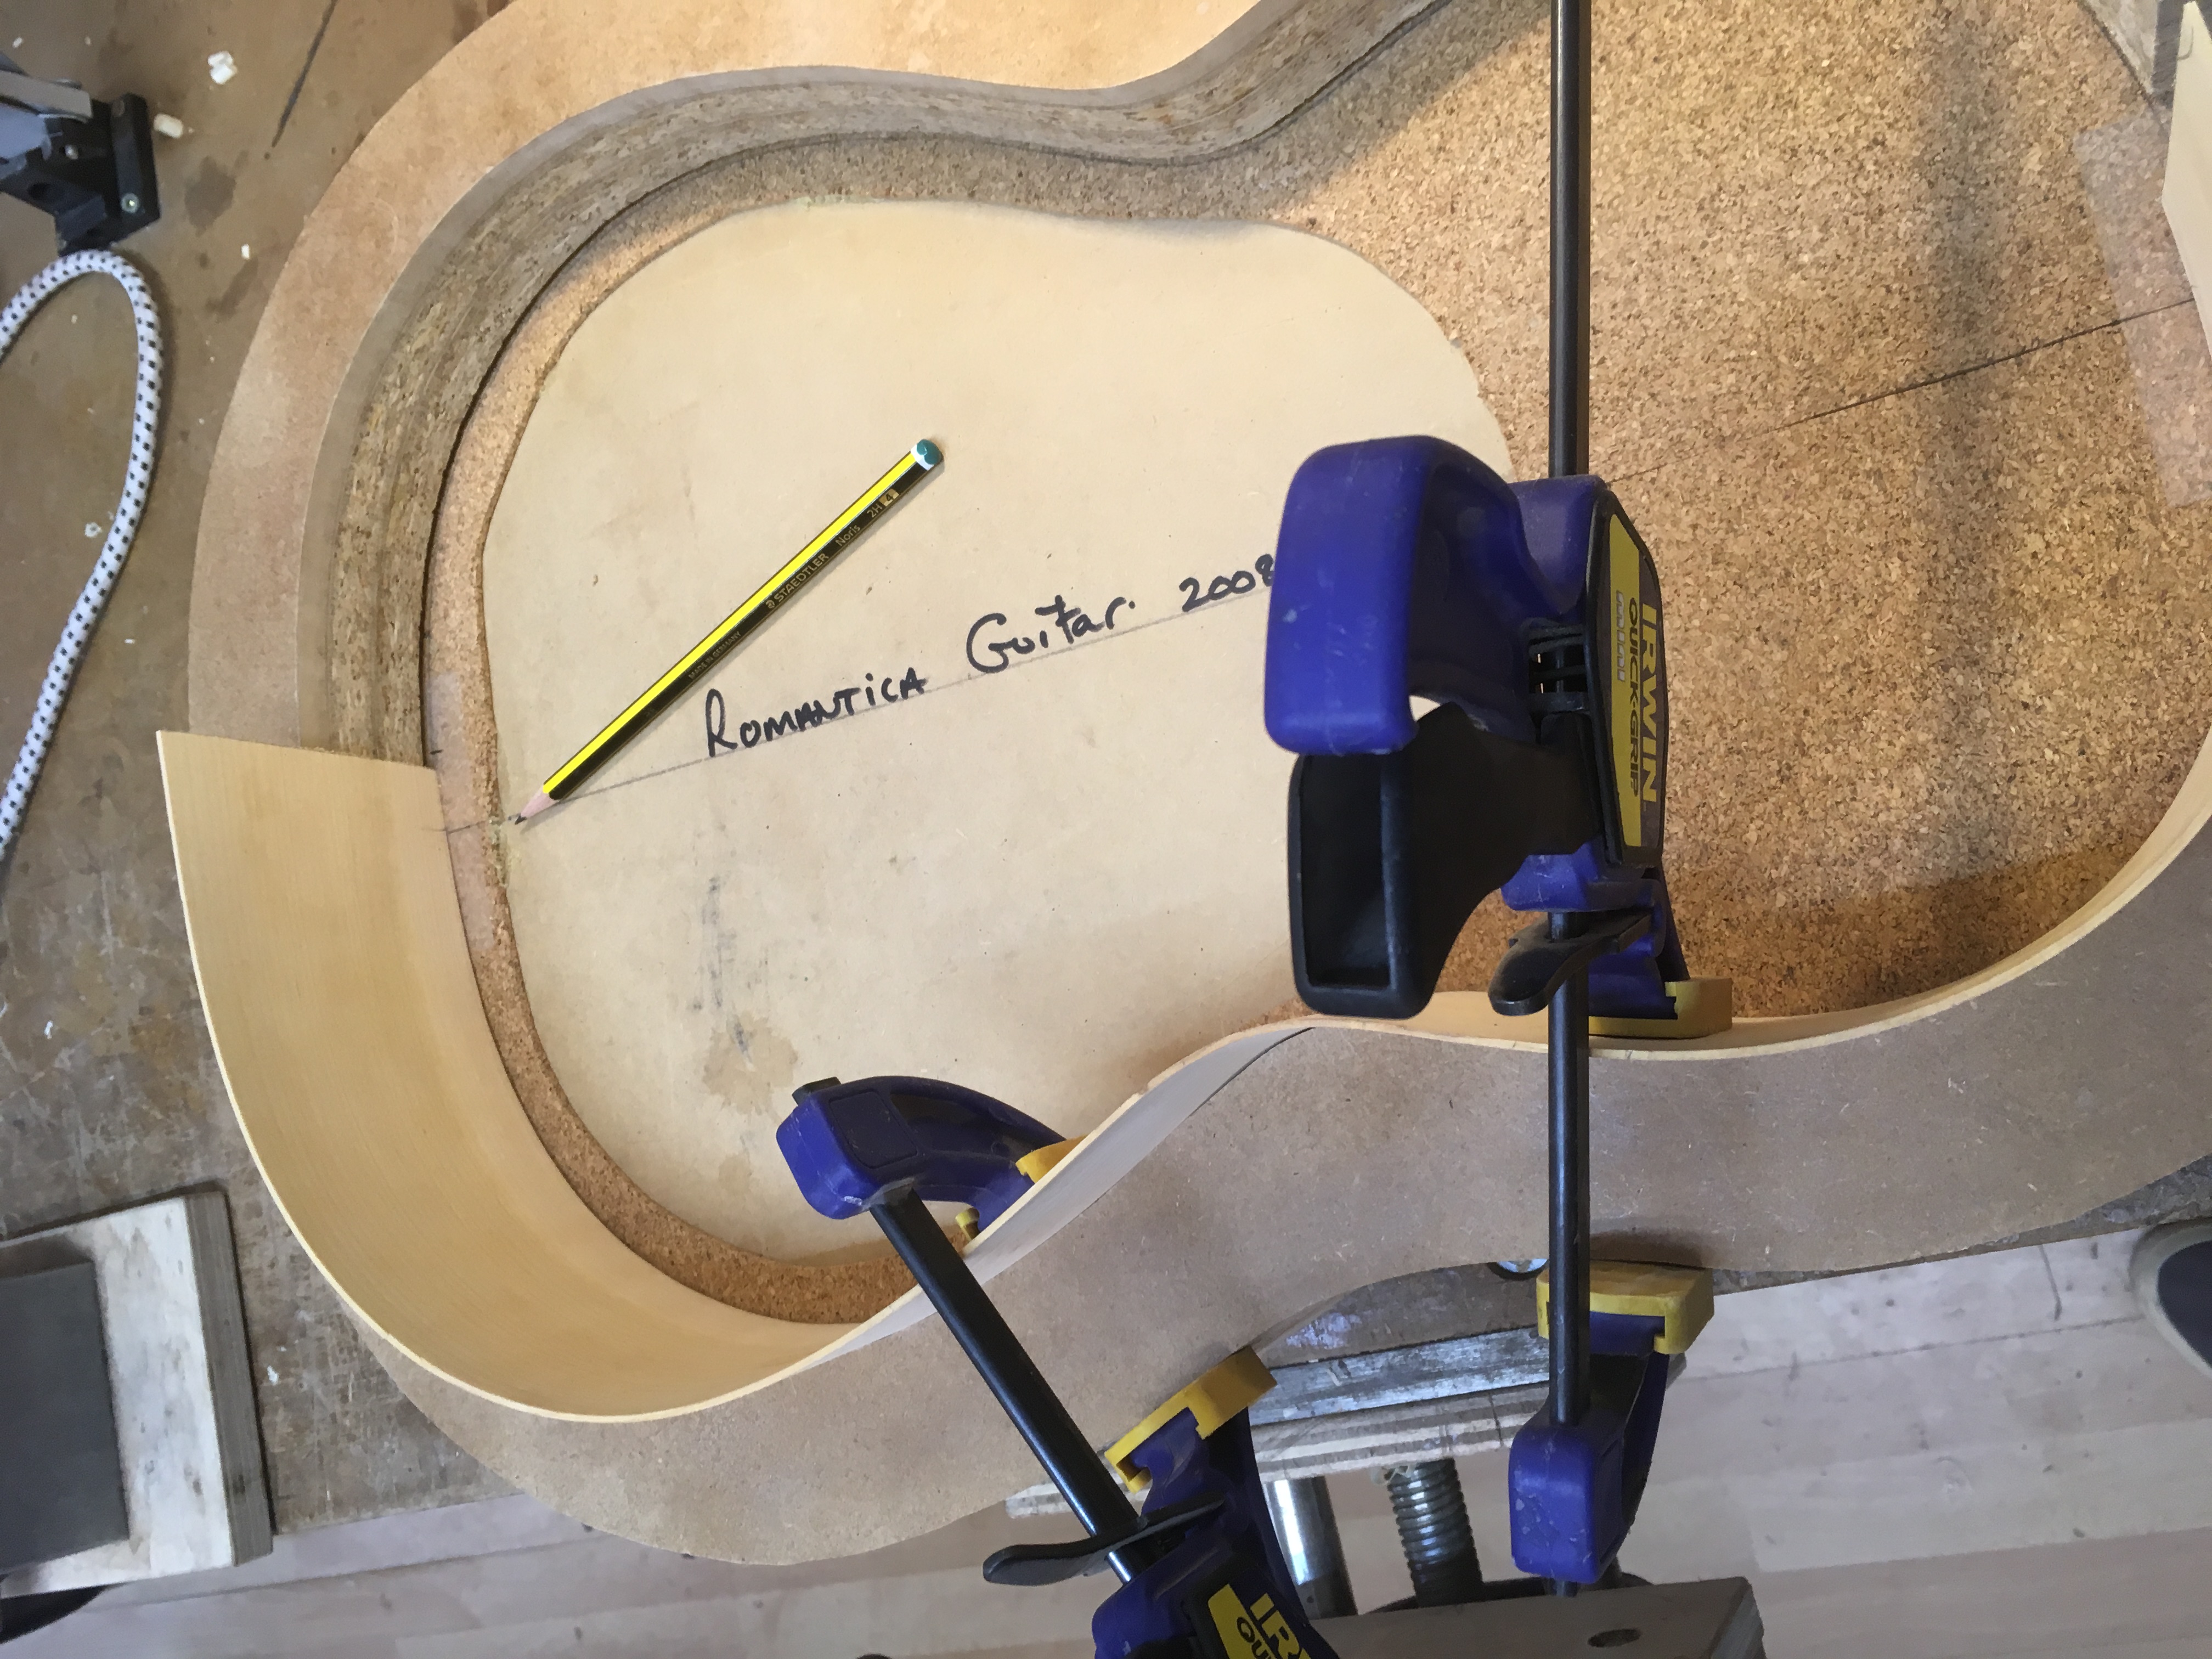
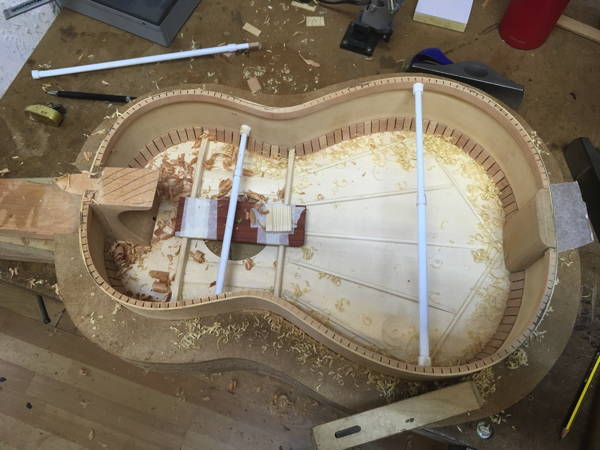
The guitar top is carefully placed on the centre line and is held against the Solera suface by a brace spanning the transverse bars , which is screwed to the deck of the Solera. The ribs can then be carefully inserted.
The sides of the Solera are then screwed on to the base.
I then cleaned up the inside of the ribs with some 150 grit sandpaper.
FINISHING UP THE HEEL / FOOT
I had to cut the excess on the heel / foot so the neck would be flush to the top of the guitar.
I also needed to clean up the Cocobolo head.
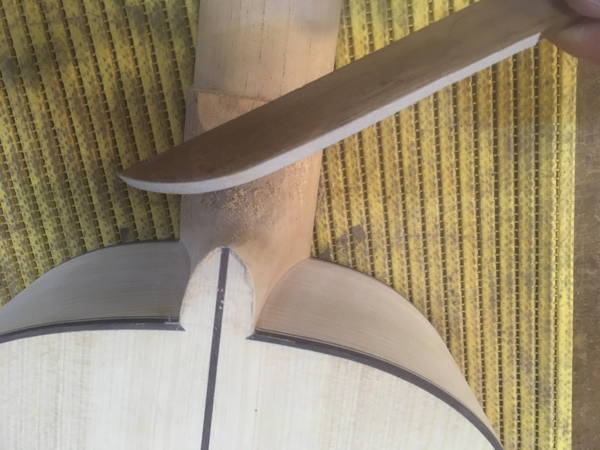
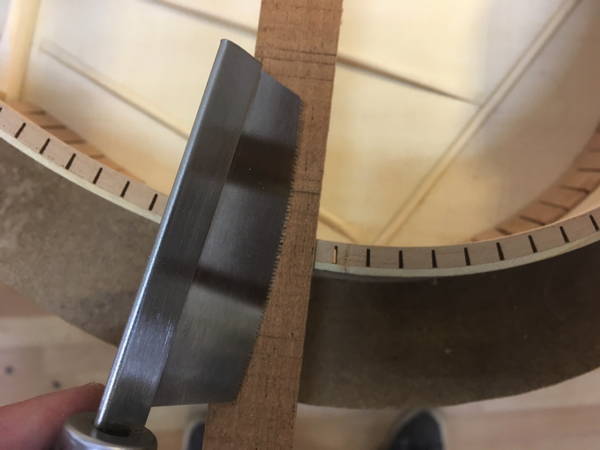
A precision cut needed to be made with a specially curved small saw at the point where the neck butts up against the guitar body.
CUTTING AND SHAPING THE WEDGES
Next I had to prepare the two wedges that would hold the ribs in place. These had to be carefully angled to form a tight, flush fit.
I then cut the wedges down to form a flush fit with the outside of the foot.
I also finished shaping off the foot with a file and sandpaper.
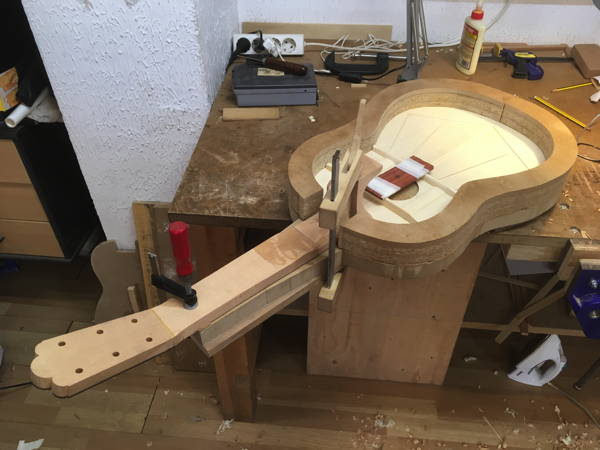
FIXING AND GLUING THE NECK
The neck is then lined up precisely to the centre line marks on the solera at the head and the soundboard at the heel.
And now the neck can be glued to the soundboard - going easy on the glue.
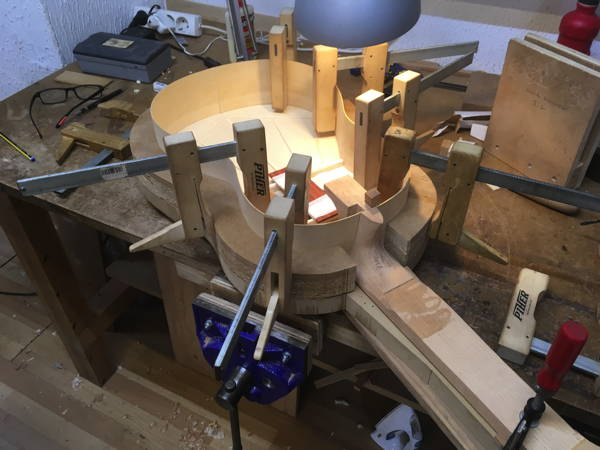
INSERTING THE RIBS AND WEDGES
Once the neck is clamped firmly in place, the ribs can be inserted, glue applied to the wedges and then pushed firmly in place - with a final tap of the hammer.
And the was the close of day with a weekend to prepare for week number three.
Top of Page
Monday 21st May - Day 11
PREPARING THE END BLOCK
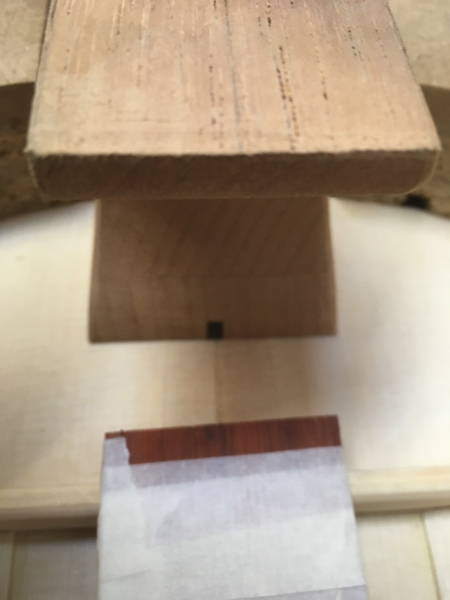
The end block can be made of Cedar or pieces of laminated wood which provide added strength. First it had to be sanded on a surface slightly concaved to allow for the curve of the guitar back.
A slight incline needs to be added to the end which will meet the top of the guitar to allow for the domed curvature of the soundboard. This is done by using a shooting block and plane and 0.5mm strip of laminate under the end block.
The edges facing into the guitar body are then rounded for a finished effect.
The end block is then glued and clamped into place ensuring that it is pressed firmly against the end of the guitar and the soundboard.
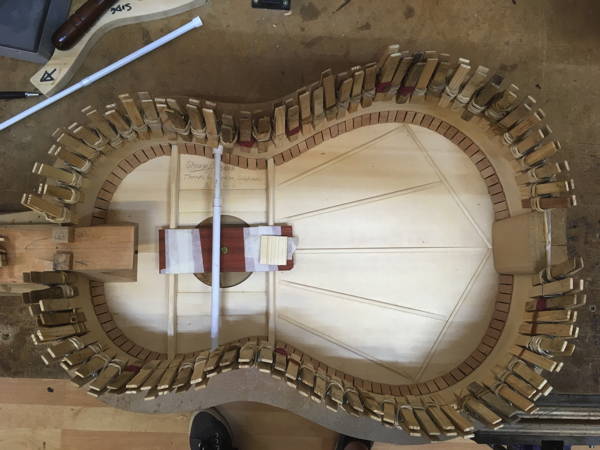
ATTACHING THE LINING BLOCKS
The lining blocks which attach the sound board to the ribs are applied using hide glue.
Each one is applied using a scalpel and there needs to be the slightest gap between each.
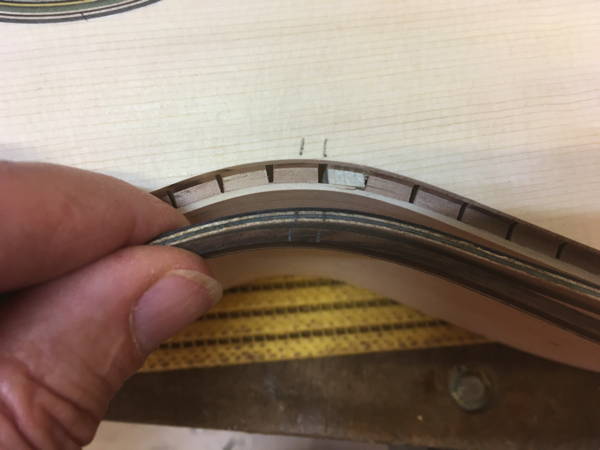
ATTACHING THE PURFED LINING
A purfed lining attaches the back to the ribs. This is a continuous strip of wood with small cuts along it's length to allow it to be bent to the shape of the guitar.
Stephen felt the ribs should be reduced by 3mm, so I used a marking guage to scribe a line around the inside of the ribs.
I then used the bending iron to mould the purfed lining into an approximate shape of the curvature of the ribs.
The linings could then be cut to the right length and glued - in my case to the 3mm line. They are held in place by numerous pegs.
ATTACHING THE BACK REINFORCING STRIP & BACK BARS
The back reinforcing strip is a piece of Cedar which is glued using the solera to give a slight curvature to the back. The spring sticks are employed for this. The strip can then be shaped and rounded to a thickness of about 1.25mm. Tape is then applied each side to protect the back while the reinforcing strip is being sanded.
The back bars provide strengthening to the back. They are strips of spurce with a curve to allow for the curvature of the back.
The bars are trimmed to the outer edge of the soundboard and then the back reinforcing strip is notched along the previously drawn horizontal lines. The upper bar goes below the line, while the middle and lower go above it. The mini curved saw and a chisel are used to remove the sections in which the bars will sit. The bars have to be snug but not tight. Three layers of masking take are used to provide a channel for each bar to facilitate lining them up when gluing. They are glued using the solera and the spring sticks.
I had to make four rib blocks which sit on the hamonic bars and attach to the ribs.
Top of Page
Tuesday 22nd May - Day 12
PREPARING TO ATTACH THE GUITAR BACK
First I had to cut off the excess wood from the wedges using a Japanese saw.
As I was going to make the depth of my guitar 3mm less I had to remove the excess wood on the ribs with a mini plane so they were flush with the purfed lining.
I also had to remove the excess from the foot and heel including the wedges. As I was cutting across end grain I had to cut down the wedges first using a small chisel. I could then use a block plane for the rest taking care of the sides.
Once an overall level is achieved, the whole area can be finished with a large sanding disk. This consists of a heavy circular piece of wood with sandpaper attached to one side. The disk is place on the guitar and rotated which sands to an even level.
Four rib blocks sit on each end of the harmonic bars. These are made from pieces of pine which taper to form a triangular shape.
FINISHING OFF THE GUITAR BACK
The three back bars needed to be reduced to 14mm, 12mm & 12mm starting at the bottom. This was done with a block plane
Using a template, the bars were then scalloped at each end using a chisel.
With a protective mat, the bar can now be rounded with a mini plane. After, masking tape is the put either side of the bars for protetion so they can be sanded to a finish with a sanding block.
The back reinforcing bar had to be cut to the correct length either end. The measurements are taken from the central points where the sides would meet to the end of the heel, and the same with the end block. This provides a measurement for the excess that needs to be removed.
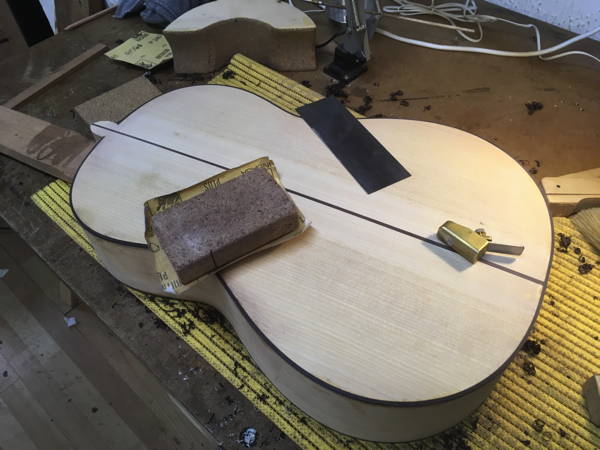
A central line is drawn on the heel and foot to the end block. The back is then aligned to this and carefully eye-balled into position. The added weight of a plane on top helps to stop any sudden movements.
A pencil is used to mark on both sides where the back bars meet the ribs. As the back bars are 6mm at the ends, a depth guage is used to make marks on the lining. The small curved saw is then used to cut grooves into the lining being careful not to cut the ribs.
Once at the correct depth, a small chisel can remove the excess.
Using a small piece of the Cypress ribs, the back bars can then be cut off to allow for the ribs, using the small curved saw.
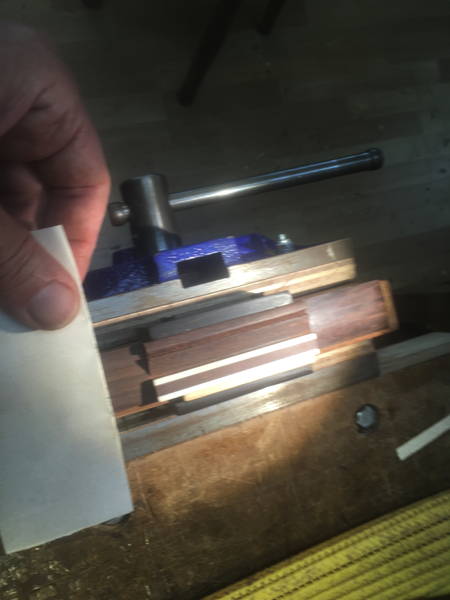
It's then a matter of planing down the scalloped ends of the bars until the back fits flat. To enable a snug fit, a piece of paper is used as a depth guage. It is placed next to the bars and when it's hard to pull out the fit is good.
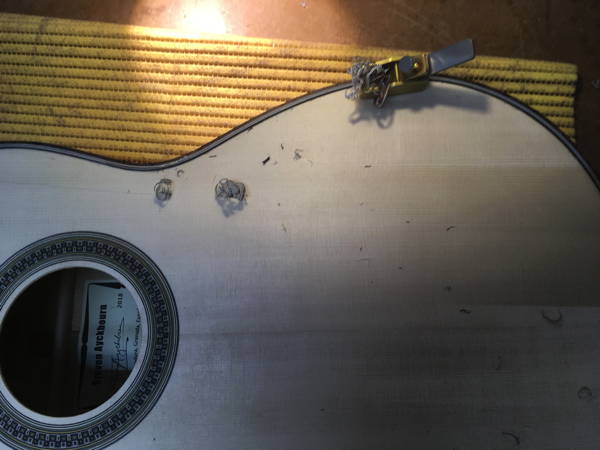
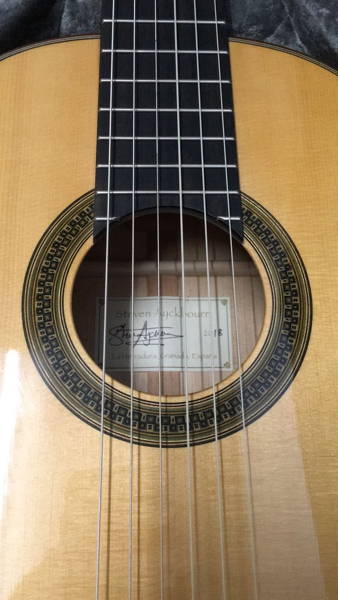
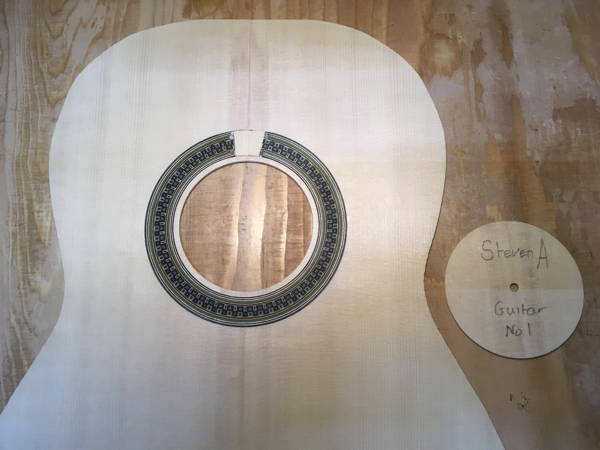
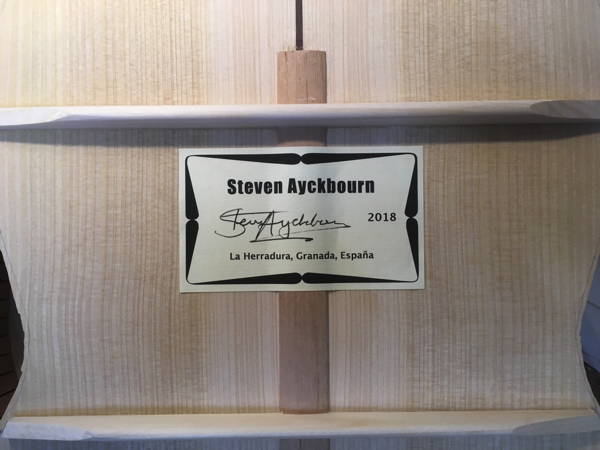
After giving the inside a quick clean up, it's now time to stick the label on to the inside of the guitar back beneath the soundhole.
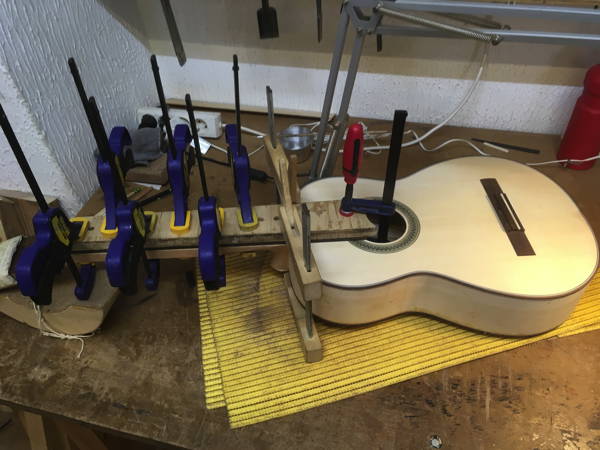
After a few moments to admire one's handywork which is about to be hidden from view, the back is then glued on using fish glue. Clamps are used to hold the back firm while it is drying.
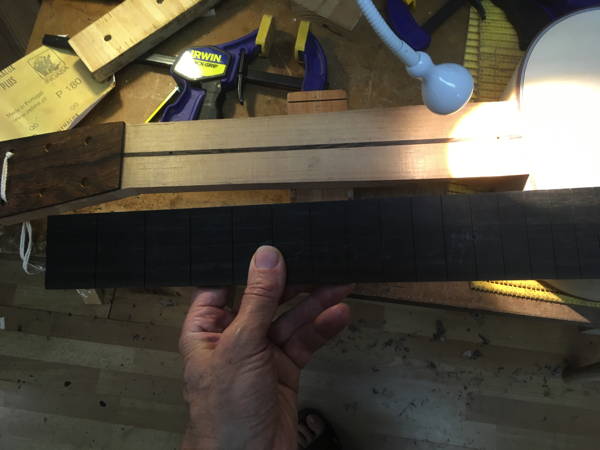
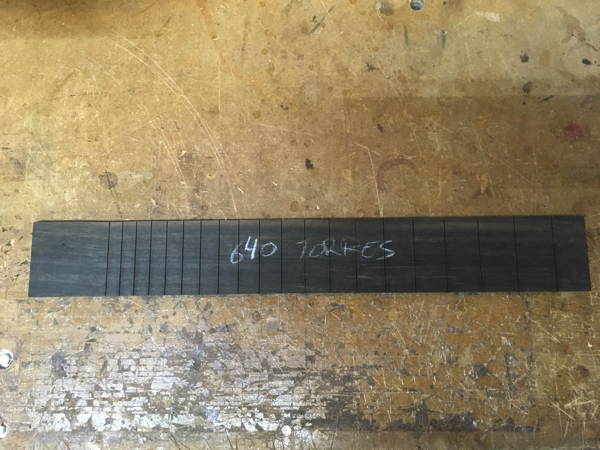
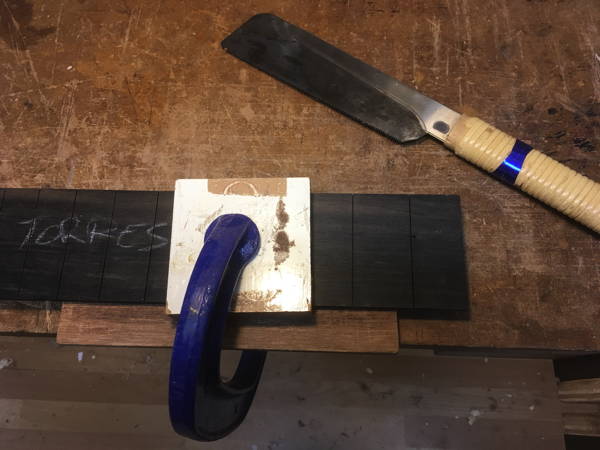
THE FINGERBOARD
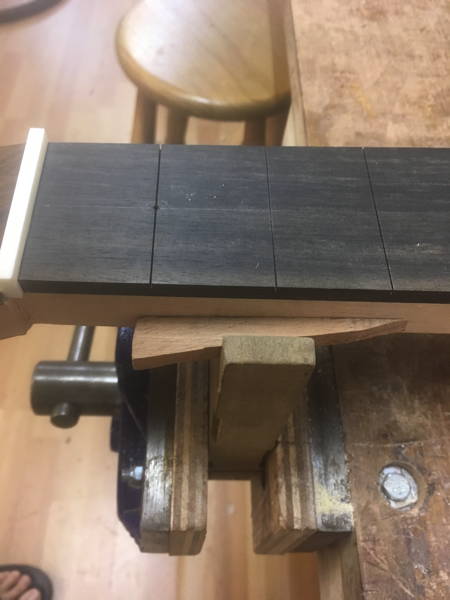
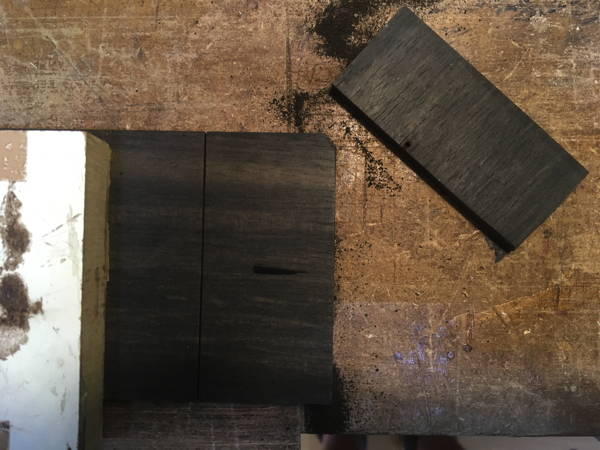
The Ebony fingerboard has had fret grooves carefully cut on a table saw with a special jig. Now the excess at the end has to be removed using a Japanese saw.
And the was the end of a productive day.
Top of Page
Wednesday 23rd May - Day 13
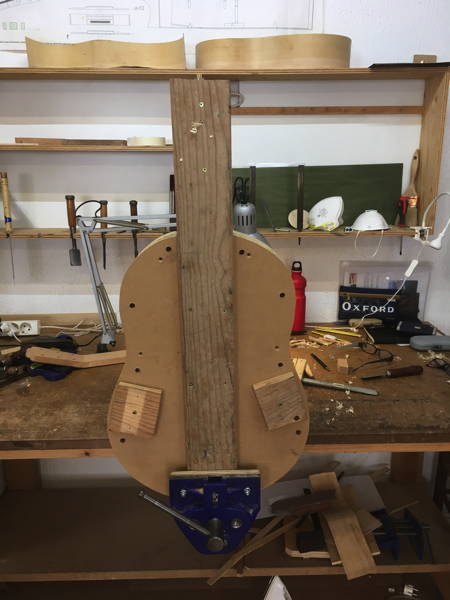
REMOVING THE GUITAR FROM THE MOULD
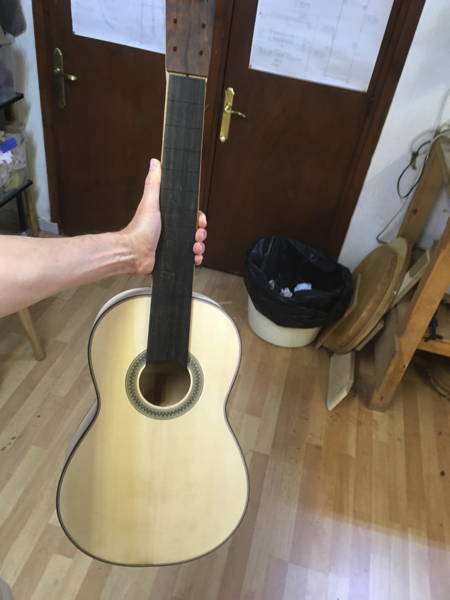
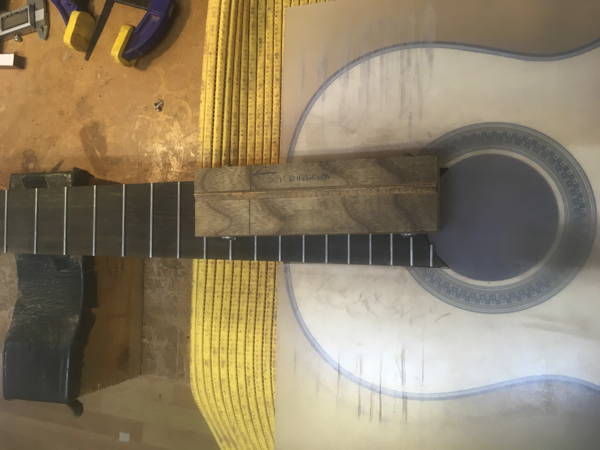
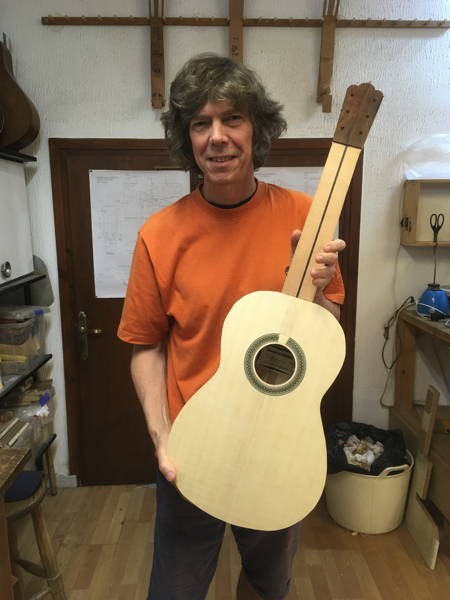
The six screws holding the sides of the mould are removed and the guitar is carefully taken out.
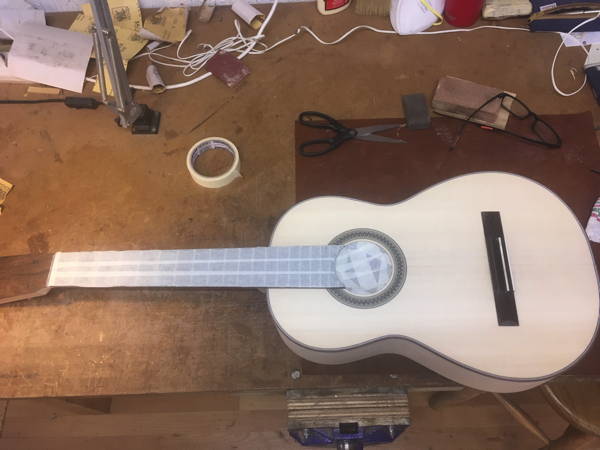
Here it is! Looking like a guitar. But still a ways to go yet.
CONTINUING WITH THE FINGERBOARD
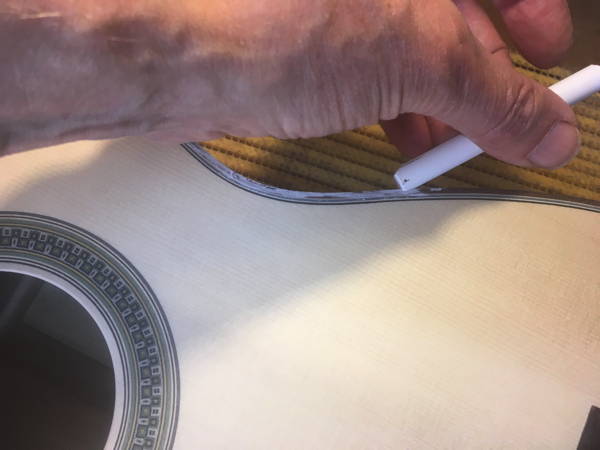
It is necessary to plane the fingerboard exactly where it meets the nut. The excess was cut off yesterday, but it is critical that the cut is precise, so chalk is used as a guide. When the chalk has been planed off that is the point to stop.
A centre line is then drawn the length of the fingerboard.
Masking tape is placed both sides and then the width at the nut and 12th fret are carefully measured and marked. At the nut the overall width is 52mm (26mm each side), while at the 12th fret it is 62mm (31mm each side).
A line is then made with a scalpel between the two marked points. The cut masking tape on the outside is the removed revealing the cutting line. This is repeated on the other side.
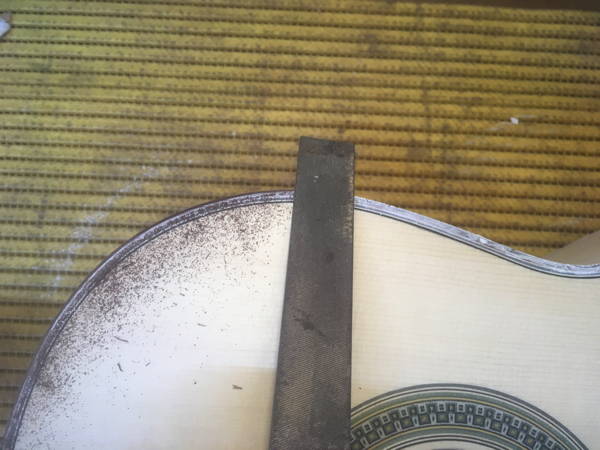
Using a shooting block and plane, the ebony is removed EXACTLY to the lines on either side. Note: Ebony is a very hard wood!
EDGING TOP AND BACK
There will be decorative edges on the soundboard and top of the ribs and the back of the guitar. The top and bottom edge of the guitar have to be carefully routed out for them to fit. A special router on a moveable arm is used.
There will also be a decorative strip where the ribs join at the back. This too is routed out using another special router jig.
The router could not cut around the guitar completely, so the excess wood next to the neck has to be removed using a scalpel and chisel. A template is used to draw a guiding line.
The channel has to be wide enough for two strip of the decorative edging to be inserted - two on each side.
The decorative edging has to be carefully measured so it is the length of each side. First the waist is established then clamped. Lines are drawn to mark the position. The the edging is walked around to the top and then the bottom.
The cut at the top will be beneath the fingerboard, but at the bottom it has to be very cut square with a saw and then finished with a chisel.
And that was the end of the day. Where did that go?
Top of Page
Thursday 24th May - Day 14
PREPARING THE BACK BINDINGS
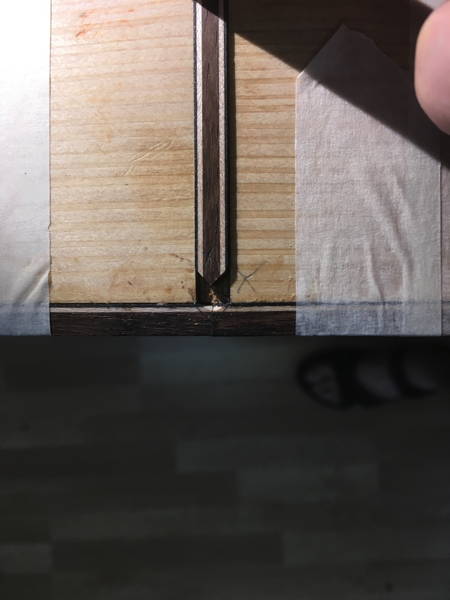
I needed to cut two arrow heads in the cypress where the bindings meet the heel. This needed to be very precise and required a 2mm chisel and a scalpel. The bindings then had to be cut at angle to fit into the arrow head spaces. At the other end one binding is cut square to the centre line of the guitar block end, while the other is left a little long for fitting.
The binding are then glued on using a masking tape system to attach them firmly in place. Before the last piece is glued, the ends are fitted flush by cutting down the extra length using a chisel. Once glued, a clamp is applied at the waist which is the point of most tension.
THE BRIDGE
The two bone strips have to be sanded flush with the wood using a sanding block and being very careful not to touch the surrounding Rosewood.
Next the wood the furthest from the Saddle needs to be planed back to the bone strip. Then using a special sanding block which has a slight curve to allow for the dome of the soundboard, the bridge is shaped to the allow for this.
END BINDING
The end binding has to shaped into a 45 degee point and then a similar point has to be carved in the back rib binding to create a perfect fit
GLUING ON THE FRONT PURFLINGS & BINDINGS
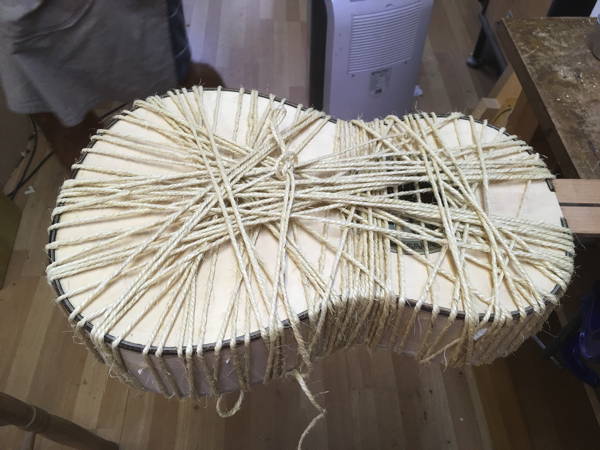
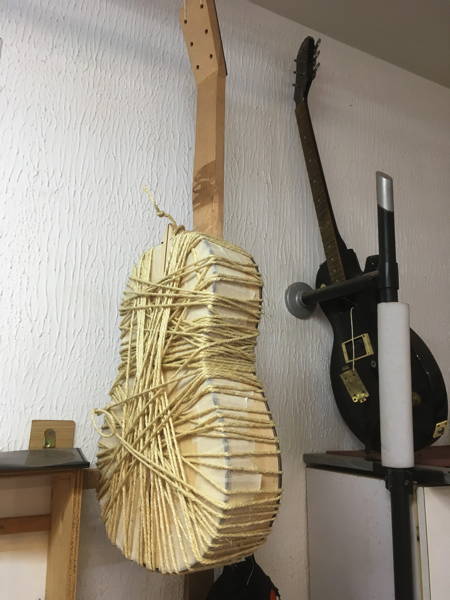
Because there was not suitable mould for my sized guitar, the attaching of the purflings and binding had to be done using the old method of wrapping with string. This is quite a skill to do and Stephen demonstrated the art on my guitar. First the bindings and binding channel are smeared with fish glue, then the pre cut bindings are attached and wrapped with string in a methodical manner. The string had to be carefully pulled tight to hold the strips of wood firmly while they are drying
And so ends day 14.
Top of Page
Friday 25th May - Day 15
GLUING END BINDING
To fit the end binding first invert the guitar in the vertical position using a special jig. The previously worked end binding is then given an arrow head at the other end and a slot to fit. It is then glued in. Fitting this accurately is one of the trickiest tasks so far.
DETACHED BINDINGS
There were a couple of places where the top bindings didn't quite stick properly. This is rectified by reheating the fish glue with an iron placed on the problem section which is slighly dampened. A little more glue can be applied and then the binding is clamped firmly to squeeze it to the rib. The other place needing attention was above the end binding. The purflings and bindings didn't quite meet at the join. This was cured used a similar system of heat, clamps and blocks.
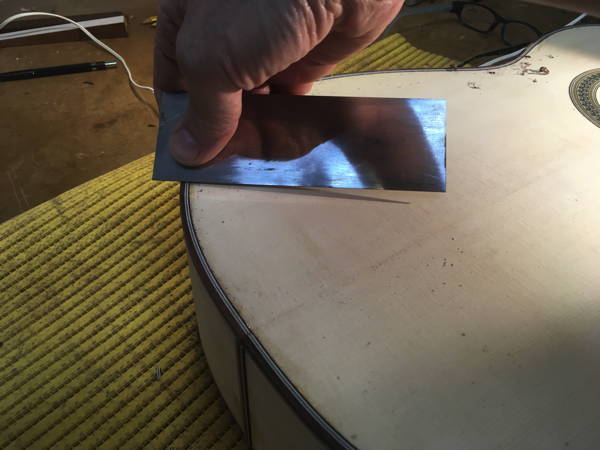
SCRAPING THE SOUNDBOARD BINDINGS
To bring the bindings and purflings to the level of the soundboard, first they are brought down to just above level with a mini place, then a scraper is used to scrape the bindings flat to the soundboard. Finally it is finised off with first 180 and then 240 grit sandpaper with a block.
FITTING THE FINGERBOARD
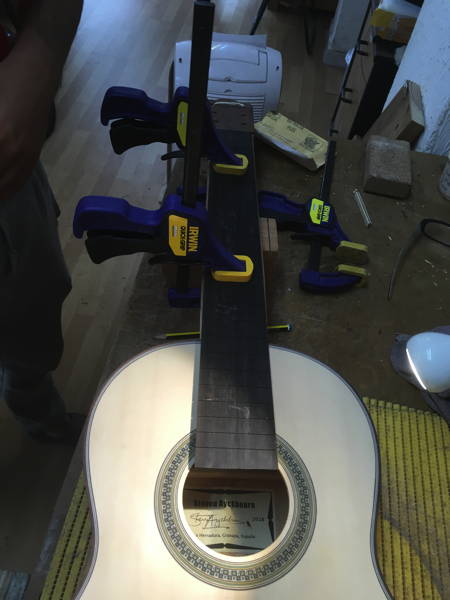
First the finger board is lined up on the centre line and 5mm from the head - to allow for the nut. The lining at the soundhole end has to be estimated using the rosette pattern. It is then firmly clamped to the neck.
Two shallow holes are then drilled at the 3rd and 11th fret to act as a guide. Small drill bits are place into the holes to realign the fingerboard exactly.
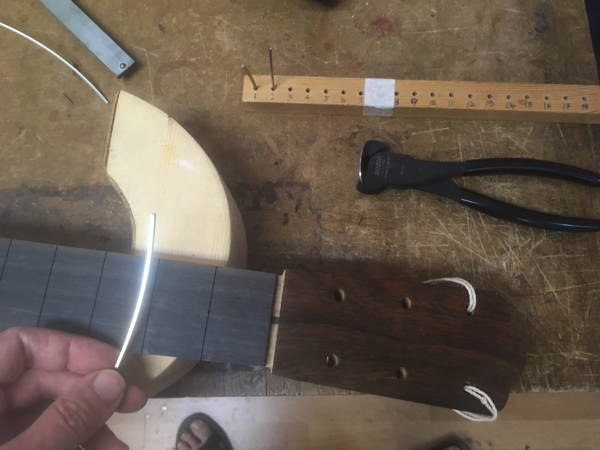
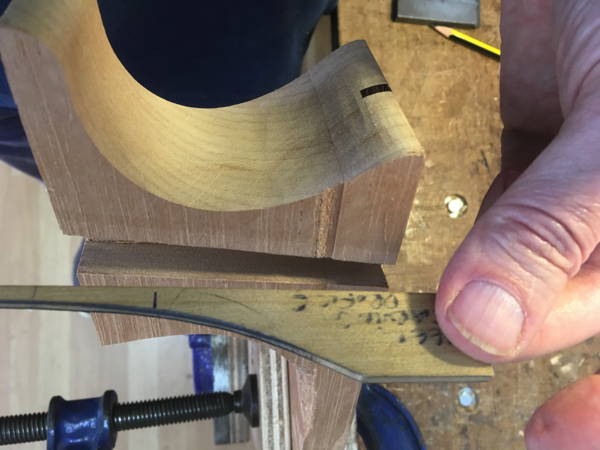
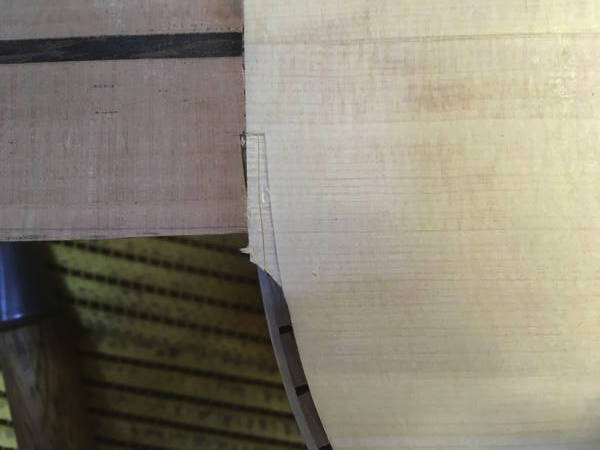
The bent pencil is then used to draw a line benath the fingerboard where it meets the soundhole. It is the cut on the band saw as close as possible, then sanded so the line disappears while keeping the integrity of the curve. Due to the slight gradient from the soundhole to the top of he heel, it is necessary to plane a small amount off the fingerboard to allow for this.
Before the fingerboard is glued, the sound hole is sanded with a contraption especially invented for the task. As the soundhole on this guitar is slightly smaller than the others, it was necessary to create a bespoke soundhole sander. Thank you to Graham Emes for this.
Time to glue on the fingerboard. Fish glue is used and generously spread all over, being careful to prevent bleedout on to the soundboard and nut.
BACK TO THE BRIDGE
The flat areas either side of the bridge have to be made into 'speed bumps', about 3mm in the middle sloping to about 1mm on the edges. A rasp is first used, then a sandpaper block.
And now the weekend is upon us and into the final week.
Saturday 26th May - Extra
There were a couple of extra bits and pieces I wanted to work on, so I put in a few extra hours to be prepared for the final week
SCRAPING THE BACK & END BINDINGS
The procedure was the same as the top. Small plane then scraper, followed by 120, 240 then 320 grit sandpaper to give a smooth finish flush to the cypress of the back and sides.
CARVING THE HEAD SHAPE
I have chosen to copy the Torres head shape. I had previously carved it, but was not happy with the symmetry. So I spent some time with fresh eyes and managed to get it closer to what I was looking for.
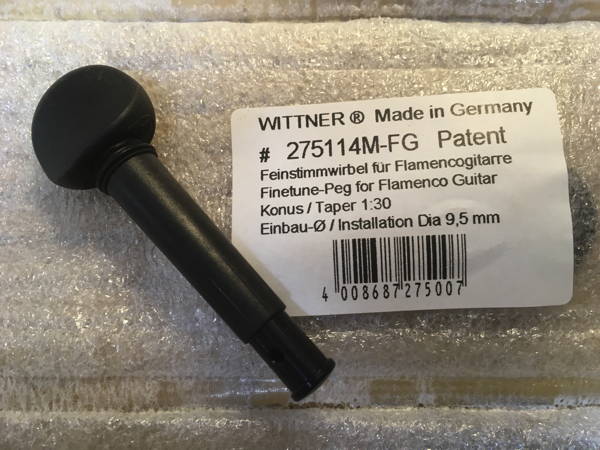
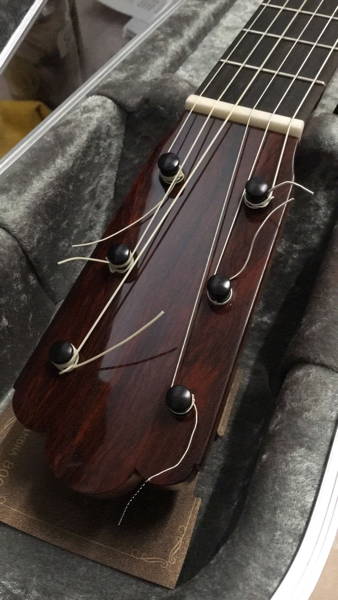
The rotary geared pegs have arrived. I wanted to go with pegs over machine heads. The original friction pegs can be very awkward to use, but these modern versions have gears built inside. This allows the pegs to sit firmly in the head while a mechanism winds the string. There is a strong argument to have the string in contact with the peg and wood, as opposed to a machine head, as it affects its vibration. I heard this from a Flamenco guitarist, who cutomarily use pegs on their guitars, though it they were also used due to the cost factor.
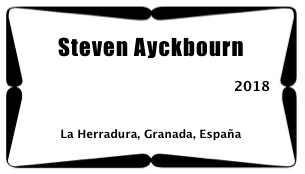
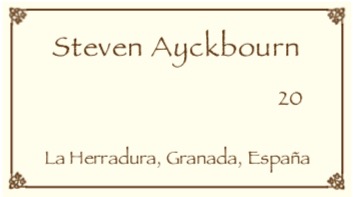
RE-DESIGNING THE LABEL
I wasn't happy with label I'd designed prior to the course. In situ it is too prominent and something more subtle is required. So a I spent an hour or so coming up with something I deemed was more in keeping with the guitar. Below are the old and new designs.
So the guitar is ready for the final week.
Top of Page
Monday 28th May - Day 16
COMPLETING AND FITTING THE BRIDGE
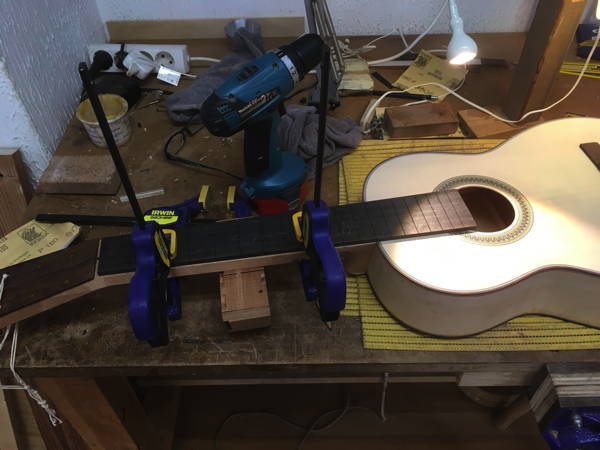
The bridge is a very complex part of the jigsaw and takes a lot of time to create. I spent the first two morning sessions completing it. First I drilled the six holes for the strings. This was made easier by the use of a special jig clamped on to the bride and provided drilling guides.
I then had to remove the excess wood in the middle so it sloped at angle away from the saddle slot and beneath the string holes by about 1mm.
It was then a matter of tidying up the surfaces and edges. I used a chisel and file to make the ends of the bone square. Also the flat file and a sanding blocks to work the wings so that they were about 1mm from the soundboard.
Finally the ends had to be sloped. This was done by measuring a 10mm line from one end of the tie block and fasting the edge of clamp to the line. When the sandpaper clock was place at the angle it created, it created the correct angle of the slope.
I then gave the whole bridge a quick sand with fine paper - 400 grit - then gave it a coat of shellac and left it to dry. I then sanded lightly the area of the soundboard where the bridge is to be positioned.
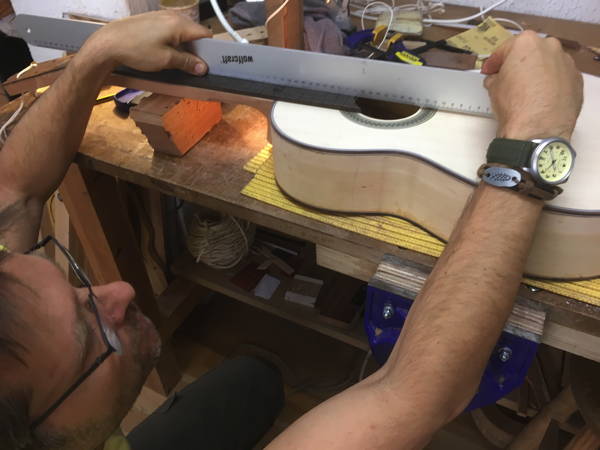
Two strips of masking tape are placed side by where the bridge is to be placed. A metal ruler is then aligned next to the fingerboard and two lines are drawn on the masking tape.
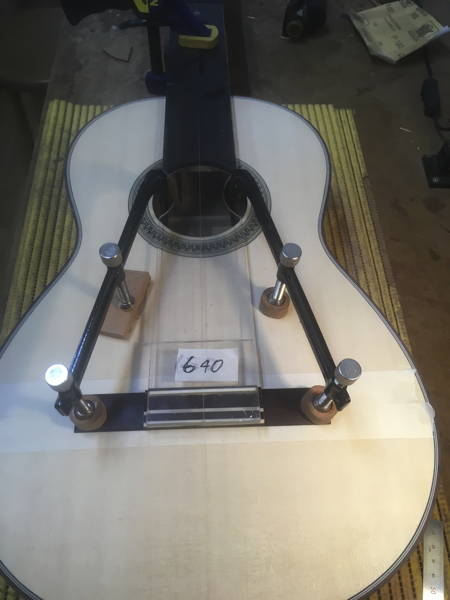
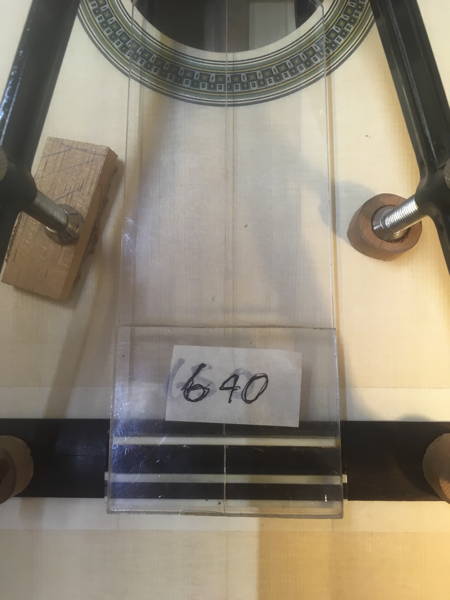
A special bridge positioning template is then used to mark the exact position of the bridge. It's necessary to align the 640mm scale length mark on the 12th fret and clamped firm, then positioned in the exact centre of the bridge (on a centre point made on the bone). The lines on the tape then help centre the bridge.
Special U clamps are placed in position to secure the bridge. Two holes are then drilled inside the saddle 2mm from the edge to act as guides. Small guiding pins are employed to mark the exact position while the clamps are removed. A scalpel can then be used to cut carefully around the bridge through the masking tape. The central area of the masking tape can then be removed.
The bridge is now ready to glue on. A thin, even layer of glue is applied and using the guiding pins the bridge is placed in postion. Three U clamps are used to apply the pressure after a special block of wood is placed inside the guitar to beneath the bridge to counteract the downward force. Any glue is cleaned up and the tape removed.
STARTING ON THE NECK
It's necessary to remove the excess cedar either side of the fingerboard. With a large chisel it needs to be cut away at 90 degrees and checked frequently with a square.
FITTING THE NUT
The nut consists of a piece of bone 5mm in width. It has to be sanded with 240 grit paper so it fits very snuggly into the space between the fingerboard and the head.
The end of a productive Monday.
Top of Page
Tuesday 29th May - Day 17
THE FINGERBOARD
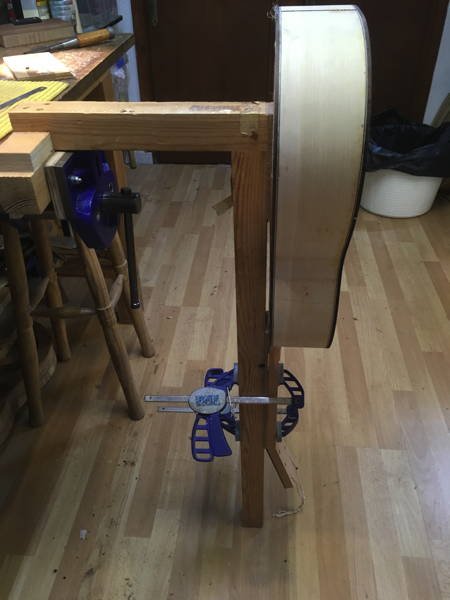
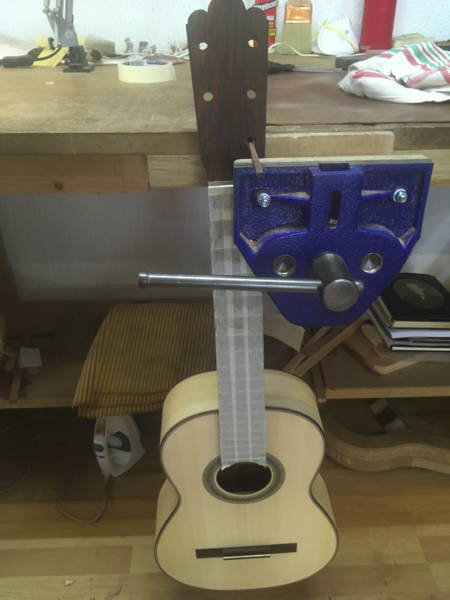
Time to work on the fingerboard. The guitar had to be securely clamped in place. So it is wedged in the vice using a neck support and a wedge. Various blocks are used to support the guitar against the wall
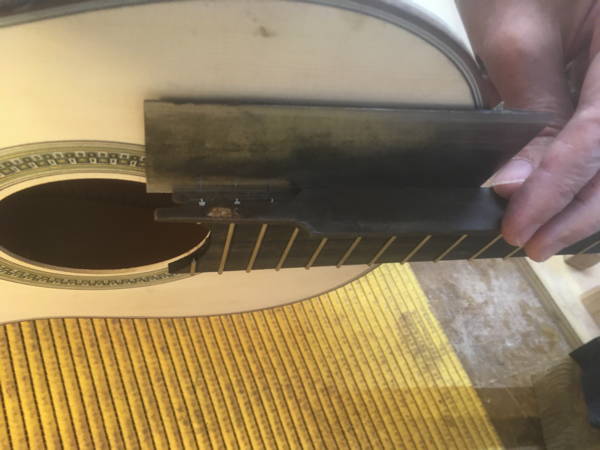
It's necessay to plane down the fingerboard at an angle. It needs to be slightly low on the treble string side and slightly high on the bass side. Two pieces of wood are placed in front of the bridge to act as a level guide. The soundhole is also closed as there will be plenty of dust from the ebony.
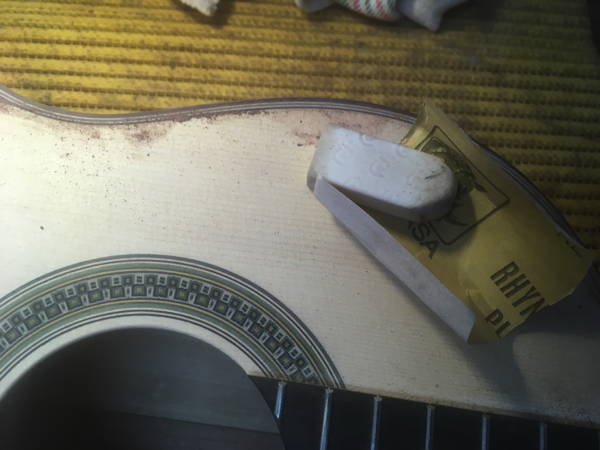
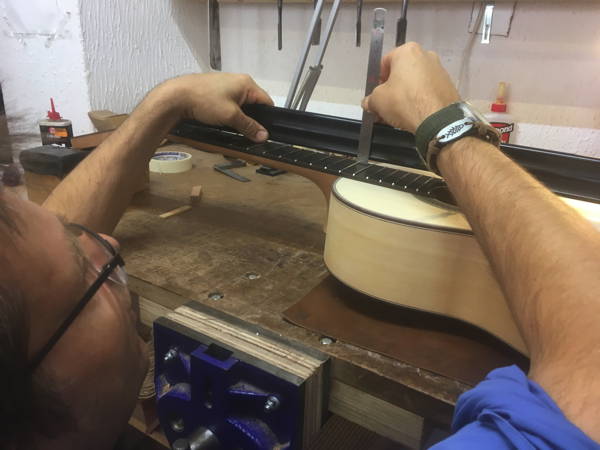
Once the planing is done and checked against the level, a large sanding block is used to smooth the fingerboard. Chalk is employed as a guide and once it's sanded off it's done. A small saning block with a finer 320 grit paper provides a final finish, working from treble to bass to the head.
Time to employ the fret saw. Because the fingerboard had been planed and sanded, some of the frets needed to be deepened. The saw had a special guide to provide the correct depth.
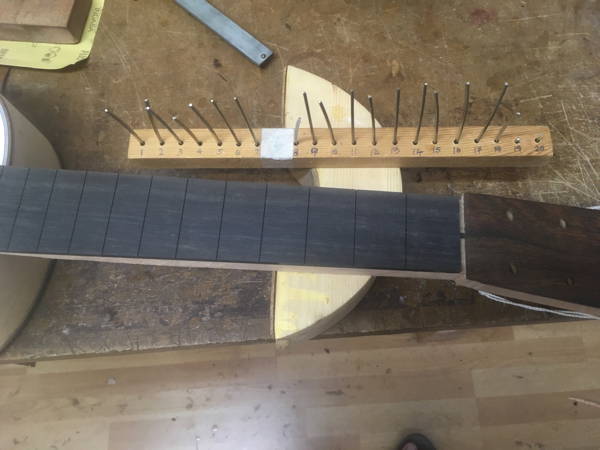
FITTING THE FRETS
The nickle frets are cut off individually from a coil of wire. They are cut 2mm long either side of the fet and placed in a special fret holder.
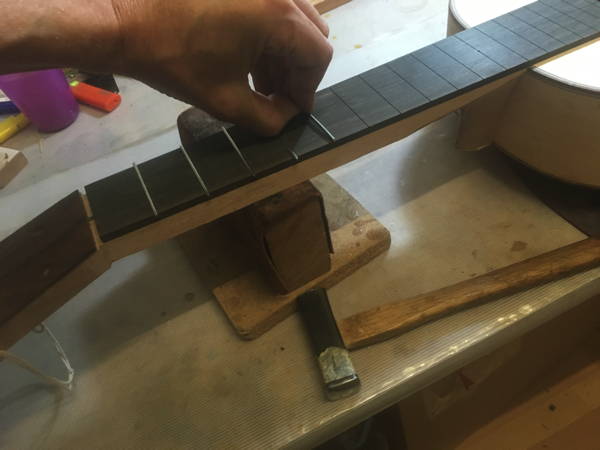
Each fret has to be carefully hammered into the slots. This is a tricky action though I managed to get the hang of it by the seventh fret - more of less.
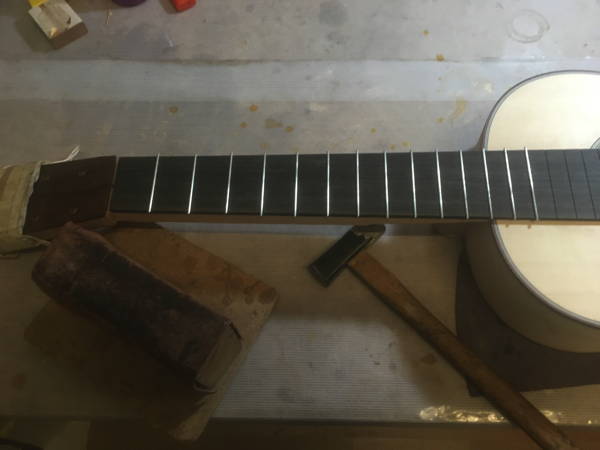
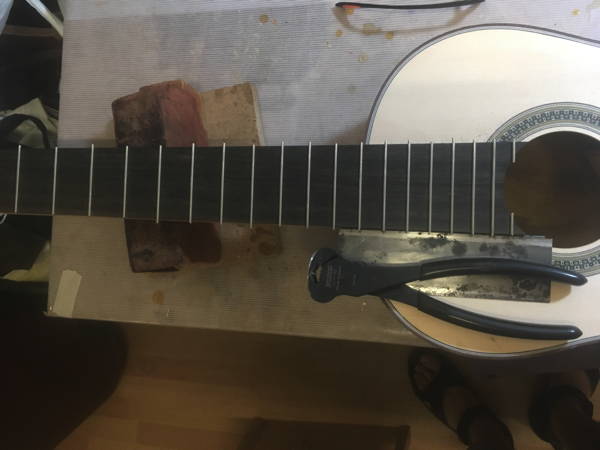
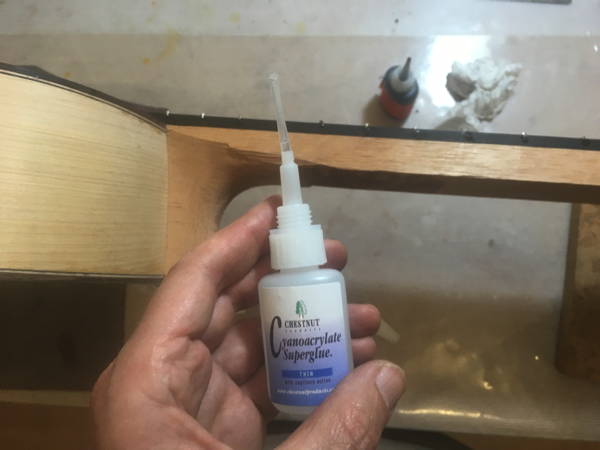
The ends then need to be clipped flush with the side of the fingerboard using a pair of wire clippers. Superglue is applied at the end of each fret. First a clear very liquid glue is applied, followed by a less liquid black glue.
A steel file removes the glue and files down the sharp ends of the metal, uning a steel plate for protecting the soundboard
A specially designed block with an angled file gives each fret an angle at the end. It's a vigorous workout and they must be planed until the ebony is given the slightest of angles.
CARVING THE NECK
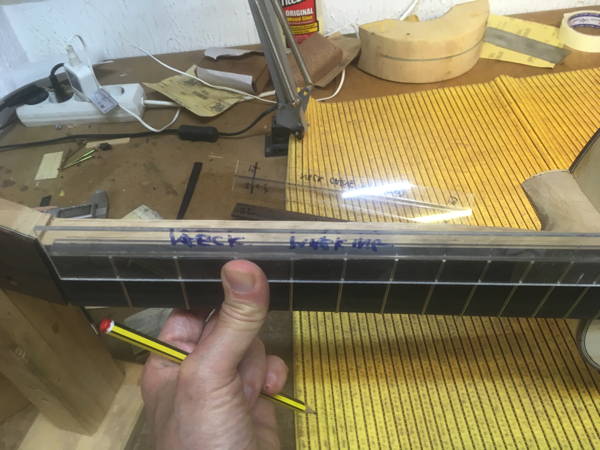
Various templates are used to draw three sets of lines on the sides of the neck to provide guidance to neck carving beginners. The top line is cutting off excess cedar. The two lower lines are to establish the angles for the final curve of the neck.
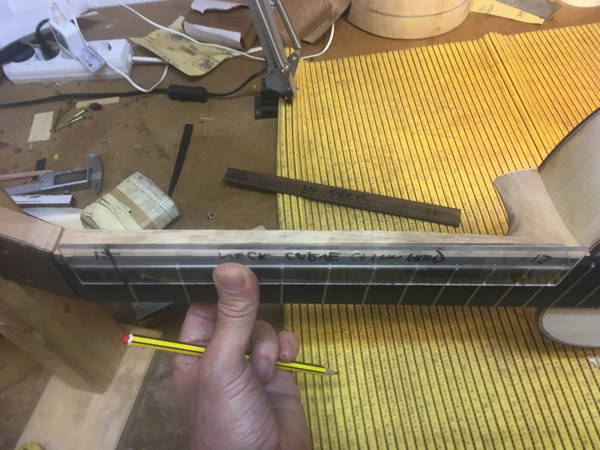
A plane is used to take the top line down to an even level. A special plane helps to cut down two sections at each end of the neck. At the head end: 21.7mm At the body end: 23.5mm. A centre line is then established on the underside of the neck with two lines 10mm either side. These lines work in conjunction with the side lines as cutting guides.
A Japanese can then cut between the lines at a diagonal and the excess wood removed with a chisel until a diagonal section is established.
To be continued tomorrow.
Top of Page
Wednesday 30th May - Day 18
I started the morning with some cleaning of the sides, using sandpaper and a scraper.
CARVING THE NECK CONTINUES
It's time to plane away the excess cedar between the two grooves. A chisel is then used to cut exactly to the lines.
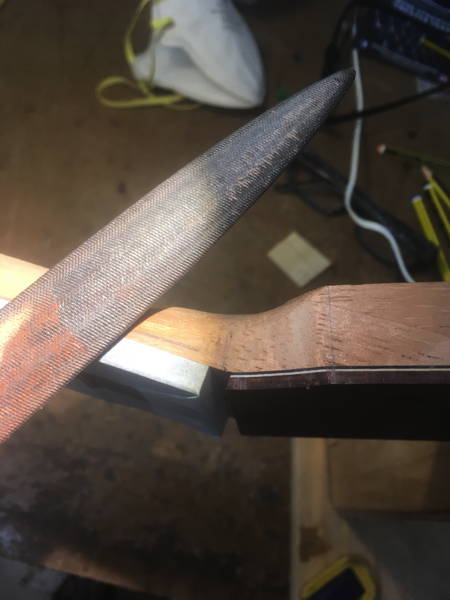
Lines are drawn at 5mm apart. The cedar is then filed away with a rasp.
The rasp is employed to rub away the lines and give an overall curve to the neck. A large sand paper paddle is then applied to smooth out the neck.
CARVING THE HEAD / NECK JOIN & HEEL
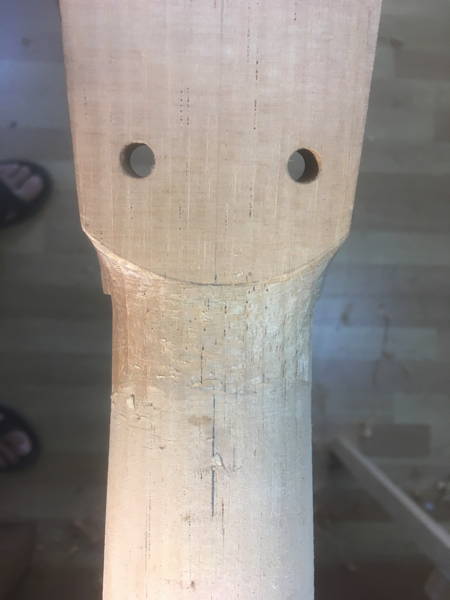
Two lines are drawn at right angles on each side of the head at a point 20mm from the bottom of the head plate. A circle is made with a compass so it intersects the two points, the centre line and the glue line.
The neck / head joint is carved with a Japanese knife until a satisfactory shape is obtained.
Two notches at the bottom of the head are created with a round file.
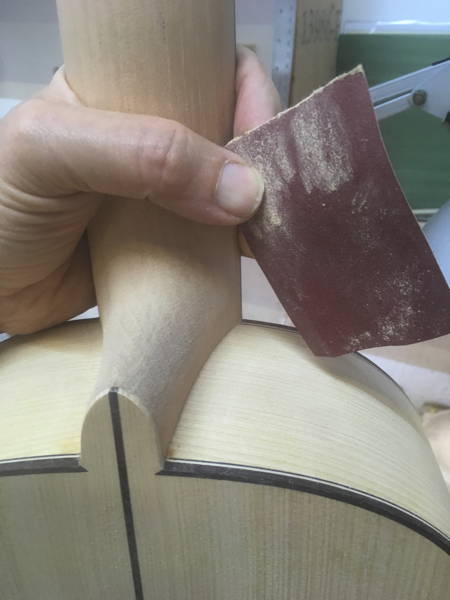
Sandpaper smooths the neck and takes out the uneveness until eventually one gets the desired result.
The heel is tackled in the same manner with the Japanese knife, along with a specially curved sanding stick to maintain the integrity of the curve of the heel.
Finally it is smooth
Two days to go!
Top of Page
Thursday 31st May - Day 19
DETAILING & A LOT OF SANDING
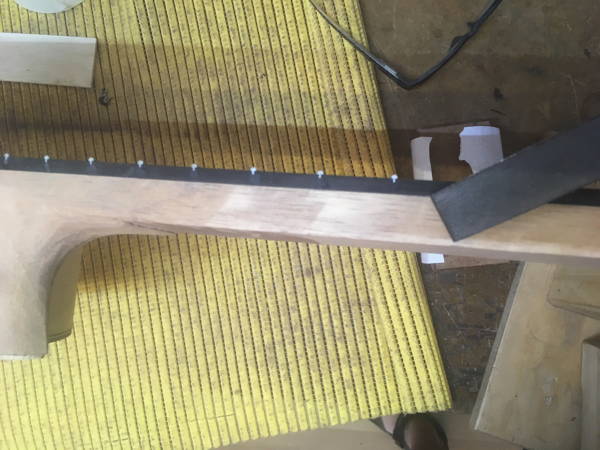
If yesterday was a day of carving, today is a day of sanding. First it is necessary to blend the neck with ebony fingerboard. This is done with a sanding block. The curve of the heel can be blended in by using a stiff 150 grit paper.
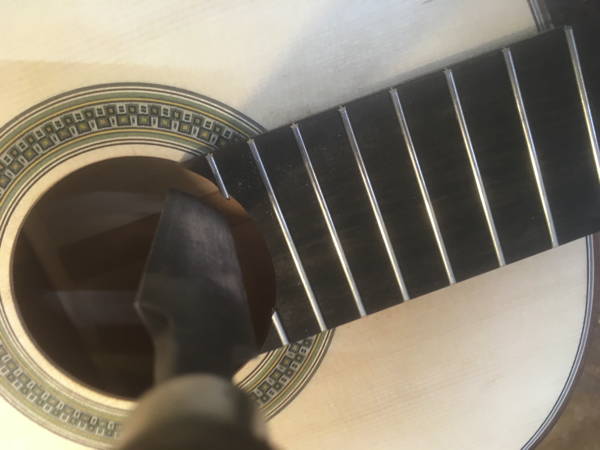
The two short frets have to be finished off. A curved file is used to file down the metal. The fingerboard is then smoothed off at the soundhole and given a slight bevel.
The soundhole is given rounded finish by sanding at a 45 degree angle and then at about 30 degree and and 70 degree angles - not forgetting the inside lip.
The head is sanded with 240 and 320 grit paper respectively. The edges are also give a light bevel.
I gave the Torres style head a final detailing with the ultra thin file. I wanted to get the gaps really sharp and clean.
Finishing the top is done with a 400 grit paper. It's important not to leave any lines - highlighed by polishing - so a slighly circular sanding motion is preferred.
The bindings have to be rounded so a chalk line is drawn along them - both back and front
The bindings are then filed at 45 degrees to create a flat, then at about 30 degrees and 75 degrees to give the rough curve. 320 grit paper around a rubber can then be used to blend in the curve.
When the sanding is done, the grain can then be raised. This is done by wiping the guitar (not the fingerboard) with a damp sponge. After it has nearly dried and imperfections are highlighted when held in the light, or the sun.
REAMING THE PEG HOLES
The rotary pegs requird 9.5mm holes. A reamer is used to get the holes to the required diameter. The hardest part is ensuring the reamer is vertical.
Top of Page
Friday 1st June - Day 20
PROTECTING THE GUITAR
To protect the guitar, it receives a sprayed coating of Shellac - except for the fingerboard, nut and soundhole which have to be sealed with masking tape. It is then hung to dry for about 10 minutes.
FRET WORK
First the frets had to be levelled using a file and a sheet of paper for protection. Another file is used to remove any flat spots.
A finer file is used to polish the fret - with a little oil. The sharp edges are then slightly rounded, before another file any sharp edges are cut back smooth.

A fret rubber is then used to polish the each fret, and a fine steel wool removes any marks on the ebony. The rubber is then used across the frets so as not to touch the ebony.
The fingerboard and frets are then finished with superfine and microfine sand paper. It is necessary to work up and down the finger board methodically hitting the ebony and frets - more the latter with the microfine.
THE SADDLE
The bone for the saddle is sanded until it fits snuggly into the slot in the bridge. It is then cut to the width of the bridge slot with a jewellers saw.
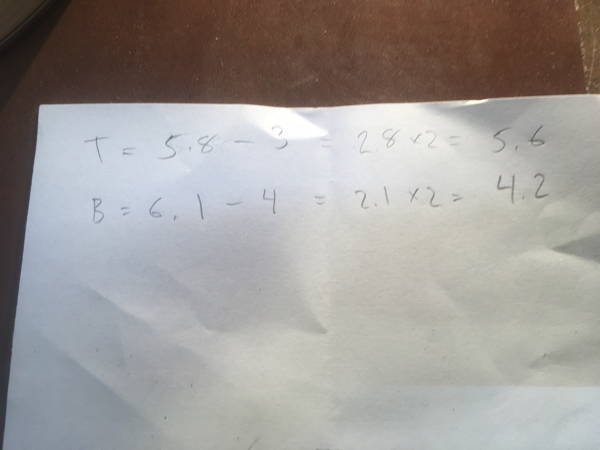
The level / action of the guitar is then measured between the height of the string at the nut (using 1mm veneer) and the saddle height at the 12th fret. The amount the saddle has to be reduced is calculated using a special formula T = Treble, B = Bass. 5.8mm and 6.1mm were the heights of the high 'e' and low 'E' strings but needed to be 3mm and 4mm respectively at the 12th fret. Because the measurement was taken at the 12th fret - half the scale length - the difference for each had to be doubled - 5.6mm and 4.2mm. So I had to remove 0.2mm from the treble side and 1.9mm from the bass side.
The saddle is then cut to the required height using the jewellers saw then filed flat to the line and polished with microfine paper.
THE NUT
The nut has to be cut to fit exactly in to the slot flush with the edge of the fret board.
A special half pencil is then used to draw a line to mark the bottom of the string channels.
The position of each string channel is marked using a depth caliper guage and a scalpel beginning at the treble end. A pencil then highlights each channel.
Files of different widths are used to cut each channel to the required depth.
With the saddle and nut in place, the guitar is now ready to be strung, though further adjustments are necessary to adjust the action to the right height. The saddle needed to have 1mm removed from the bottom as it was too high. Also the channels on the nut had to be aligned properly to prevent buzzing of the strings.
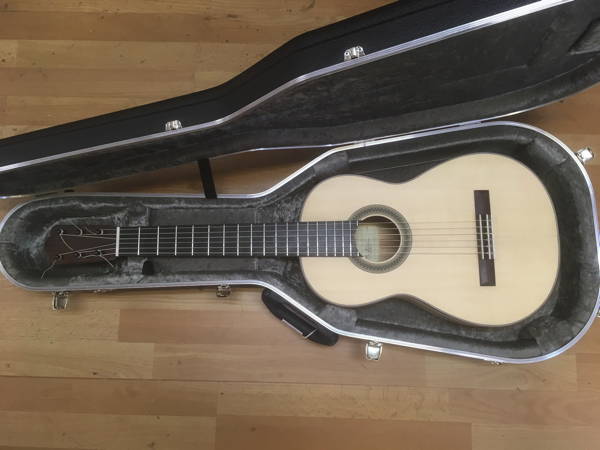
But finally here it - strung and in its case.
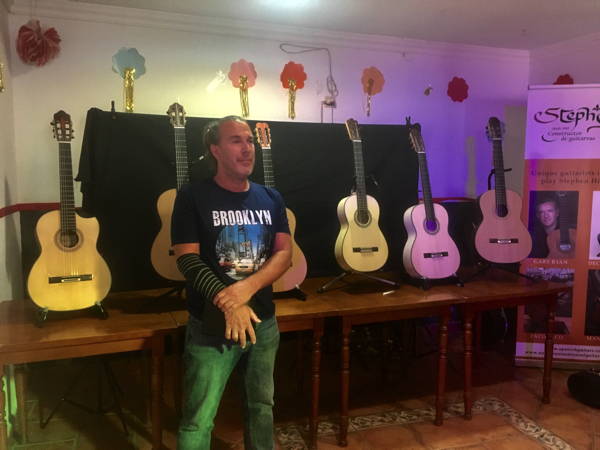
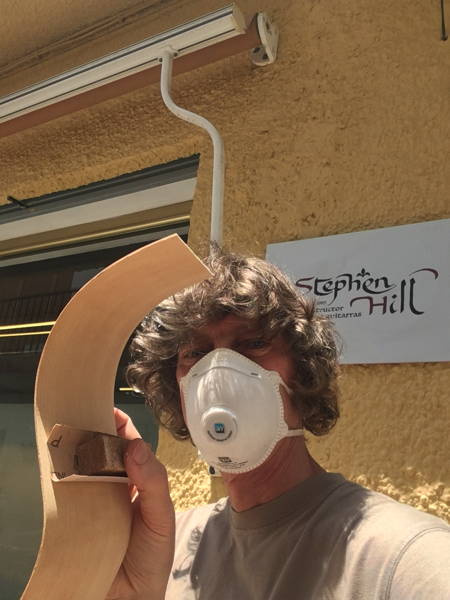
And in the hands of the maker - outside Stephen's workshop.
Top of Page
Saturday 2nd June - GUITAR SHOWCASE
Albertus Nuijten, a Dutch guitarist based locally in La Herradora, plays extracts of the six guitars made during the course - with a cameo performance by Ricardo de la Juana, a Spanish Flamenco guitarist also locally based.
Albertus Nuijten playing a short piece by Carcassi on my Romantic Guitar.
While Ricardo de la Juana breaks it in with some Flamenco!
Top of Page
GUITAR FOLLOWING FRENCH POLISHING
The guitar was sent to a company in Granada, Spain for French Polishing. The process took over a month, but certainly worth the wait.
Top of Page
GUITAR COURSE TESTIMONIAL
I wish to conclude with a few thoughts about my experience of the European Institute of Guitar Making Master Guitar Making Course run by Master Luthier Stephen Hill at his workshop in La Herradura, Spain.
To make a classical guitar in a month at the standard demanded requires all one's abilities of concentration, focus, perseverance, hand eye co-ordination and patience, so be prepared for an intense 30 days. Luckily it is how I like to work, so I relished the daily challenge.
Of course it was made all the more easier by the quality of tuition. Stephen Hill not only makes world class guitars that look and sound wonderful, he is also a teacher par excellence. He is happy to pass on his extensive knowledge of the luthier's art, and coupled with a very practical and positive approach knows how to encourage and push the students to his or her abilities, keeping them busy at all times. He won't intervene unless the situation really demands it - so, yes, you really do make your very own guitar.
Stephen is also aided by very able assistants, who have learnt their craft primarily under his tutelage. As a result they are able to advise at a high and consistent level. I really appreciated having Graham Emes on hand to help and lend advice when needed. Also Evan Kingma imparted several useful tips over the course.
One must not neglect the other side of the coin: the students. Those participating on the course have to be eager to learn, be prepared to use a variety of new, often unfamiliar tools, and rise to a challenge of asserting themselves for the duration of the month. But then if one is willing to invest the time and money in the first place, it does suggest that one's decision to participate is more than just a fanciful whim.
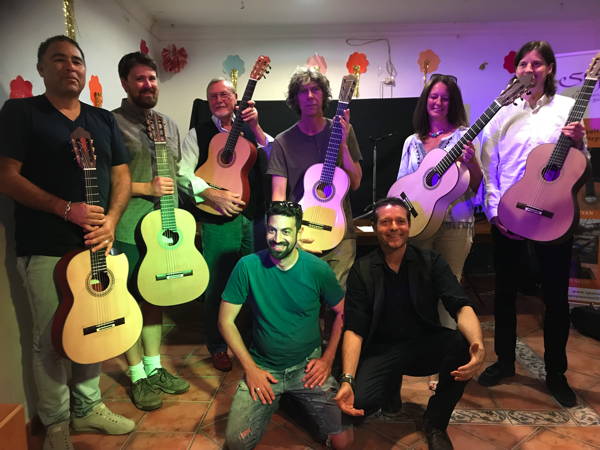
Indeed, the six participants on my course, five male and one female, immersed themselves fully in the task at hand. The workshop environment during the entire period remained harmonious and focussed - even up to the final day when the guitars had to be finished and set up for the final Guitar Showcase before a live audience. The fact that everyone was able to produce on time their own unique guitar, at a very high standard adds testimony to all the above.
So would I recommend the course? I certainly would. If you wish to build a magnificent instrument while learning the luthier's art in beautiful surroundings, I couldn't envisage a better place to do it. Not only will you leave with an instrument to be proud of, but you will be equipped with the knowledge and skills to produce more quality guitars, as many ex-students have done - either for their own pleasure or in a professional capacity.
But you will need to book early as the places on the courses fill up very quickly. It's not cheap, it requires complete commitment, but you will have an experience you will remember your entire life - for all the right reasons.
Top of Page
FINAL THOUGHTS...
Part of the reason I am interested in Antonio Torres as a guitar maker is the emphasis he placed on producing an instrument that first and foremost sounded wonderful. As a result he was often experimenting with this in mind, though by the time of his his Second Epoch of guitar making he had settled on certain standard features e.g. fan bracing, a 650mm scale length. As a trained cabinet maker, Torres certainly possessed the required carpentry skills to turn out an extraordinarily beautiful instrument, as demonstrated by a special guitar he created for a competition, complete with intricate inlays. However it is evident that his emphasis was on the sound quality, and this was borne out by the great guitarists who at the time were keen to play his guitars - the most famous being Tarrega.
But Torres is known not so much as an inventor, rather as someone who took existing ideas and improved on them; just as he did not invent the fan braced system, but certainly perfected it. So I have employed several Torres features on my guitar, modelling it loosely on a smaller Romantic model he built during his First Epoch of guitar making. Unlike his later concert models, it has a 640mm scale length, as opposed to 650mm which Torres is reputed to have standardised. The smaller box enables the sides to be very thin - around 1mm in my case - and the whole guitar is relatively light and compact. I have also incorporated his five strutted fan system and styled the head shape after his design. Also, like some of his earlier guitars, I have chosen pegs over of machine heads - although these are modern versions with a geared mechanism.
But there are two other important influences besides Torres. Firstly, the master luthier's hand which is guiding the student - in my case Stephen Hill whose Plantilla (guitar plan) I used as a basis for my guitar. It was created by Stephen for a Romantic style guitar he built at an earlier stage in his career, and it had the 'Torreseque' size and proportions I was looking for.
And while I physically built the guitar, it was so important to have the experience of Stephen to make the necessary suggestions in order to create the optimum instrument. While a student can copy a plan and build to the prescribed dimension, the ability to tweak the components to maximum effect can only be carried out by a master. This includes determining the thicknesses of the woods - soundboard and sides, the best positioning of bracing to ensure proper flexibility*. Finally there is the setting up of the finished instrument - which can only be learned from trial and experience. Not just experience, but the ability to tap into an innate sense. Then Torres freely admitted to those who asked him to reveal the secret behind producing guitars that sounded so wonderful that he held no secrets. Isn't this the case with many great artists.
The final vital ingredient is that of the guitar maker - in this case - myself. As Stephen says, each builder imbues the instrument with their own 'soul' - gives it its own unique qualities, that 'je ne sais quoi' quality. But given the building process takes place over an extended period, involving an intimate relationship at each stage, surely it is no surprise that this is going to affect the final product - especially when the task is performed with such love and devotion.
* As an example. I had spent a good deal of time creating my five fan braced system with the two closing bars which gives support and tonal qualities to the soundboard. I had carefully followed the instructions provided and carved each strut to the required heights given in the plan. Stephen then picked it up, felt its flexibility, tapped it and decided that the two outer struts and the two closing bars needed to be much thinner - in order to produce the resonant qualities we were looking to achieve. I believe he was right.
Top of Page
Updated: Tuesday, September 11, 2018


 nbsp;
nbsp;